Zum Hauptinhalt wechseln

Nikon Coolpix L27 Screen Replacement

Was du brauchst

  1. Nikon Coolpix L27 Screen Replacement, Screen: Schritt 1, Bild 1 von 3 Nikon Coolpix L27 Screen Replacement, Screen: Schritt 1, Bild 2 von 3 Nikon Coolpix L27 Screen Replacement, Screen: Schritt 1, Bild 3 von 3
    • Undo the latch at the bottom of the camera by pushing it to the side

    • Remove the batteries (and memory card if applicable)

  2. Nikon Coolpix L27 Screen Replacement: Schritt 2, Bild 1 von 2 Nikon Coolpix L27 Screen Replacement: Schritt 2, Bild 2 von 2
    • Remove the two 5 mm Phillips #000 screws from the left side.

  3. Nikon Coolpix L27 Screen Replacement: Schritt 3, Bild 1 von 3 Nikon Coolpix L27 Screen Replacement: Schritt 3, Bild 2 von 3 Nikon Coolpix L27 Screen Replacement: Schritt 3, Bild 3 von 3
    • Lift the cover labeled "A/V OUT" to expose a hidden screw.

    • Remove two 5 mm Phillips #000 screws from the bottom of the camera.

  4. Nikon Coolpix L27 Screen Replacement: Schritt 4, Bild 1 von 2 Nikon Coolpix L27 Screen Replacement: Schritt 4, Bild 2 von 2
    • Remove the two 5 mm Phillips #000 screws from the right side of the camera.

  5. Nikon Coolpix L27 Screen Replacement: Schritt 5, Bild 1 von 3 Nikon Coolpix L27 Screen Replacement: Schritt 5, Bild 2 von 3 Nikon Coolpix L27 Screen Replacement: Schritt 5, Bild 3 von 3
    • Carefully pry the back cover starting from the battery latch.

    • Once all sides are loose, lift the back cover up and off.

  6. Nikon Coolpix L27 Screen Replacement: Schritt 6, Bild 1 von 1
    • Carefully lift the LCD screen up towards the bottom of the camera.

    • The LCD is connected to a cable so don't pull it out yet.

  7. Nikon Coolpix L27 Screen Replacement: Schritt 7, Bild 1 von 1
    • Lightly push back the white switch holding in the screen cable

  8. Nikon Coolpix L27 Screen Replacement: Schritt 8, Bild 1 von 2 Nikon Coolpix L27 Screen Replacement: Schritt 8, Bild 2 von 2
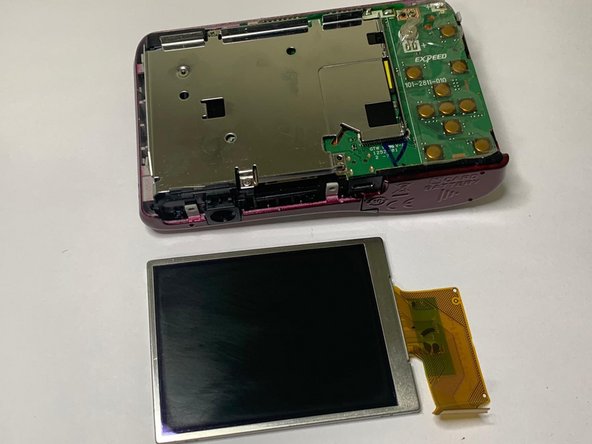
    • Remove the cable from the camera.

    • Lift the screen out.

Abschluss

To reassemble your device, follow these instructions in reverse order.

Vishalpreet Sandhu

Mitglied seit: 01/18/22

157 Reputation

1 Anleitung geschrieben

Team

York University, Team R-25, Melo-Thaiss Winter 2022 Mitglied von York University, Team R-25, Melo-Thaiss Winter 2022

YORK-MELO-THAISS-W22SRG25

1 Mitglied

1 Anleitung geschrieben

Ein Kommentar

would you know how to replace the little button battery just next to the screen, because the Lense is not retracting anymore?

Walter D. - Antwort

Kommentar hinzufügen

Seitenaufrufe:

Letzte 24 Stunden: 0

Letzte 7 Tage: 10

Letzte 30 Tage: 29

Insgesamt: 586