Zum Hauptinhalt wechseln

Nikon Coolpix L330 Front Housing Replacement

Was du brauchst

  1. Nikon Coolpix L330 Front Housing Replacement, Back Housing: Schritt 1, Bild 1 von 3 Nikon Coolpix L330 Front Housing Replacement, Back Housing: Schritt 1, Bild 2 von 3 Nikon Coolpix L330 Front Housing Replacement, Back Housing: Schritt 1, Bild 3 von 3
    • There are six screws attaching the back housing to the camera. Remove the screws from the body with a PH000 screw head.

    • Two 1.5x2.5mm screws on the right side.

    • Two 1.5x2.5mm screws on the underside.

    • Two 1.5x2.5mm screw on the left side.

  2. Nikon Coolpix L330 Front Housing Replacement: Schritt 2, Bild 1 von 2 Nikon Coolpix L330 Front Housing Replacement: Schritt 2, Bild 2 von 2
    • After removing the screws, use a metal spudger or plastic opening tool to push the back cover out.

    • The metal spudger can damage the plastic housing, so use caution when applying any pressure to it. Use a plastic opening tool to reduce the risk of damage to the housing.

    • Remove the back housing of the camera by lifting it directly up.

    • The back cover may be slightly tight, therefore more force may be needed to lift it up.

  3. Nikon Coolpix L330 Front Housing Replacement, Front Housing: Schritt 3, Bild 1 von 1
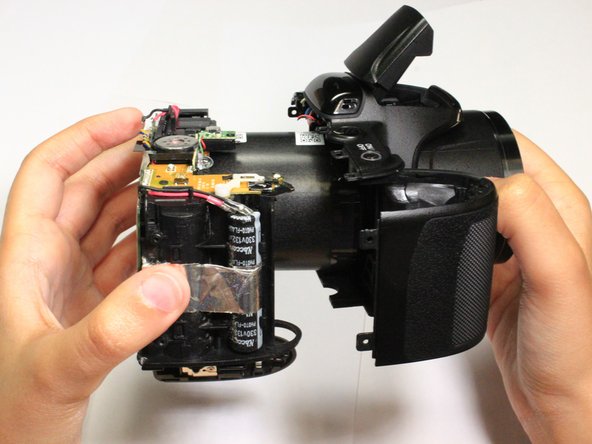
    • Remove the four 1.5x2.5mm screws in the battery housing using a PH000 screw head.

  4. Nikon Coolpix L330 Front Housing Replacement: Schritt 4, Bild 1 von 1
    • Remove the two 1.5x2.5mm screws below the flash unit using a PH000 screw head.

  5. Nikon Coolpix L330 Front Housing Replacement: Schritt 5, Bild 1 von 3 Nikon Coolpix L330 Front Housing Replacement: Schritt 5, Bild 2 von 3 Nikon Coolpix L330 Front Housing Replacement: Schritt 5, Bild 3 von 3
    • Remove the black tape covering the electrical connections.

    • Remove the 1.5x2.5mm screw using a PH000 screw head.

    • Desolder the six marked wires.

    • The screen has been removed as well as the back-plate in this step, however they need not be removed to replace the front housing.

  6. Nikon Coolpix L330 Front Housing Replacement: Schritt 6, Bild 1 von 2 Nikon Coolpix L330 Front Housing Replacement: Schritt 6, Bild 2 von 2
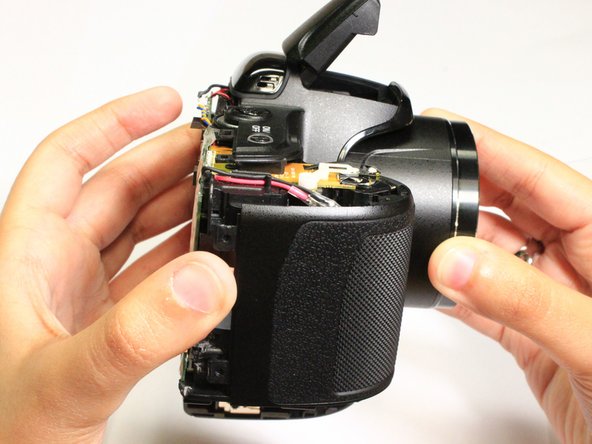
    • Insert a plastic opening tool between the front housing and inner frame.

    • Lever the tool to slide the front housing forward.

  7. Nikon Coolpix L330 Front Housing Replacement: Schritt 7, Bild 1 von 3 Nikon Coolpix L330 Front Housing Replacement: Schritt 7, Bild 2 von 3 Nikon Coolpix L330 Front Housing Replacement: Schritt 7, Bild 3 von 3
    • Position the fingers of one hand on the inner frame and the other hand around the lens barrel.

    • Pull the front housing away from the inner frame.

Abschluss

To reassemble your device, follow these instructions in reverse order.

Rajeev

Mitglied seit: 02/09/16

596 Reputation

4 Anleitungen geschrieben

Team

USF Tampa, Team 2-10, Cagle Spring 2016 Mitglied von USF Tampa, Team 2-10, Cagle Spring 2016

USFT-CAGLE-S16S2G10

4 Mitglieder

14 Anleitungen geschrieben

0 Kommentare

Kommentar hinzufügen

Seitenaufrufe:

Letzte 24 Stunden: 0

Letzte 7 Tage: 1

Letzte 30 Tage: 28

Insgesamt: 888