Einleitung
The device ports on a digital camera can be prone to damage that may render them nonfunctional. This guide will lead you through the necessary steps to replace damaged device ports.
Was du brauchst
-
-
Use a Phillips #0 screwdriver to remove the screws on the front casing. There are ten screws, three on the left side, two on the bottom, and one on the right side of the camera.
-
-
-
Remove the front top Phillips screw with the screwdriver.
-
Open the empty battery slot on the bottom of the camera, revealing four additional screws.
-
Unscrew the four Phillips screws with the screwdriver.
-
-
-
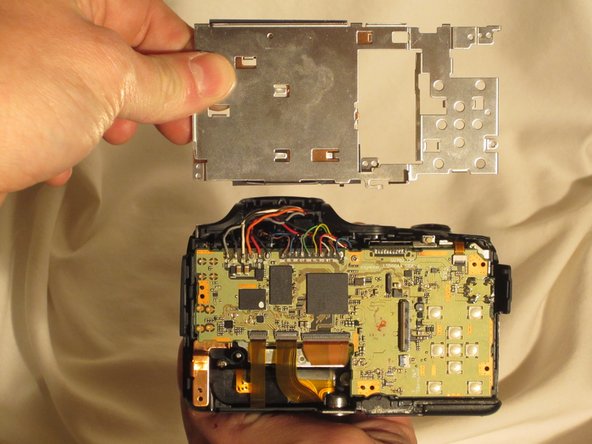
Using the spudger, move around the casing, carefully separating the rear housing from the camera assembly.
-
Once the rear housing is separated, the settings buttons will be accessible for replacement.
-
-
-
-
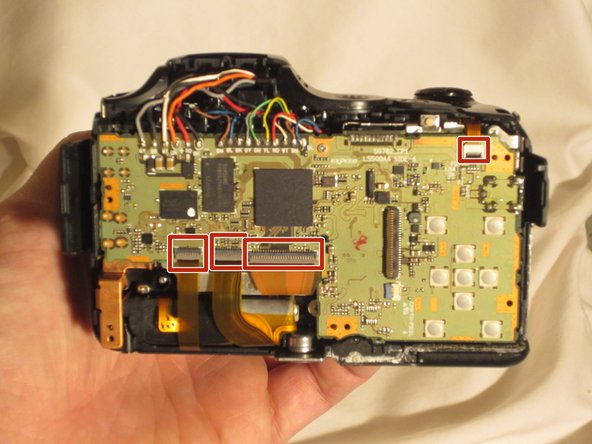
Using the tweezers, lift the hinges connecting the two ribbon wires to the camera.
-
-
-
Using the pointed end of the spudger, lift the hinges that secure these four flex circuits.
-
-
-
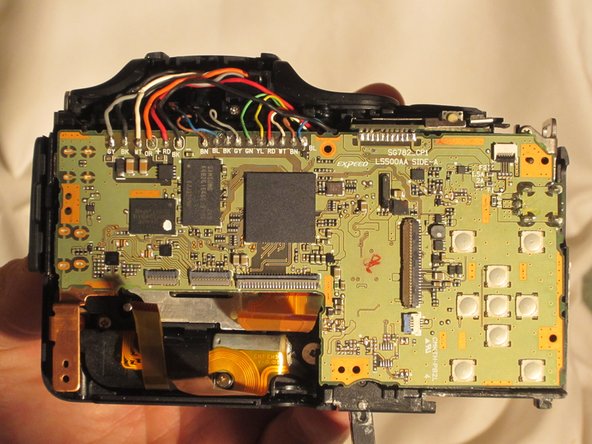
Once the flex circuits are removed, the motherboard can be lifted and the device can be accessed for replacement.
DO NOT “just lift the motherboard"! The motherboard is soldered to a daughterboard for the power button and for the battery compartment. If you do forcibly lift the motherboard you will rip some solder pads off. You need to desolder the motherboard from the daughterboard FIRST before attempting to flip up the motherboard. AFTER desoldering the motherboard there is a singular screw holding in the board in the top left, remove that too!
-


To reassemble your device, follow these instructions in reverse order.
To reassemble your device, follow these instructions in reverse order.
Rückgängig: Ich habe diese Anleitung nicht absolviert.
2 weitere Nutzer:innen haben diese Anleitung absolviert.
Team

UMass Dartmouth, Team 1-4, Miles Spring 2015 Mitglied von UMass Dartmouth, Team 1-4, Miles Spring 2015
UMASSD-MILES-S15S1G4
3 Mitglieder
10 Anleitungen geschrieben