Zum Hauptinhalt wechseln

Nikon Coolpix S9050 Motherboard Replacement

Was du brauchst

  1. Nikon Coolpix S9050 Motherboard Replacement, Menu Wheel and OK Button: Schritt 1, Bild 1 von 3 Nikon Coolpix S9050 Motherboard Replacement, Menu Wheel and OK Button: Schritt 1, Bild 2 von 3 Nikon Coolpix S9050 Motherboard Replacement, Menu Wheel and OK Button: Schritt 1, Bild 3 von 3
    • Using a Phillips #000 screwdriver, remove the two 3.2mm black screws on both sides of the camera.

    • Set the camera face down and remove the four 3.2mm silver screws using the same screwdriver.

  2. Nikon Coolpix S9050 Motherboard Replacement: Schritt 2, Bild 1 von 1
    • Remove the display frame and trim from the main body of the camera.

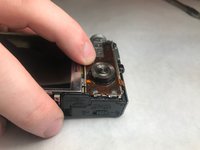
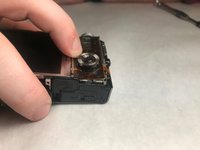
  3. Nikon Coolpix S9050 Motherboard Replacement: Schritt 3, Bild 1 von 3 Nikon Coolpix S9050 Motherboard Replacement: Schritt 3, Bild 2 von 3 Nikon Coolpix S9050 Motherboard Replacement: Schritt 3, Bild 3 von 3
    • Press down and pull the Menu Wheel/OK Button panel toward the screen.

    • This releases the panel from the slots.

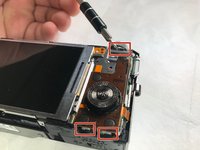
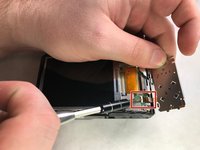
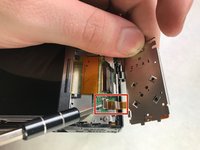
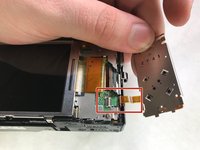
  4. Nikon Coolpix S9050 Motherboard Replacement: Schritt 4, Bild 1 von 3 Nikon Coolpix S9050 Motherboard Replacement: Schritt 4, Bild 2 von 3 Nikon Coolpix S9050 Motherboard Replacement: Schritt 4, Bild 3 von 3
    • Lift the black plastic tabs, which are securing the panel.

    • Gently pull the panel out to separate the display ribbon cable from the camera body.

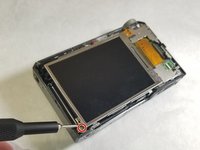
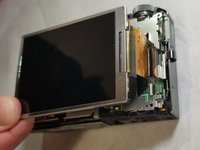
  5. Nikon Coolpix S9050 Motherboard Replacement, Motherboard: Schritt 5, Bild 1 von 3 Nikon Coolpix S9050 Motherboard Replacement, Motherboard: Schritt 5, Bild 2 von 3 Nikon Coolpix S9050 Motherboard Replacement, Motherboard: Schritt 5, Bild 3 von 3
    • Remove the two 3.2 mm silver screws on either side of the display screen using a Phillips #000 screwdriver.

    • Use a spudger to detach the display ribbon cable and remove the display screen.

  6. Nikon Coolpix S9050 Motherboard Replacement: Schritt 6, Bild 1 von 1
    • Remove the three 3.2 mm silver screws surrounding the metal panel using a Phillips #000 screwdriver.

  7. Nikon Coolpix S9050 Motherboard Replacement: Schritt 7, Bild 1 von 1
    • Remove the two 3.2 mm silver screws from both of the side panels using a Phillips #000 screwdriver.

  8. Nikon Coolpix S9050 Motherboard Replacement: Schritt 8, Bild 1 von 3 Nikon Coolpix S9050 Motherboard Replacement: Schritt 8, Bild 2 von 3 Nikon Coolpix S9050 Motherboard Replacement: Schritt 8, Bild 3 von 3
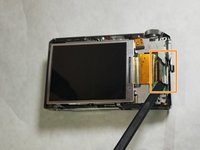
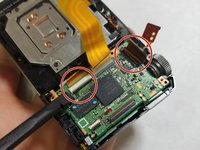
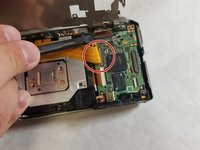
    • Remove the metal panel from the body and use the spudger to detach the three ribbon wires attached to the motherboard.

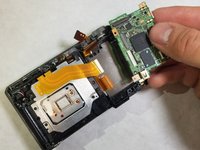
    • Remove the two 3.2 mm silver screws, which secure the motherboard using a Phillips #000 screwdriver.

    • Lift and remove the motherboard from the camera body.

    • The AV port will be attached to the motherboard.

Abschluss

To reassemble your device, follow these instructions in reverse order.

Eine weitere Person hat diese Anleitung absolviert.

Kyle Gildner

Mitglied seit: 11/05/19

199 Reputation

2 Anleitungen geschrieben

Team

IUPUI, Team S1-G5, Stella Fall 2019 Mitglied von IUPUI, Team S1-G5, Stella Fall 2019

IUPUI-STELLA-F19S1G5

3 Mitglieder

5 Anleitungen geschrieben

0Leitfaden Kommentare

Kommentar hinzufügen

Seitenaufrufe:

Letzte 24 Stunden: 1

Letzte 7 Tage: 2

Letzte 30 Tage: 7

Insgesamt: 311