Einleitung
This guide will walk you through how to remove the outer casing of the Ninja Foodi DZ401.
The outer casing has many small screws that may be lost during removal. It is recommended to use a container or magnetic mat to prevent any structural screws from being lost.
Was du brauchst
-
-
Position the air fryer so that the front is facing you and the top is accessible.
-
Using opening picks and a metal spudger, pry open the silver ring on the front, right corner.
-
Place an opening pick on the left side of the corner to hold the ring away from the cover.
-
Slide the metal spudger underneath the silver ring. When you find a notch, place the metal spudger next to the notch and pry up to release it.
-
-
-
Using a metal spudger, pry open the plastic top cover by inserting into the slots and pushing up on the tabs.
-
-
-
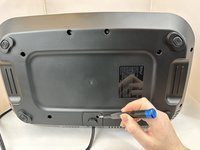
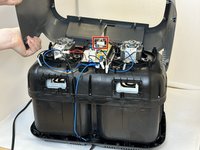
Rotate the air fryer so that the back of the air fryer is facing down and the base is facing you.
-
-
-
-
Remove the ten 15 mm screws from the bottom of the air fryer using a Phillips #3 screwdriver.
-
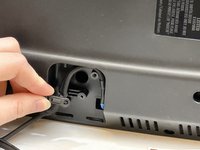
Remove the power cord cover.
-
Remove the two 16.7 mm power cord bracket screws using a Phillips #1 screwdriver.
-
-
-
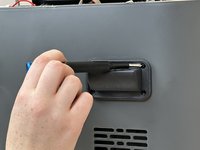
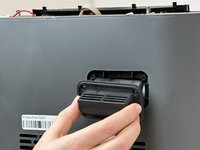
Remove the four 11.1 mm screws from each vent using a Phillips #1 screwdriver.
-
Remove both vents.
-
-
-
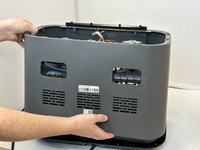
Carefully pull the outer casing up from the back.
-
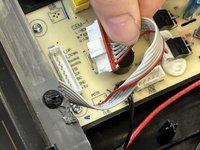
Disconnect the front display cable from the motherboard.
-
Fully remove the outer casing.
-


To reassemble your device, follow these instructions in reverse order.
To reassemble your device, follow these instructions in reverse order.

Team

Eastern Washington University, Team 1-2, Carnegie Fall 2024 Mitglied von Eastern Washington University, Team 1-2, Carnegie Fall 2024
EWU-CARNEGIE-F24S1G2
4 Mitglieder
7 Anleitungen geschrieben