Einleitung
This guide will show how to remove the outer and inner blender base and sections from your Ninja Professional Blender BL660 Blender. This will allow you to get access to the inner components.
Was du brauchst
-
-
Using the Phillips #1 screwdriver, remove the 5 screws (13mm long, 6mm wide) holding the outer base.
-
Lift the base up to remove it.
-
-
-
Remove the midsection by pulling it up. If the section is stuck, use the iFixit plastic opening tool to pry it off.
-
Pull the power cord through the mid-section opening.
-
-
-
-
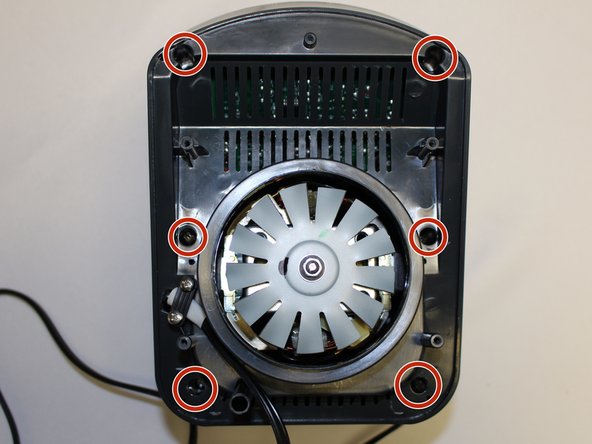
Using the Phillips #1 screwdriver, remove the 6 screws (13 mm long, 6 mm wide).
-
-
-
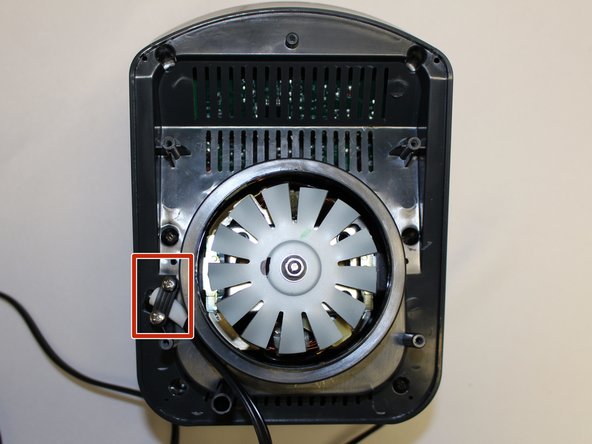
Using the Phillips #1 screwdriver, remove the two screws (5 mm long, 3 mm wide) holding the power cord onto the motor cover.
-
-
-
Using the iFixit plastic opening tool, pry the motor cover off the general housing. Once it is loose, lift it up to remove it off the base.
-
Slide the cover all the way to the end of the power cord.
-
To reassemble your device, follow these instructions in reverse order.
To reassemble your device, follow these instructions in reverse order.


