Einleitung
If you have noticed that the left shoulder button on your Nintendo 3DS is no longer registering your presses, it may be due to a faulty left bumper and/or ribbon cable. Over time, the left bumper assembly and ribbon cable can become worn out or damaged, causing the button to malfunction. In this guide, we will provide you with the necessary steps to replace the left bumper and left ribbon cable on your 3DS. By following these instructions, you can restore the functionality of your left shoulder button and enjoy your gaming experience once again.
Was du brauchst
-
-
Locate the battery cover panel on the back of the device.
-
Unscrew the two screws on the battery cover panel with a Phillips #00 screwdriver.
-
Remove the battery and battery cover panel.
-
-
-
Remove the four screws on the battery panel using the Phillips #00 screwdriver.
-
-
-
-
Locate the two screw covers on the bottom of the back panel, near the middle of the device.
-
Insert the tip of a flathead screwdriver or spudger and gently pry the cover off by applying upward pressure.
-
Remove the two screws located behind the screw covers using a Phillips #00 screwdriver.
-
-
-
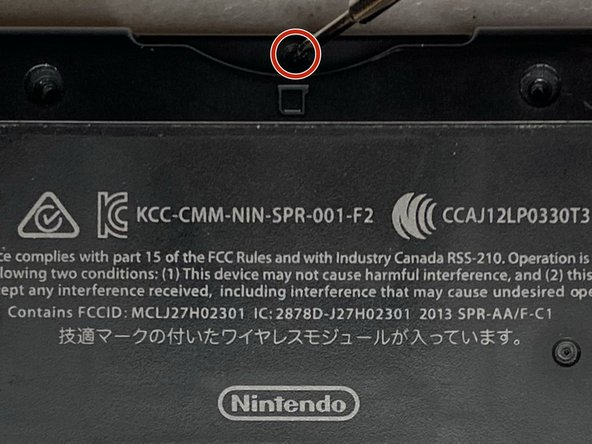
Remove the screw near the game card compartment using a Phillips #00 screwdriver.
-
-
-
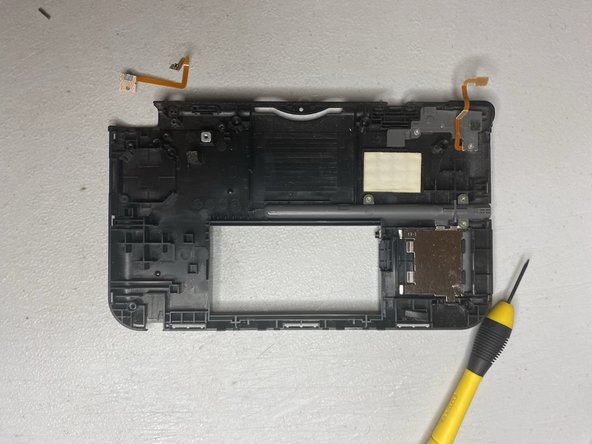
Lift the back panel off of the device.
-
Locate and disconnect the ribbon cables from the motherboard by gently pulling on the tabs that hold them in place.
-
-
-
Remove the three left bumper assembly screws using Phillips #00 screwdriver.
-
Once the three screws are removed, gently remove the left bumper assembly from the device.
-
Remove the hinge pin from the bumper assembly.
-
-
-
Using a spudger or a flathead screwdriver, gently pull the ribbon cable straight out of the connector in order to remove it.
-
Replace the left bumper ribbon cable.
-


To reassemble your device, follow these instructions in reverse order.
To reassemble your device, follow these instructions in reverse order.
Rückgängig: Ich habe diese Anleitung nicht absolviert.
2 weitere Personen haben diese Anleitung absolviert.
Team

University of North Texas, Team 3-1, Thomas Fall 2021 Mitglied von University of North Texas, Team 3-1, Thomas Fall 2021
UNT-THOMAS-F21S3G1
4 Mitglieder
3 Anleitungen geschrieben
3 Kommentare
No steps on how to install the new bumper?
good but i wish there were reinstall instructions