Diese Übersetzung enthält möglicherweise noch nicht die neuesten Änderungen der Original-Anleitung. Hilf mit, die Übersetzung zu aktualisieren oder sieh dir die Original-Anleitung an.
Einleitung
Wenn sich die Cartridges nicht mehr leicht auswerfen lassen musst du die NES öffnen und den Einschub austauschen. Dies wird hier gezeigt.
Was du brauchst
-
-
Entferne die sechs 13,25 mm Kreuzschlitzschrauben an der Bodenplatte der Konsole.
-
Drehe die Konsole herum und ziehe das obere Gehäuseteil vom Rest des Gerätes weg.
-
-
-
Entferne sieben 13,25 mm Kreuzschlitzschrauben #2 von der Metallabdeckung.
-
Ziehe die Metallabdeckung mit den Händen hoch und vom Rest des Gerätes weg.
-
-
-
-
Entferne die beiden silberfarbenen 17,25 mm Kreuzschlitzschrauben #2 vom Einschub .
-
Entferne die beiden bronzefarbenen 13,25 mm Kreuzschlitzschrauben #2 vom Cartridge Einschub .
-
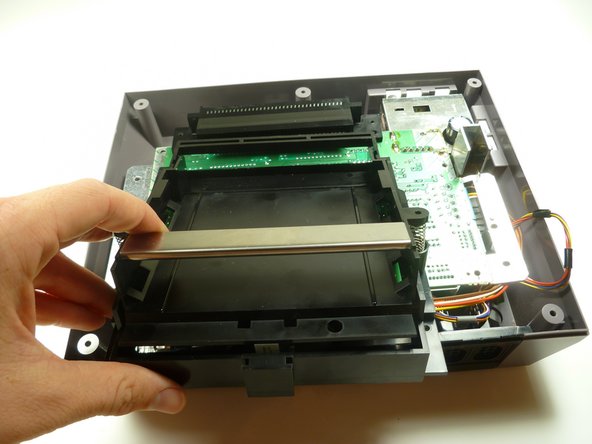
Schiebe den Cartridge Einschub zu dir , weg vom 72 Pin Verbinder und weg von der Einheit der Hauptplatine.
-
-
-
Unter dem Einschub ist eine Lasche/Lippe, im Bild markiert.
This is so unclear! I have no idea what tab this step is referring to.
So, it’s a year later, and I have a lot more experience with this system now. The front of the cartridge tray needs to hook under the edge of the board.
It’s much easier to get the tray on and off if you just make sure the board is unscrewed from the case. Then pick the board up a little and the tray should be much easier to slide on and off.
its when your replacing the cartridge tray, if u do it wrong the tray will feel like it's bowing up in the middle, like when u put in the screws u have to press the tray down to get the screw holes to line up / be flush, if u get the lip underneath to catch correctly there will be no issue/bow u wan't have to press down on it, or make the screws pull the tray to the motherboard, instead the tray will be flush with no pressure applied, i had no idea what he meant either until i was reversing the steps.
also not all NES are the same underneath, my tab was much less noticeable and i had one less screw to get the shield off then he showed. and 2 less screws to remove the cartridge tray.
This seemed very unclear to me at first, until I tried to replace the cart tray. I apparently didn’t get the little lip under the mobo on my first attempt, and I noticed there was a pretty decent chunk of space between the front brass screw holes and their corresponding holes on the mobo. I reseated it, and the second time I heard a little click (apparently the lip going under the mobo). This time the bottom/brass screw holes were virtually FLUSH with the mobo holes. If you see a chunk of space between the cart tray and the mobo near the brass screw holes you didn’t get the lip under the mobo.
-


Um dein Gerät wieder zusammen zu setzen folge den Schritten in umgekehrter Reihenfolge.
Um dein Gerät wieder zusammen zu setzen folge den Schritten in umgekehrter Reihenfolge.
Rückgängig: Ich habe diese Anleitung nicht absolviert.
8 weitere Nutzer:innen haben diese Anleitung absolviert.
Besonderer Dank geht an diese Übersetzer:innen:
87%
VauWeh hilft uns, die Welt in Ordnung zu bringen! Wie kann ich mithelfen?
Hier starten ›
Team

Cal Poly, Team 14-40, Forte Fall 2010 Mitglied von Cal Poly, Team 14-40, Forte Fall 2010
CPSU-FORTE-F10S14G40
4 Mitglieder
20 Anleitungen geschrieben
the outside screws are a little deep, plan ahead :)
Joseph McCord - Antwort
Why use a slotted driver? The screws are phillips. Both #1 and #2 work for me.
kmcrawford111 - Antwort