Einleitung
The speaker is located in the center of the Game Boy Advance SP's button panel. It is not wired to the motherboard which allows for an easy fix with no soldering.
Was du brauchst
-
-
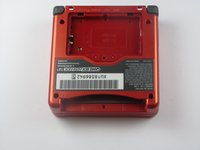
Use a standard Phillips #00 screwdriver to loosen the 4 mm screw that keeps the battery cover attached to the device.
-
-
-
Use your fingers or a plastic opening tool to remove the battery from the device.
-
-
-
-
Remove four 6.5 mm screws from the corners of the back cover using a tri-point Y00 screwdriver.
-
Remove two 4.6mm screws from the top-center and bottom-center of the device using a tri-point Y00 screwdriver.
-
-
-
Using a Phillips #00 screwdriver, remove the three Phillips #00 4 mm long screws that hold the motherboard to the button panel.
-
-
-
Flip the motherboard up and rest it on the other half of the device, so that the back of the buttons are visible as seen in the picture.
-
-
In diesem Schritt verwendetes Werkzeug:Tweezers$4.99
-
Lift the speaker out of its slot in the button panel, using a plastic opening tool or tweezers.
-


To reassemble your device, follow these instructions in reverse order.
To reassemble your device, follow these instructions in reverse order.
Rückgängig: Ich habe diese Anleitung nicht absolviert.
13 weitere Personen haben diese Anleitung absolviert.
Team

Cal Poly, Team 17-22, Forte Winter 2013 Mitglied von Cal Poly, Team 17-22, Forte Winter 2013
CPSU-FORTE-W13S17G22
4 Mitglieder
41 Anleitungen geschrieben