Zum Hauptinhalt wechseln

Nintendo Super Famicom SHVC-001 Controller Port Board Replacement

Was du brauchst

  1. Nintendo Super Famicom SHVC-001 Controller Port Board Replacement, Upper Case: Schritt 1, Bild 1 von 1
    • Remove the six 13.5 mm screws on the lower case with a 4.5 mm Gamebit screwdriver.

  2. Nintendo Super Famicom SHVC-001 Controller Port Board Replacement: Schritt 2, Bild 1 von 2 Nintendo Super Famicom SHVC-001 Controller Port Board Replacement: Schritt 2, Bild 2 von 2
    • Flip the Famicom over and set it down.

    • Lift off the upper case.

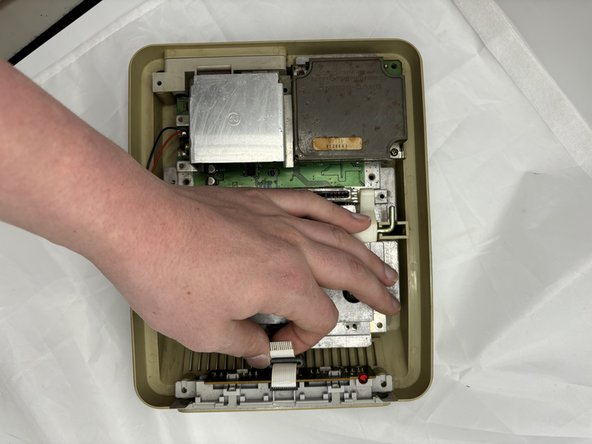
  3. Nintendo Super Famicom SHVC-001 Controller Port Board Replacement, Controller Port Board: Schritt 3, Bild 1 von 2 Nintendo Super Famicom SHVC-001 Controller Port Board Replacement, Controller Port Board: Schritt 3, Bild 2 von 2
    • Carefully disconnect the ribbon cable that is attached to the controller board and the main board.

  4. Nintendo Super Famicom SHVC-001 Controller Port Board Replacement: Schritt 4, Bild 1 von 1
    • Lift the controller port board directly up and out of the chassis.

    • If your new controller port board does not come with a ribbon cable, you will also need to replace that.

  5. Nintendo Super Famicom SHVC-001 Controller Port Board Replacement: Schritt 5, Bild 1 von 3 Nintendo Super Famicom SHVC-001 Controller Port Board Replacement: Schritt 5, Bild 2 von 3 Nintendo Super Famicom SHVC-001 Controller Port Board Replacement: Schritt 5, Bild 3 von 3
    • The next bullet demonstrates how to replace your ribbon cable.

    • Disconnect and remove the old cable and replace it with a new 1.25 mm ribbon cable.

Abschluss

To reassemble your device, follow these instructions in reverse order.

Carter Eason

Mitglied seit: 02/05/24

454 Reputation

4 Anleitungen geschrieben

0 Kommentare

Kommentar hinzufügen

Seitenaufrufe:

Letzte 24 Stunden: 2

Letzte 7 Tage: 3

Letzte 30 Tage: 38

Insgesamt: 83