Diese Version enthält möglicherweise inkorrekte Änderungen. Wechsle zur letzten geprüften Version.
Was du brauchst
-
Dieser Schritt ist noch nicht übersetzt. Hilf mit, ihn zu übersetzen!
-
Locate the black or white stickers on the underside of the unit. A spudger will be used to remove these stickers to revel 9 screws.
-
-
Dieser Schritt ist noch nicht übersetzt. Hilf mit, ihn zu übersetzen!
-
Remove the five Phillips #0 screws.
-
Remove the four Tri-Wing (Y1) screws.
-
-
Dieser Schritt ist noch nicht übersetzt. Hilf mit, ihn zu übersetzen!
-
Remove the CMOS battery door on the left side of the console.
-
Remove the three Y1 Tri-Wing screws.
-
-
Dieser Schritt ist noch nicht übersetzt. Hilf mit, ihn zu übersetzen!
-
Gently pry off the top lid of the Wii U.
-
-
Dieser Schritt ist noch nicht übersetzt. Hilf mit, ihn zu übersetzen!
-
Rotate the device so that the front plate is facing you.
-
Remove the two Phillips #1 screws that connect the front plate to each side of the device.
-
-
-
Dieser Schritt ist noch nicht übersetzt. Hilf mit, ihn zu übersetzen!
-
Remove the ribbon cable from the unit.
-
Separate the front plate from the main console.
-
-
Dieser Schritt ist noch nicht übersetzt. Hilf mit, ihn zu übersetzen!
-
Remove the fan with a Phillips #1 by unscrewing the two connecting screws on both sides of the fan. The fan’s wires will still be attached to the motherboard as it is permanently affixed.
-
-
Dieser Schritt ist noch nicht übersetzt. Hilf mit, ihn zu übersetzen!
-
Using a Phillips #0 screwdriver, unscrew the four screws (two on each side) from the disc reader connecting it to the main console and remove disc reader.
-
-
Dieser Schritt ist noch nicht übersetzt. Hilf mit, ihn zu übersetzen!
-
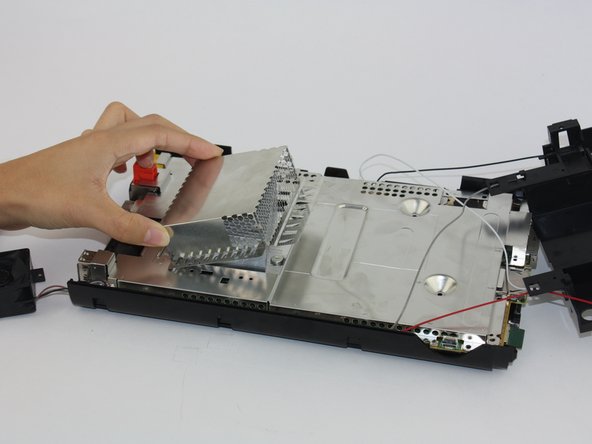
Unscrew and remove the heatsink. You will have to carefully move the antenna cables out of the way in order to remove the heatsink shielding.
-
-
Dieser Schritt ist noch nicht übersetzt. Hilf mit, ihn zu übersetzen!
-
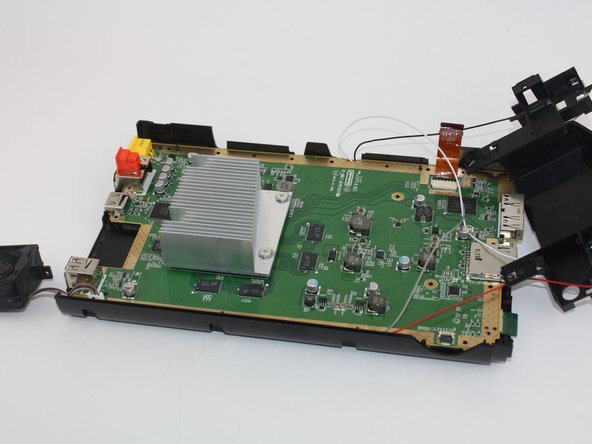
Using a Phillips #1 unscrew all floor screws connecting the outer plate from the circuit board to remove the circuit board.
-
-
Dieser Schritt ist noch nicht übersetzt. Hilf mit, ihn zu übersetzen!
-
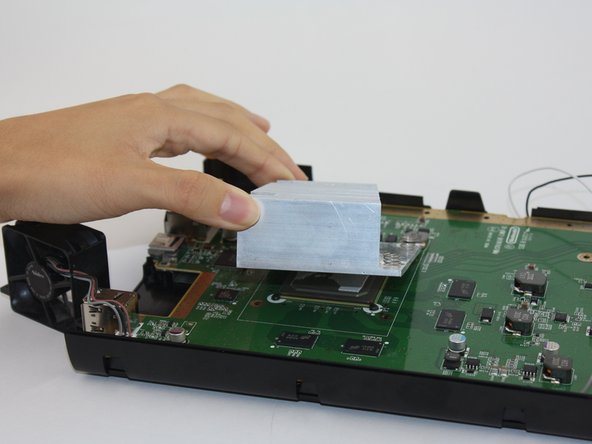
Using a Phillips #1 unscrew the 4 screws securing the heatsink to the motherboard and remove the heatsink.
-
-
Dieser Schritt ist noch nicht übersetzt. Hilf mit, ihn zu übersetzen!
-
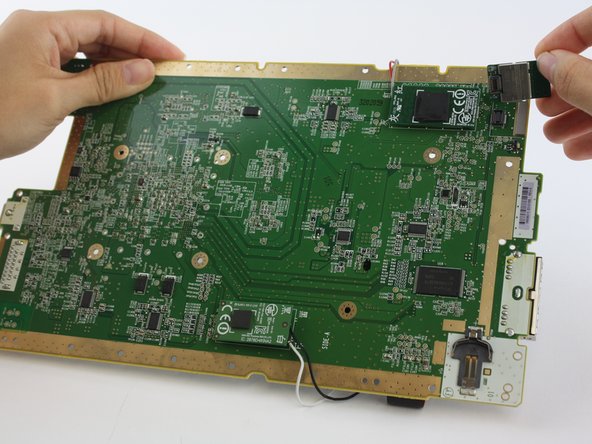
Locate the screws lining the perimeter of the motherboard that you will remove with a Phillips #1 screwdriver. Once they are unscrewed, the motherboard should easily separate from the lower tray.
-
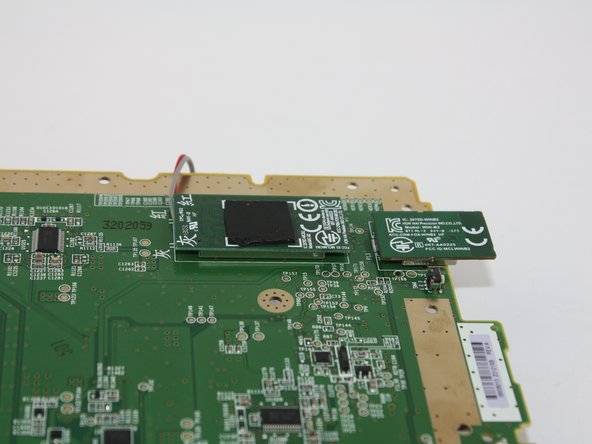
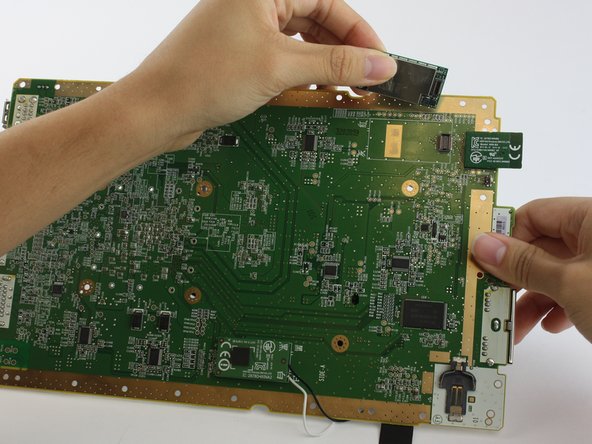
Once the motherboard is detached, flip it over to view the wireless modules.
-
-
Dieser Schritt ist noch nicht übersetzt. Hilf mit, ihn zu übersetzen!
-
Pull up gently on the wireless modules to avoid breakage.
-


Rückgängig: Ich habe diese Anleitung nicht absolviert.
9 weitere Nutzer:innen haben diese Anleitung absolviert.

Team

USF Tampa, Team 1-2, Leahy Spring 2016 Mitglied von USF Tampa, Team 1-2, Leahy Spring 2016
USFT-LEAHY-S16S1G2
3 Mitglieder
12 Anleitungen geschrieben
7 Kommentare
GamePad module is model: MIC-B2 (5GHz) (BCM43237KMLG).
WiFi module is model: WIN-A2 (2.4GHz) (BCM43362KUBG).
Bluetooth module is model: WIN-B2 (BCM20702).
Great guide with clear pictures!
Question: Does the Wii U operate correctly without WiFi and without Bluetooth modules? Of course, no connection can be established thru these modules when they were removed, but, does all the other stuff work correctly and you can play your games as usual?
I am thinking you wouldn't be able to use any controllers if you did so because of their reliance on the Bluetooth module, no? I am not sure if the Gamepad controller uses only 5GHz wifi only or Bluetooth too
So after wasting quite a bit of my life looking for these parts. Here are the part numbers that you should type into the good ole Google machine or Ebay if you are looking to purchase these parts.
GamePad module (5GHz) : 2878D-MIC-B2
WiFi module (2.4GHz) Part number is: 2878D-WIN-A2
Bluetooth module Part number is: 2878D-WIN-B2
How in the world am I expected to get these 2 cables off of the bluetooth adapter? I do not want to break them off but I do not think they twist off either
Great instructions! Can anyone recommend site to purchase? Cheers & Thanks! Paul
What is the name of the bluetooth module connector?