Diese Version enthält möglicherweise inkorrekte Änderungen. Wechsle zur letzten geprüften Version.
Was du brauchst
-
Dieser Schritt ist noch nicht übersetzt. Hilf mit, ihn zu übersetzen!
-
Press down on the grip on the back of the phone and slide the rear housing down towards the bottom of the phone.
-
-
Dieser Schritt ist noch nicht übersetzt. Hilf mit, ihn zu übersetzen!
-
Use your finger to gently pull the bottom of the battery up by using the slip found at the bottom of the phone.
-
Lift out battery and remove.
-
-
Dieser Schritt ist noch nicht übersetzt. Hilf mit, ihn zu übersetzen!
-
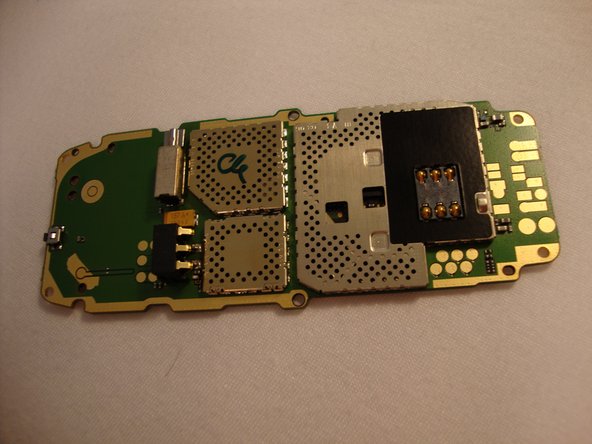
Use your finger to lift the metal cage up.
-
Remove SIM card.
-
-
Dieser Schritt ist noch nicht übersetzt. Hilf mit, ihn zu übersetzen!
-
Use your finger to close the metal cage.
-
-
-
Dieser Schritt ist noch nicht übersetzt. Hilf mit, ihn zu übersetzen!
-
Insert your two fingers under the two tabs found at the top of the phone underneath the black casing, then pull the casing up and slide it out slowly.
-
-
Dieser Schritt ist noch nicht übersetzt. Hilf mit, ihn zu übersetzen!
-
After removing the top cover, turn the phone over so the screen is facing upwards.
-
-
Dieser Schritt ist noch nicht übersetzt. Hilf mit, ihn zu übersetzen!
-
Use your fingers to slowly lift the screen back towards the bottom of the phone using the arrows found at the top of the phone.
-
-
Dieser Schritt ist noch nicht übersetzt. Hilf mit, ihn zu übersetzen!
-
Remove the six screws found along the frame of the phone with a T6 Torx screwdriver and put them to the side.
-
-
Dieser Schritt ist noch nicht übersetzt. Hilf mit, ihn zu übersetzen!
-
Gently lift the top of the screen up.
-
-
Dieser Schritt ist noch nicht übersetzt. Hilf mit, ihn zu übersetzen!
-
Gently pull up on the grey plastic tab.
-


Rückgängig: Ich habe diese Anleitung nicht absolviert.
Ein:e weitere:r Nutzer:in hat diese Anleitung absolviert.

Team

Cal Poly, Team 23-63, Johann Spring 2010 Mitglied von Cal Poly, Team 23-63, Johann Spring 2010
CPSU-JOHANN-S10S23G63
3 Mitglieder
17 Anleitungen geschrieben