Zum Hauptinhalt wechseln

Nook Color Motherboard Replacement

Was du brauchst

  1. Nook Color Motherboard Replacement, Back Cover: Schritt 1, Bild 1 von 2 Nook Color Motherboard Replacement, Back Cover: Schritt 1, Bild 2 von 2
    • Remove the two 3.8 mm screws located in the back right corner of the device using the T5 Torx screwdriver.

  2. Nook Color Motherboard Replacement: Schritt 2, Bild 1 von 2 Nook Color Motherboard Replacement: Schritt 2, Bild 2 von 2
    • Pry off the back cover with the plastic opening tool. Go around the device with the tool to ensure complete detachment.

  3. Nook Color Motherboard Replacement, Front Cover: Schritt 3, Bild 1 von 1
    • Remove the ten 4.0 mm screws from the device's perimeter using the T5 Torx screwdriver.

  4. Nook Color Motherboard Replacement: Schritt 4, Bild 1 von 2 Nook Color Motherboard Replacement: Schritt 4, Bild 2 von 2
    • Pry off the front panel using the plastic opening tool.

  5. Nook Color Motherboard Replacement: Schritt 5, Bild 1 von 2 Nook Color Motherboard Replacement: Schritt 5, Bild 2 von 2
    • Lift up on the connectors to disconnect them using the plastic opening tool.

  6. Nook Color Motherboard Replacement, Motherboard: Schritt 6, Bild 1 von 3 Nook Color Motherboard Replacement, Motherboard: Schritt 6, Bild 2 von 3 Nook Color Motherboard Replacement, Motherboard: Schritt 6, Bild 3 von 3
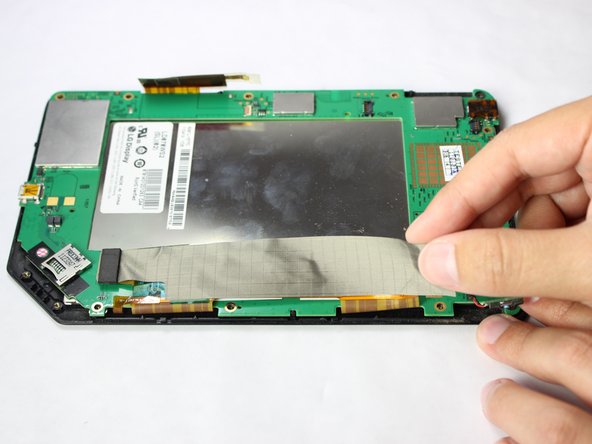
    • Gently lift and peel the orange and grey ribbon connectors to disconnect the screen and motherboard.

  7. Nook Color Motherboard Replacement: Schritt 7, Bild 1 von 1
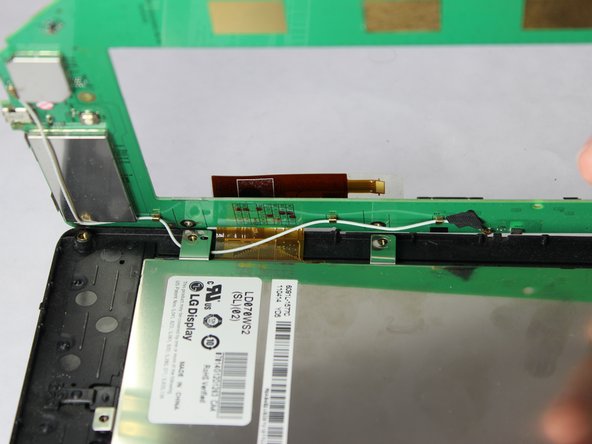
    • Remove the easy-to-miss T5 Torx 3.8 mm screw located in the tabbed corner of the device.

  8. Nook Color Motherboard Replacement: Schritt 8, Bild 1 von 2 Nook Color Motherboard Replacement: Schritt 8, Bild 2 von 2
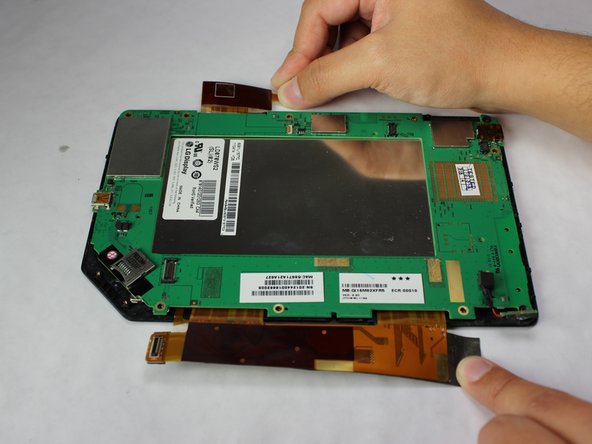
    • Lift the motherboard gently from the side with the larger connector ribbon.

    • Slide the white cable gently from underneath its holding place to free the motherboard completely.

    • Remove the motherboard carefully from the device.

Abschluss

To reassemble your device, follow these instructions in reverse order.

2 weitere Nutzer:innen haben diese Anleitung absolviert.

Team

USF Tampa, Team 11-5, Blackwell Winter 2015 Mitglied von USF Tampa, Team 11-5, Blackwell Winter 2015

USFT-BLACKWELL-W15S11G5

3 Mitglieder

14 Anleitungen geschrieben

0 Kommentare

Kommentar hinzufügen

Seitenaufrufe:

Letzte 24 Stunden: 0

Letzte 7 Tage: 2

Letzte 30 Tage: 3

Insgesamt: 1,068