Diese Version enthält möglicherweise inkorrekte Änderungen. Wechsle zur letzten geprüften Version.
Was du brauchst
-
Dieser Schritt ist noch nicht übersetzt. Hilf mit, ihn zu übersetzen!
-
Be sure the device is powered off. Clean the device to prevent any dirt and dust from entering into the device.
-
Use the plastic opening tool to gently pry the plastic screen frame away from the screen. Run the plastic opening tool along the interior edge of the screen until the screen frame is completely separated from the glass.
-
The screen frame is held onto the Nook by a set of tab that run around the outside of the frame. There may also be a line of rubber cement around the Nook under the screen frame. If your Nook has this, you will have to dig deep to separate the frame from the Nook.
-
-
Dieser Schritt ist noch nicht übersetzt. Hilf mit, ihn zu übersetzen!
-
Use a T5 screwdriver to remove the seventeen 5.0 millimeter screws from the back casing.
-
-
Dieser Schritt ist noch nicht übersetzt. Hilf mit, ihn zu übersetzen!
-
Slowly pull the back casing away from the screen and motherboard.
-
-
Dieser Schritt ist noch nicht übersetzt. Hilf mit, ihn zu übersetzen!
-
Use the plastic opening tool to gently unclip the wire from the pins by pulling the white connector up.
-
-
-
Dieser Schritt ist noch nicht übersetzt. Hilf mit, ihn zu übersetzen!
-
There are three ribbon cable connections that you must disconnect in order to remove the motherboard.
-
The first of these connections is small black - grey plastic connection housing.
-
Use the plastic opening tool to pull the black part of the ribbon cable housing up and away from the circuit board.
-
Carefully pull the ribbon cable out of the plastic connection housing.
-
-
Dieser Schritt ist noch nicht übersetzt. Hilf mit, ihn zu übersetzen!
-
The second of these connections is a small white - tan plastic connection housing.
-
Use the plastic opening tool to pull the tan part of the housing up and away from the circuit board.
-
Carefully pull the ribbon cable out of the plastic connection housing.
-
-
Dieser Schritt ist noch nicht übersetzt. Hilf mit, ihn zu übersetzen!
-
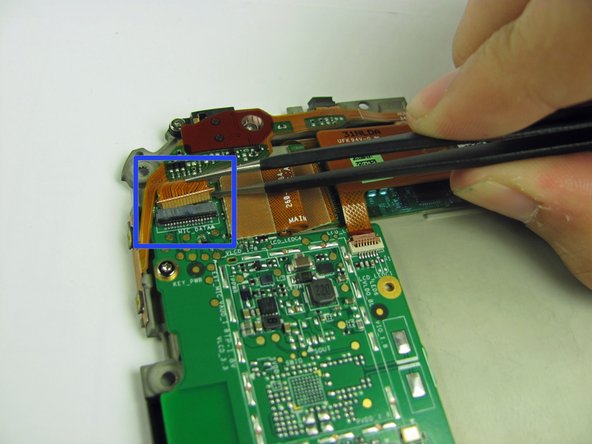
The final connection is a large orange ribbon cable that connects to an entirely separate circuit board.
-
Use the plastic opening tool to gently pry the cable away from the smaller circuit board as to disconnect the cable from the pins.
-
Carefully pull the ribbon cable out of the plastic connection housing.
-
-
Dieser Schritt ist noch nicht übersetzt. Hilf mit, ihn zu übersetzen!
-
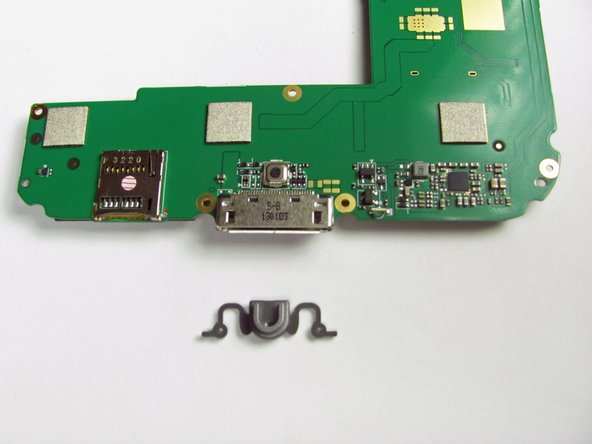
Use the T5 torx screwdriver to remove the four 2.5 millimeter screws that attach the motherboard to the back plate.
-
-
Dieser Schritt ist noch nicht übersetzt. Hilf mit, ihn zu übersetzen!
-
Gently pull the motherboard straight off of the back plate.
-
-
Dieser Schritt ist noch nicht übersetzt. Hilf mit, ihn zu übersetzen!
-
Using the plastic opening tool, lever the button arms towards the center of the nook so the button mechanism slides free.
-
Check moving parts for dust or other obstructions and contacts for insulators.
-


Rückgängig: Ich habe diese Anleitung nicht absolviert.
2 weitere Nutzer:innen haben diese Anleitung absolviert.
Team

Cal Poly, Team 3-43, Maness Spring 2014 Mitglied von Cal Poly, Team 3-43, Maness Spring 2014
CPSU-MANESS-S14S3G43
5 Mitglieder
10 Anleitungen geschrieben