Zum Hauptinhalt wechseln

NuVision TM1088 Motherboard Replacement

Was du brauchst

  1. NuVision TM1088 Motherboard Replacement, Rear Cover: Schritt 1, Bild 1 von 1
    • Place the plastic opening tool between the front and rear cover and pry up on each corner of the cover.

  2. NuVision TM1088 Motherboard Replacement, Motherboard: Schritt 2, Bild 1 von 1
    • Remove the two plugs for the screen by pulling up and away from the motherboard.

  3. NuVision TM1088 Motherboard Replacement: Schritt 3, Bild 1 von 1
    • Remove the plug for the cameras by pulling the plug up and away from the motherboard.

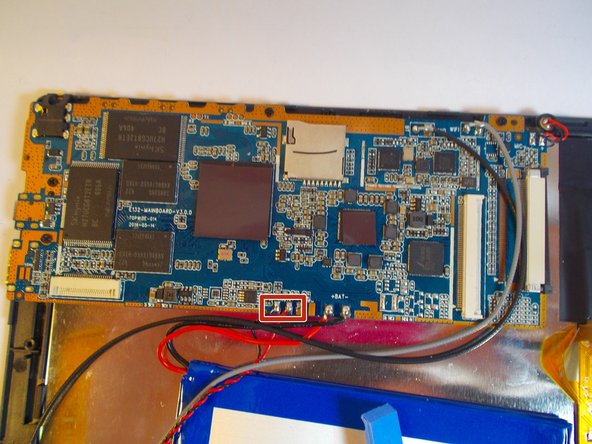
  4. NuVision TM1088 Motherboard Replacement: Schritt 4, Bild 1 von 1
    • Melt solder and remove red and black wires leading to the battery.

  5. NuVision TM1088 Motherboard Replacement: Schritt 5, Bild 1 von 1
    • Melt the solder on the black and gray wires and remove wires from motherboard.

  6. NuVision TM1088 Motherboard Replacement: Schritt 6, Bild 1 von 1
    • Melt the solder and remove the red and black wires leading to the speaker.

  7. NuVision TM1088 Motherboard Replacement: Schritt 7, Bild 1 von 1
    • Remove the four 4 mm Phillips head screws holding in the motherboard.

  8. NuVision TM1088 Motherboard Replacement: Schritt 8, Bild 1 von 1
    • Lift the motherboard away from the front cover assembly.

Abschluss

To reassemble your device, follow these instructions in reverse order.

Ein:e weitere:r Nutzer:in hat diese Anleitung absolviert.

Team

UMass Dartmouth, Team 1-1, Miles Spring 2015 Mitglied von UMass Dartmouth, Team 1-1, Miles Spring 2015

UMASSD-MILES-S15S1G1

3 Mitglieder

10 Anleitungen geschrieben

0 Kommentare

Kommentar hinzufügen

Seitenaufrufe:

Letzte 24 Stunden: 0

Letzte 7 Tage: 0

Letzte 30 Tage: 3

Insgesamt: 1,646