Diese Version enthält möglicherweise inkorrekte Änderungen. Wechsle zur letzten geprüften Version.
Was du brauchst
-
Dieser Schritt ist noch nicht übersetzt. Hilf mit, ihn zu übersetzen!
-
Place the laptop upside down with the handle away from you.
-
-
Dieser Schritt ist noch nicht übersetzt. Hilf mit, ihn zu übersetzen!
-
Slide the tabs out, towards the green edges, to show the open lock symbol.
-
-
Dieser Schritt ist noch nicht übersetzt. Hilf mit, ihn zu übersetzen!
-
Lift the middle of the battery to remove it.
-
-
Dieser Schritt ist noch nicht übersetzt. Hilf mit, ihn zu übersetzen!
-
Turn the laptop so it is resting on its bottom.
-
Open the laptop by rotating the green wings on the side up, then lifting the top half of the laptop.
-
Rotate the top half of the laptop about 90 degrees.
-
-
Dieser Schritt ist noch nicht übersetzt. Hilf mit, ihn zu übersetzen!
-
Turn the laptop upside down, so you can see the screws on the bottom of the top half.
-
Remove the two 4mm screws with a Phillips #1 screwdriver.
-
Rotate the top half 180 degrees.
-
Remove the two 4mm screws with a Phillips #1 screwdriver.
-
-
Dieser Schritt ist noch nicht übersetzt. Hilf mit, ihn zu übersetzen!
-
Rotate the top of the laptop 90 degrees, so that it is facing you again.
-
Slide the green pieces off the device. They should come off easily.
-
-
-
Dieser Schritt ist noch nicht übersetzt. Hilf mit, ihn zu übersetzen!
-
Pull down on the white screen cover. It does not require much force.
-
Remove the screen cover.
-
-
Dieser Schritt ist noch nicht übersetzt. Hilf mit, ihn zu übersetzen!
-
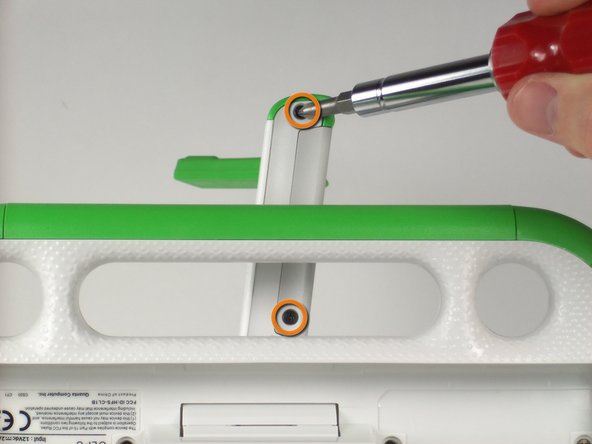
Unscrew the four 7.62mm Phillips #1 screws on either side of the screen.
-
Move the screen down a little to expose the ribbon cables.
-
-
Dieser Schritt ist noch nicht übersetzt. Hilf mit, ihn zu übersetzen!
-
Flip up the tab right under the middle top of the screen.
-
Pull the black ribbon cable out of the socket.
-
-
Dieser Schritt ist noch nicht übersetzt. Hilf mit, ihn zu übersetzen!
-
Flip up the smaller tab under the left side of the screen.
-
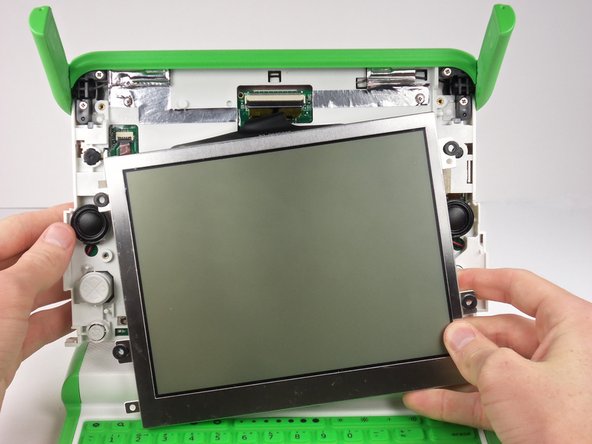
Remove the small cable to separate the screen from the rest of the laptop.
-
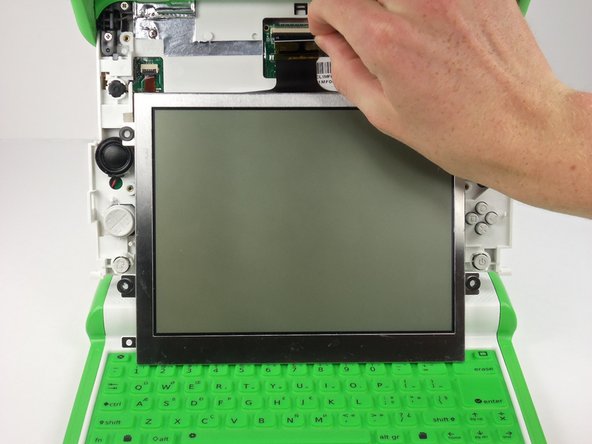
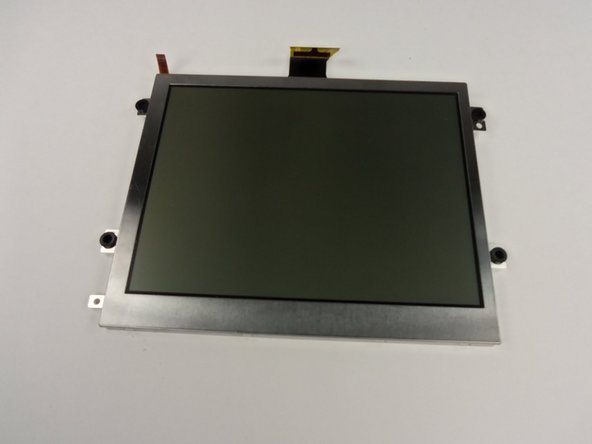
Gently remove the screen.
-
-
Dieser Schritt ist noch nicht übersetzt. Hilf mit, ihn zu übersetzen!
-
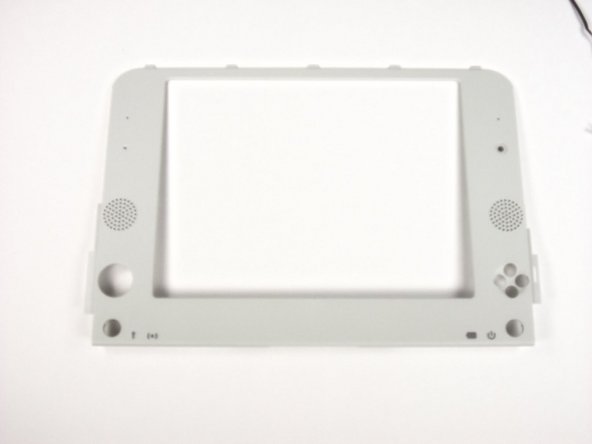
Remove the four 4mm Phillips #1 screws that hold the top cover to the case.
-
-
Dieser Schritt ist noch nicht übersetzt. Hilf mit, ihn zu übersetzen!
-
Press firmly on the top two corners of the outside cover. Then slide it down, away from the antennas.
-
-
Dieser Schritt ist noch nicht übersetzt. Hilf mit, ihn zu übersetzen!
-
Remove the five 4mm Phillips #1 screws securing the EMI shield to the motherboard.
-
Gently lift up and remove the EMI shield.
-
-
Dieser Schritt ist noch nicht übersetzt. Hilf mit, ihn zu übersetzen!
-
Gently remove the two antenna cables by lightly pulling the cable connectors up.
-
-
Dieser Schritt ist noch nicht übersetzt. Hilf mit, ihn zu übersetzen!
-
Remove the two 5mm Phillips #1 screws holding the wireless card to the motherboard.
-
-
Dieser Schritt ist noch nicht übersetzt. Hilf mit, ihn zu übersetzen!
-
Remove the wireless card by gently lifting it out of the socket.
-


Team

Cal Poly, Team 3-28, Amido Winter 2013 Mitglied von Cal Poly, Team 3-28, Amido Winter 2013
CPSU-AMIDO-W13S3G28
3 Mitglieder
10 Anleitungen geschrieben