Einleitung
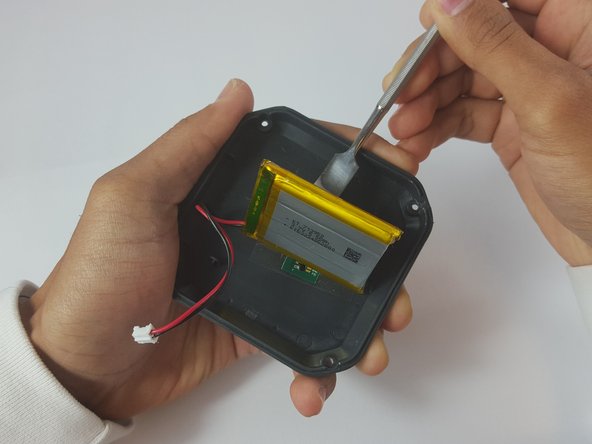
When using the metal spudger to remove the battery, be sure to carefully pry along the entire side the battery so that the battery will come off without bending.
Was du brauchst
-
-
Flip the device over so the front of the speaker is facing down. Make sure to place the speaker on a flat surface
-
-
-
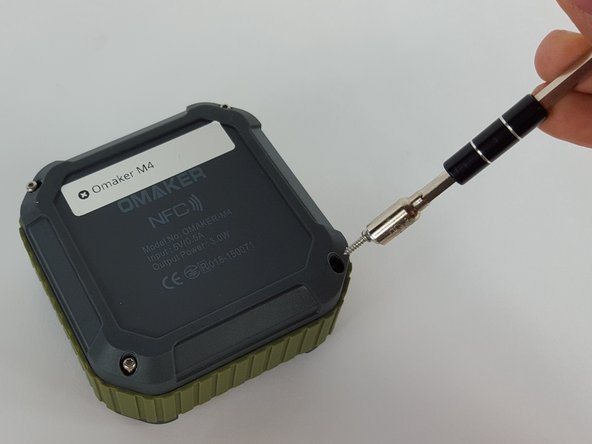
Use a T6 Torx screwdriver to remove the four 9mm screws from the back of the device.
-
-
-
-
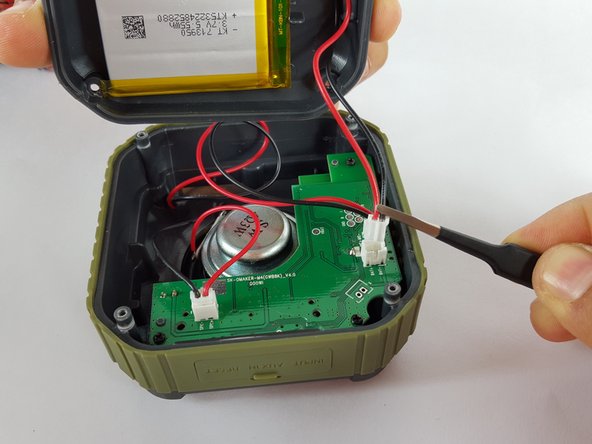
Remove the end of the battery connection from the motherboard by holding the end of the wire and carefully pulling it out of the socket using tweezers.
-
-
-
Use the metal spudger to carefully pry along the entire side of the battery from its connecting tape on the back cover.
-


To reassemble your device, follow these instructions in reverse order.
To reassemble your device, follow these instructions in reverse order.
Rückgängig: Ich habe diese Anleitung nicht absolviert.
3 weitere Personen haben diese Anleitung absolviert.
Team

USF Tampa, Team 2-2, Sullivan Spring 2016 Mitglied von USF Tampa, Team 2-2, Sullivan Spring 2016
USFT-SULLIVAN-S16S2G2
3 Mitglieder
2 Anleitungen geschrieben