Zum Hauptinhalt wechseln

One Education Infinity:One Motherboard Replacement

Was du brauchst

  1. One Education Infinity:One Motherboard Replacement, Battery: Schritt 1, Bild 1 von 2 One Education Infinity:One Motherboard Replacement, Battery: Schritt 1, Bild 2 von 2
    • Use a spudger to disconnect the black bundled cable connector from the motherboard.

  2. One Education Infinity:One Motherboard Replacement: Schritt 2, Bild 1 von 3 One Education Infinity:One Motherboard Replacement: Schritt 2, Bild 2 von 3 One Education Infinity:One Motherboard Replacement: Schritt 2, Bild 3 von 3
    • Use a spudger to lift the black tab on top of the ZIF connector.

    • Slide the ribbon cable out of the connector.

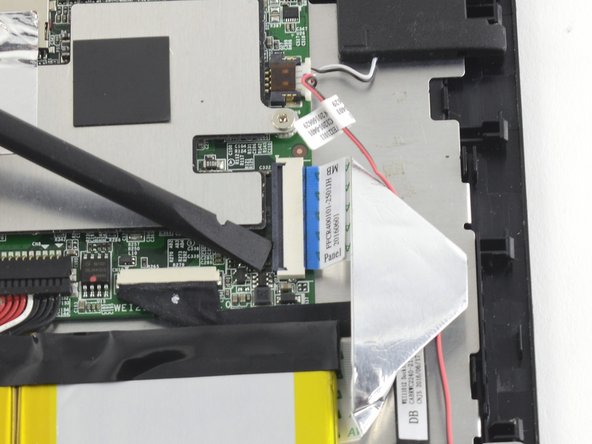
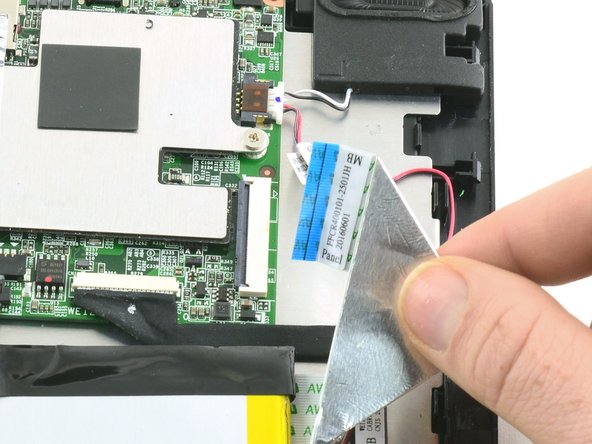
  3. One Education Infinity:One Motherboard Replacement: Schritt 3, Bild 1 von 3 One Education Infinity:One Motherboard Replacement: Schritt 3, Bild 2 von 3 One Education Infinity:One Motherboard Replacement: Schritt 3, Bild 3 von 3
    • Use a spudger to flip up the black retaining flap on the ZIF connector.

    • Pull the folded ribbon cable straight out of the connector.

    • This ribbon cable must be disconnected before removing the battery because it is attached to the battery with adhesive.

  4. One Education Infinity:One Motherboard Replacement: Schritt 4, Bild 1 von 1
    • Use a spudger to pry the battery away from the device.

    • Always use ESD safe tools when working with delicate electrical components.

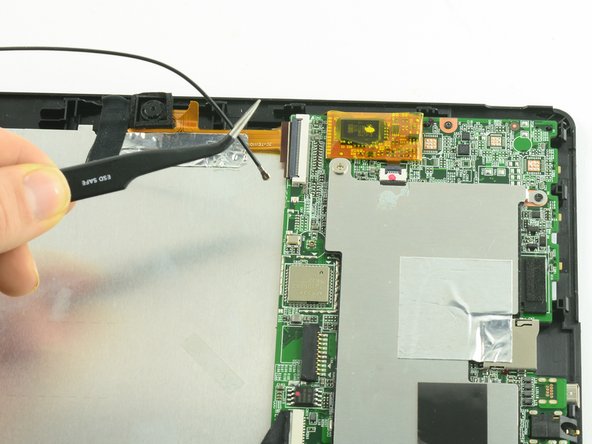
  5. One Education Infinity:One Motherboard Replacement, Antenna: Schritt 5, Bild 1 von 2 One Education Infinity:One Motherboard Replacement, Antenna: Schritt 5, Bild 2 von 2
    In diesem Schritt verwendetes Werkzeug:
    Tweezers
    $4.99
    Kaufen
    • Use ESD safe tweezers to disconnect the antenna from the motherboard.

  6. One Education Infinity:One Motherboard Replacement, Motherboard: Schritt 6, Bild 1 von 3 One Education Infinity:One Motherboard Replacement, Motherboard: Schritt 6, Bild 2 von 3 One Education Infinity:One Motherboard Replacement, Motherboard: Schritt 6, Bild 3 von 3
    • Use a spudger to flip up the black flap on the camera's ZIF connector.

    • Pull the ribbon cable straight out of the connector.

  7. One Education Infinity:One Motherboard Replacement: Schritt 7, Bild 1 von 1
    In diesem Schritt verwendetes Werkzeug:
    Tweezers
    $4.99
    Kaufen
    • Use tweezers to pull the dock connection cable away from the motherboard.

  8. One Education Infinity:One Motherboard Replacement: Schritt 8, Bild 1 von 1
    • Use a Phillips #00 screwdriver to unscrew the two 3.4 mm screws.

    • Use a Phillips #000 screwdriver to unscrew the one 4.2mm screw.

  9. One Education Infinity:One Motherboard Replacement: Schritt 9, Bild 1 von 1
    • Lift the protective shield away from the motherboard.

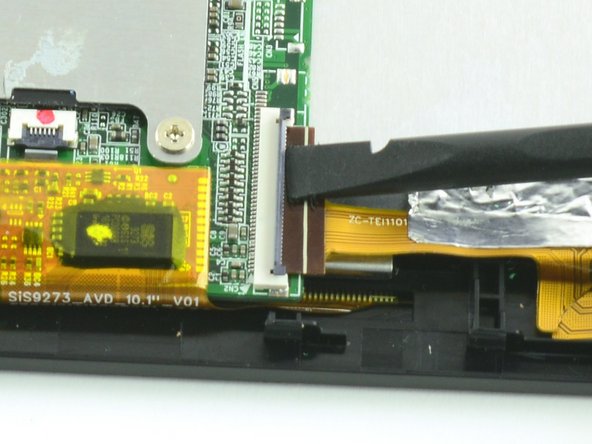
  10. One Education Infinity:One Motherboard Replacement: Schritt 10, Bild 1 von 3 One Education Infinity:One Motherboard Replacement: Schritt 10, Bild 2 von 3 One Education Infinity:One Motherboard Replacement: Schritt 10, Bild 3 von 3
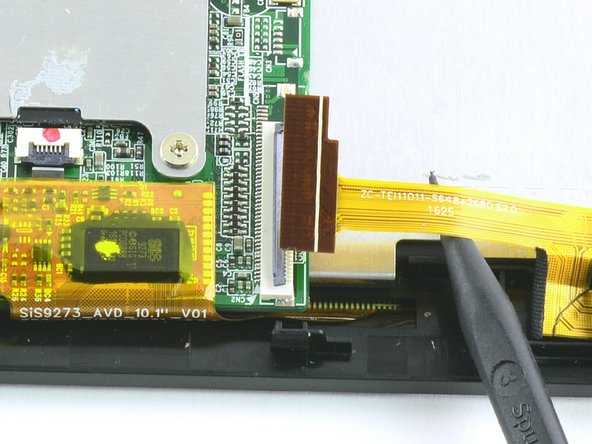
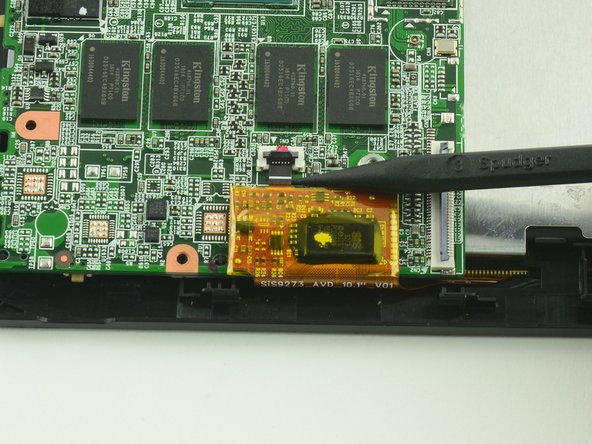
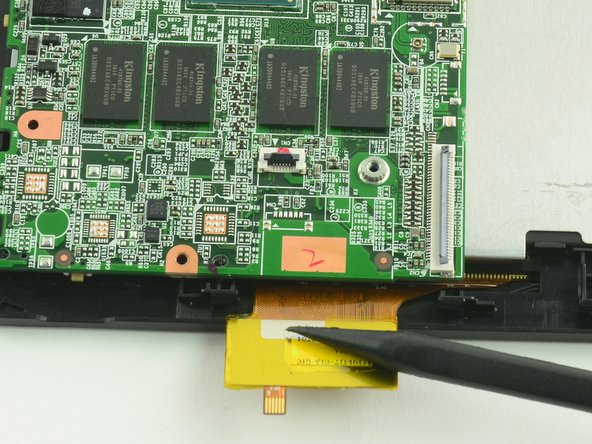
    • With the flat end of a spudger, flip up the black flap on the display's ZIF connector.

    • Insert the pointed end of the spudger between the cable and the motherboard and gently pull the cable straight out of the connector.

    • During reassembly, be sure to insert the cable into the connector up to the white line on the cable and then close the retaining flap.

  11. One Education Infinity:One Motherboard Replacement: Schritt 11, Bild 1 von 1
    • Gently lift the motherboard away from the display assembly.

Abschluss

To reassemble your device, follow these instructions in reverse order.

Eine weitere Person hat diese Anleitung absolviert.

Taylor Bratsch

Mitglied seit: 09/06/16

5.795 Reputation

14 Anleitungen geschrieben

0 Kommentare

Kommentar hinzufügen

Seitenaufrufe:

Letzte 24 Stunden: 0

Letzte 7 Tage: 0

Letzte 30 Tage: 2

Insgesamt: 506