Einleitung
In this guide, some soldering is required when disconnecting the battery and the speakers from the motherboard. If you are unfamiliar with soldering, watch Soldering Tutorial for Beginners, Five Easy Steps to familiarize yourself and to be able to disconnect the battery and speaker.
Was du brauchst
-
-
Use the plastic opening tool to remove the rubber caps from each end of the speaker.
-
-
-
Remove four (4) 11.7 mm Phillips #0 screws from each side at the bottom of the speaker.
-
-
-
-
Use the plastic opening tool on one of the corners to separate the bottom piece from the speaker, and then remove the piece.
-
-
-
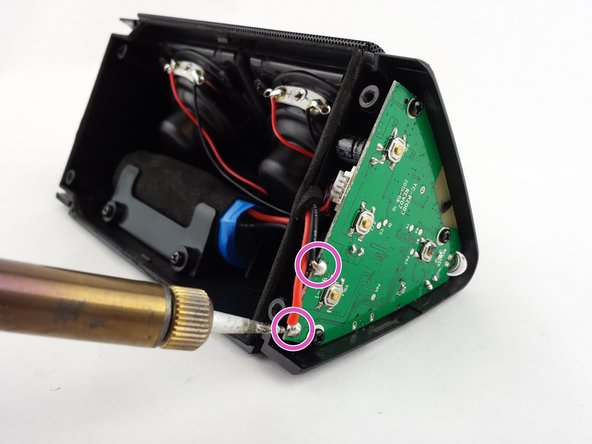
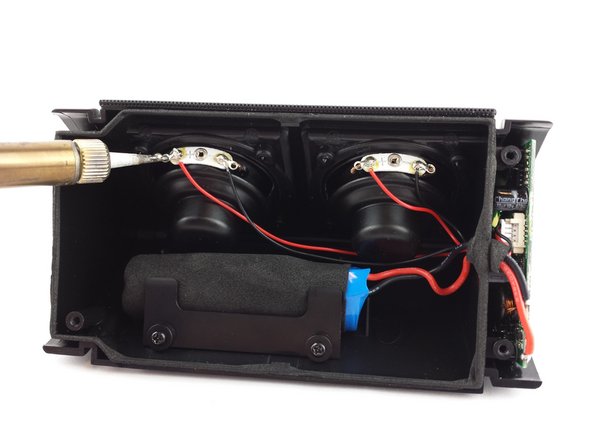
Locate the soldering connections for the battery on the motherboard and the wires for the speakers.
-
Use the soldering iron to disconnect the battery wires from the motherboard.
-
Use the soldering iron to disconnect the speaker wires from the motherboard.
-
-
-
Remove the three (3) 3.6mm screws using a Phillips #0 screwdriver.
-
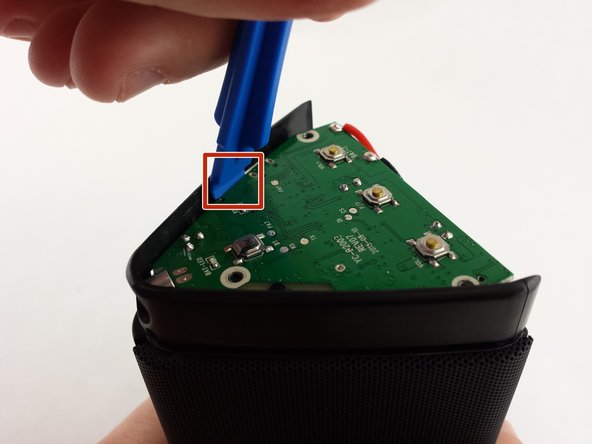
Use the plastic opening tool about midway down one side of the motherboard to pry it out of the casing.
-
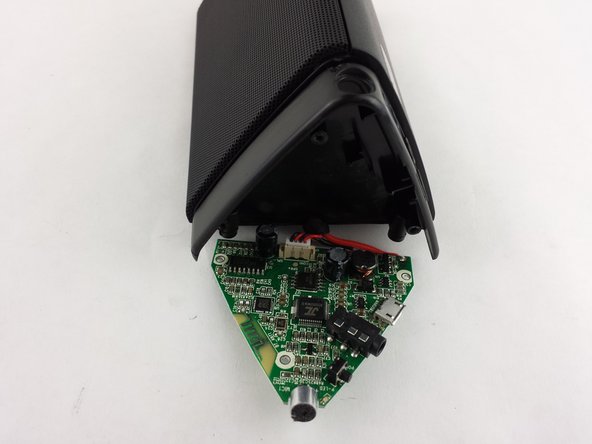
Remove the faulty motherboard.
-
To reassemble your device, follow these instructions in reverse order.
To reassemble your device, follow these instructions in reverse order.
Rückgängig: Ich habe diese Anleitung nicht absolviert.
7 weitere Personen haben diese Anleitung absolviert.
15 Kommentare
where do i buy mother board of oontz angle 3?
how much does a new motherboard cost??
Can you post where to get a new MB?
It does require a part...the new motherboard!
I'm having a hard time tracking down motherboards too. But the guide is still helpful if someone wants to harvest a motherboard out of another broken Oontz and use it in their own. If anyone else finds a source for the motherboard, feel free to edit the guide and include a link to it in the details section. Maybe if we all work together we can find a source.


