Einleitung
Hier wird der Austausch eines defekten Akkus gezeigt. Dazu muss die Zahnbürste geöffnet werden. Achte darauf, dass du keinen Kurzschluss zwischen den (+) und (-) Anschlüssen erzeugst. Du musst bei dieser Reparatur auch löten. Hinweise findest du unter
Was du brauchst
-
-
Hebele die Endkappe vom Gehäuse.
-
Entferne die Feder.
Beim (fast?) baugleichen Oral-B Pro 2500 Modell ist an der Vorderseite ca. 5mm unterhalb der untersten Signalleuchte eine kleine Öffnung in der Hartplastikhülle, über die nur die Gummibeschichtung läuft (Also von außen nur erfühlbar, nicht sichtbar). Man kann den vorderen Einraster durch das Gummi nach Innen drücken.
With the (almost?) Identical Oral-B Pro 2500 model, there is a small opening in the hard plastic shell on the front about 5mm below the lowest signal light, over which only the rubber coating runs (i.e. only palpable, not visible from the outside). You can push the front catch inwards through the rubber.
Mike -
The bottom cap comes loose easily with a 45 degree twist using pliers and a piece of cloth for protection.
-
-
-
Drücke auf die Achse der Zahnbürste um das Innere nach außen zu bringen.
-
Entferne die Innenteile aus dem Gehäuse.
If the green charge led quit flashing, check the hair fine coil connections to the PC board. One of mine was broken and soldering it back was the fix. Probably broke from vibration
-
-
-
-
Entferne die Druckplatte für die Einschalttaste mit einem flachen Schraubendreher.
On mine, the head end of the pressure plate has a ‘wing’ on each side that can be pushed in to release from the other metal enclosure that has not been removed yet.
-
-
-
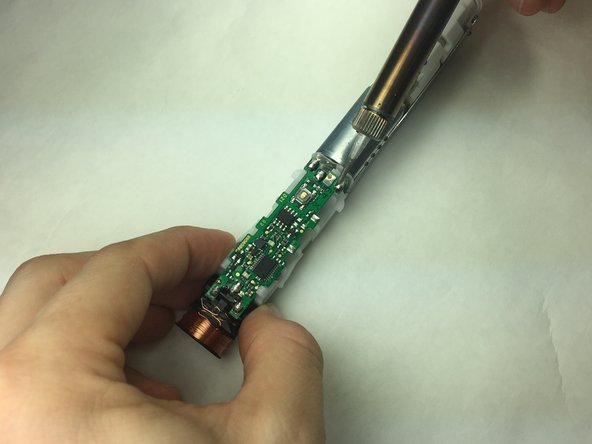
Entlöte die Drahtenden der Spule.
-
Halte die Spule gut fest und ziehe sie ab.
Before going further, check these two connections for continuity. With my toothbrush one of the two coil wires was not making a good connection and therefor not charging the battery. Easy fix if that’s your problem.
-
-
-
Entlöte den Motor von der Platine.
-
Entferne die Platine und den Akku vom Gerät.
pics too small. show after housing off and not how to get there. why even go to this hell and not have replaceable batteries like a remote or flashlight? this is made this hard just so you buy another one.
-
-
-
Entlöte den Akkuanschluss von der Platine.
-
Trenne Platine und Akkuhalter.
-
-
-
Ziehe den Akku aus dem Halter heraus.
-
Entferne den Akku.
Hi, what battery does this toothbrush use?
Ni-MH 14430
I opened up my Oral-B Pro 1000 toothbrush and found a Ni-MH 14430 cell inside. The markings on the cell specified the chemistry (Ni-MH), and I measured the dimensions to find the size (14430). If you buy one, just make sure it has the proper tab configuration (or that you can prepare that yourself).
-


Für den Zusammenbau musst du die Schritte in umgekehrter Reihenfolge befolgen.
Für den Zusammenbau musst du die Schritte in umgekehrter Reihenfolge befolgen.
Rückgängig: Ich habe diese Anleitung nicht absolviert.
21 weitere Nutzer:innen haben diese Anleitung absolviert.
Besonderer Dank geht an diese Übersetzer:innen:
100%
Diese Übersetzer:innen helfen uns, die Welt zu reparieren! Wie kann ich mithelfen?
Hier starten ›
Team

IUPUI, Team S5-G4, Baechle Fall 2017 Mitglied von IUPUI, Team S5-G4, Baechle Fall 2017
IUPUI-BAECHLE-F17S5G4
3 Mitglieder
6 Anleitungen geschrieben
14 Kommentare
This guide also works for Oral-B genius 9000. Thank You!! On mine, the coil wires was losen. Just soldered it back and works fine again.
Same with mine: coil was loose. I guessed it because the red blinking light would not react (turn off) by putting the toothbrush on the charger. (checked also a second charger, never through away older parts, using as spare…) ;)
Karsten -
This guide also works for Oral B PRO 2950N. Thank you so much!
I had the same issue, the coil was broken on one side, and it doesn't charge. Adding a little bit of solder to weld the broken end was enough for making it charge again
What type of battery is that? It's not listed under “parts.”
I’ve wrote it in another comment as well, but in case you didn’t see it: As far as I know, these are 4/5 AA batteries with about 1200 mAh and U-shaped solder tails. So the size of the battery is roughly 42x14mm . But as mentioned in the comments, regular AA size batteries worked in my case as well, just had to cut the spacers in the battery retainer. AA batteries are cheaper to get obviously and most likely they’ll have more capacity as well.
benn_i -
I have had my Oralb 1000 for only 1 month, bought in Apri, 2019l, quit charging at the end of May, 2019, May 31, so I caution anyone that might buy this rechargeable toothbrush, I hope they have better luck
what battery is it?
I’ve wrote it in another comment as well, but in case you didn’t see it: As far as I know, these are 4/5 AA batteries with about 1200 mAh and U-shaped solder tails. So the size of the battery is roughly 42x14mm . But as mentioned in the comments, regular AA size batteries worked in my case as well, just had to cut the spacers in the battery retainer. AA batteries are cheaper to get obviously and most likely they’ll have more capacity as well.
benn_i -
I confirm that, like benn_i said, a standard AA NiMH battery can be used as replacement. Cheaper and with higher capacity. The only con is that some work is required to cut the plastic spacers: juste use a good cutter and some patience and you will be ok.
Nice guide! My toothbrush was a 3756 model, quite similar to the one of this tutorial. I had to desolder a few more components, but eventually I succeeded. Thanks a lot, and special thanks to benn_i for the tip on buying a standard AA battery; it took some time to cut the spacers but now I have a toothbrush with some more energy.
Cheers
Aldo
I did this replacement, but with AA mod. Working great! Only three brushings before it died before replacement. Three brushings in since replacement and I haven’t even noticed a power step-down. Only issue I have is that I don’t know if I got it put back together right. There is a tiny bit of space showing between the tail-cap and body of the toothbrush, there is a tiny gap between the toothbrush body and the part the head attaches to, and the heads don’t click on anymore, like they used to, but just kind of go on there with a mushy feeling. Does anybody have any ideas for maybe what I got wrong putting the mechanical and electrical components back in the body, or is it just a function of having removed the tail-piece or a battery that is a bit too long? Also, closeup pictures in the guide of both ends would be nice for knowing if you’ve got it put back together properly.
Kip HacKman - Sounds like innards not fully inserted as this is noted in other websites as a common problem with reassembly. It can take some force to get it all the way into and seated fully in the body. Careful on pushing the coil end of things. Maybe someone else has a trick for this.