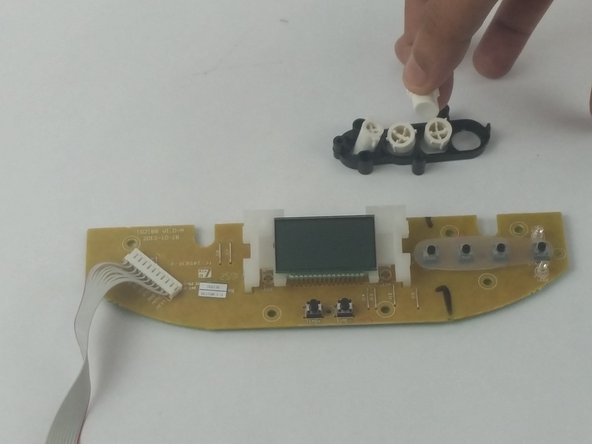
Zum Hauptinhalt wechseln

Oster Expressbake CKSTBRTW20 Top Panel Buttons Replacement

Was du brauchst

  1. Oster Expressbake CKSTBRTW20 Top Panel Buttons Replacement, Top Panel Removal: Schritt 1, Bild 1 von 1
    • Remove the bread pan.

  2. Oster Expressbake CKSTBRTW20 Top Panel Buttons Replacement: Schritt 2, Bild 1 von 3 Oster Expressbake CKSTBRTW20 Top Panel Buttons Replacement: Schritt 2, Bild 2 von 3 Oster Expressbake CKSTBRTW20 Top Panel Buttons Replacement: Schritt 2, Bild 3 von 3
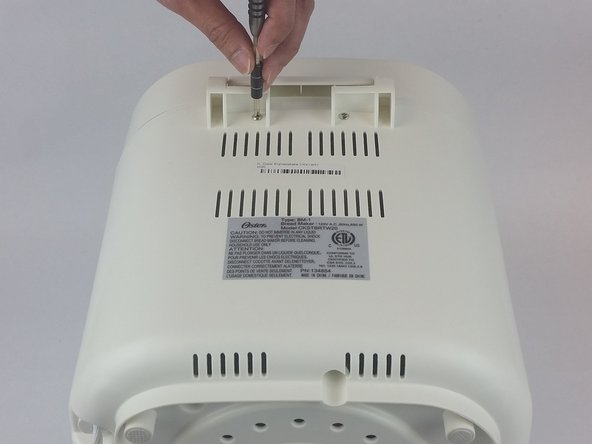
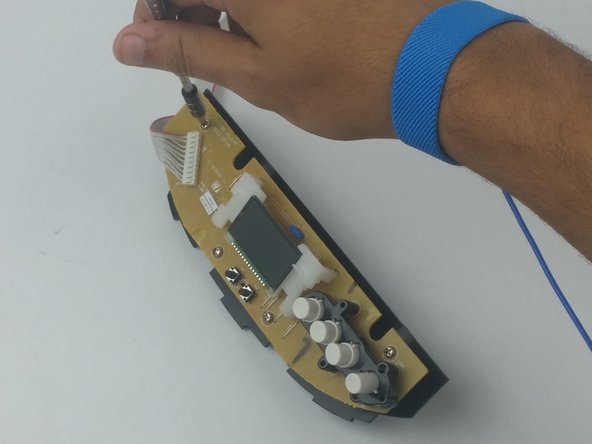
    • Remove the eight 22mm Phillips #1 screws from the grey lining.

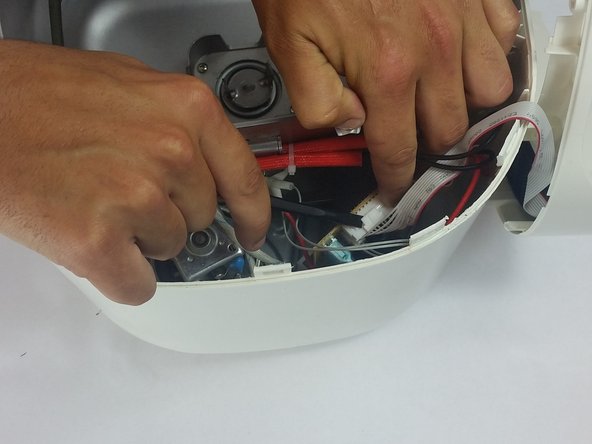
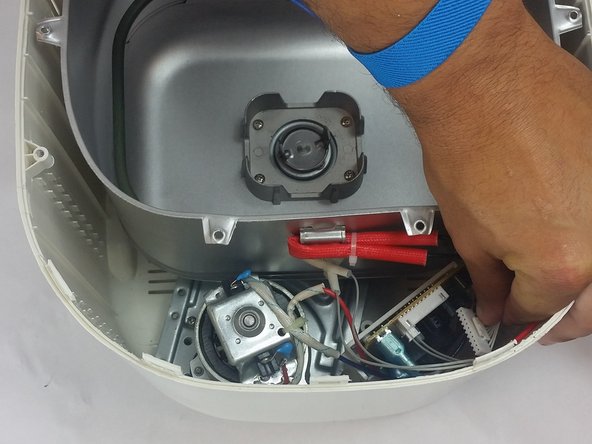
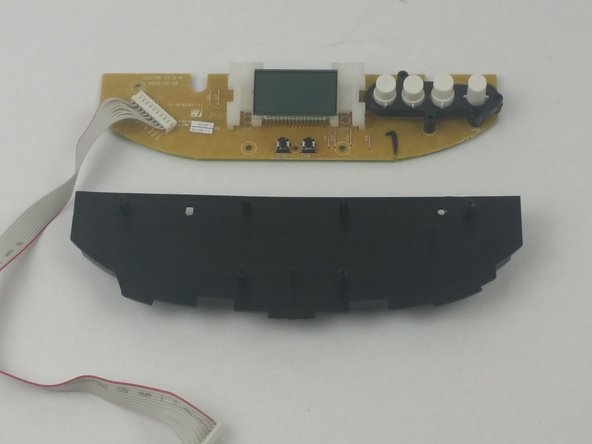
    • Remove the grey liner.

  3. Oster Expressbake CKSTBRTW20 Top Panel Buttons Replacement: Schritt 3, Bild 1 von 2 Oster Expressbake CKSTBRTW20 Top Panel Buttons Replacement: Schritt 3, Bild 2 von 2
    • Remove the two 11mm Phillips #1 screws from the back of the device.

  4. Oster Expressbake CKSTBRTW20 Top Panel Buttons Replacement: Schritt 4, Bild 1 von 2 Oster Expressbake CKSTBRTW20 Top Panel Buttons Replacement: Schritt 4, Bild 2 von 2
    • Pop off the top case using a spudger.

    • Keep the spudger away from the control panel.

    • Be aware of wires connecting the microcontroller to the panel when removing the top lining.

  5. Oster Expressbake CKSTBRTW20 Top Panel Buttons Replacement, Top Panel Buttons: Schritt 5, Bild 1 von 3 Oster Expressbake CKSTBRTW20 Top Panel Buttons Replacement, Top Panel Buttons: Schritt 5, Bild 2 von 3 Oster Expressbake CKSTBRTW20 Top Panel Buttons Replacement, Top Panel Buttons: Schritt 5, Bild 3 von 3
    • Disconnect microcontroller and top lining.

    • Ground yourself prior to disconnecting in order to avoid harming the inner electronics.

  6. Oster Expressbake CKSTBRTW20 Top Panel Buttons Replacement: Schritt 6, Bild 1 von 2 Oster Expressbake CKSTBRTW20 Top Panel Buttons Replacement: Schritt 6, Bild 2 von 2
    • Remove the two 11mm Phillips #1 screws from the top cover.

  7. Oster Expressbake CKSTBRTW20 Top Panel Buttons Replacement: Schritt 7, Bild 1 von 1
    • Use spudger to pop the control panel out.

  8. Oster Expressbake CKSTBRTW20 Top Panel Buttons Replacement: Schritt 8, Bild 1 von 3 Oster Expressbake CKSTBRTW20 Top Panel Buttons Replacement: Schritt 8, Bild 2 von 3 Oster Expressbake CKSTBRTW20 Top Panel Buttons Replacement: Schritt 8, Bild 3 von 3
    • Remove the four 11mm Phillips #1 screws from the control panel.

  9. Oster Expressbake CKSTBRTW20 Top Panel Buttons Replacement: Schritt 9, Bild 1 von 3 Oster Expressbake CKSTBRTW20 Top Panel Buttons Replacement: Schritt 9, Bild 2 von 3 Oster Expressbake CKSTBRTW20 Top Panel Buttons Replacement: Schritt 9, Bild 3 von 3
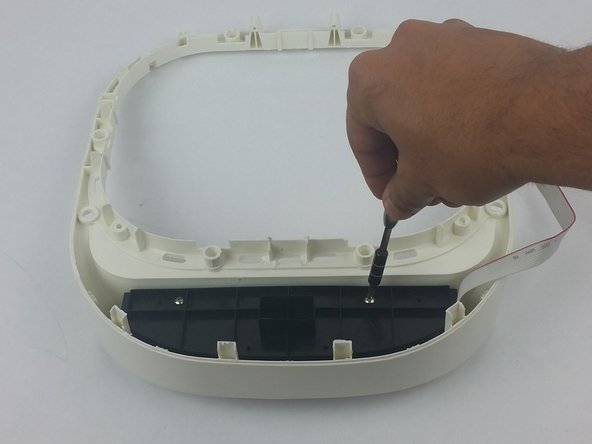
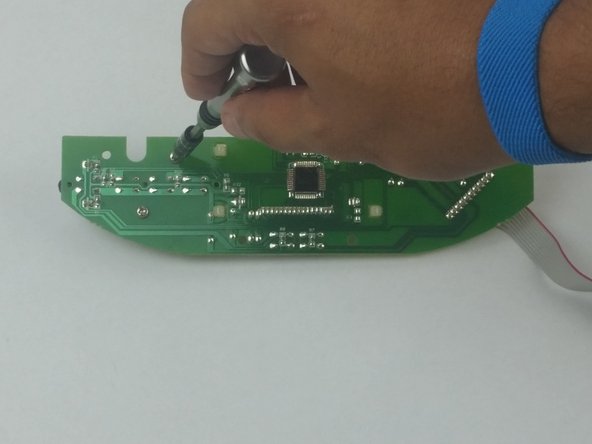
    • Remove the two 11mm Phillips #1 screws from the button panel.

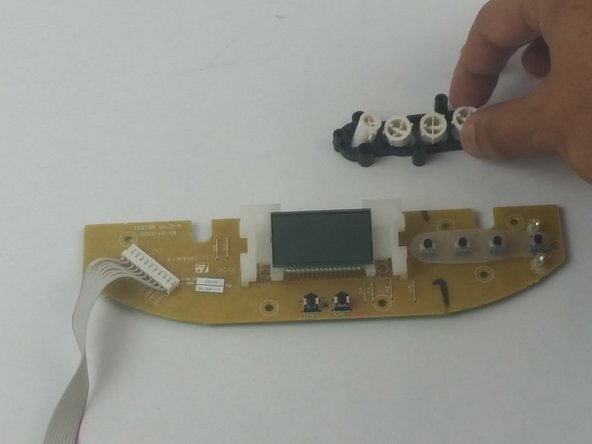
    • Flip the screen assembly over and remove the button panel.

  10. Oster Expressbake CKSTBRTW20 Top Panel Buttons Replacement: Schritt 10, Bild 1 von 2 Oster Expressbake CKSTBRTW20 Top Panel Buttons Replacement: Schritt 10, Bild 2 von 2
    • Remove and replace buttons as necessary.

Abschluss

To reassemble your device, follow these instructions in reverse order.

Team

USF Tampa, Team S7-G5, Passmore Spring 2018 Mitglied von USF Tampa, Team S7-G5, Passmore Spring 2018

USFT-PASSMORE-S18S7G5

4 Mitglieder

5 Anleitungen geschrieben

0 Kommentare

Kommentar hinzufügen

Seitenaufrufe:

Letzte 24 Stunden: 0

Letzte 7 Tage: 0

Letzte 30 Tage: 1

Insgesamt: 226