Einleitung
This guide will show you how to replace the stove element, which is also referred to as the bake element or oven heating element. If your electric stove or oven’s heating element is cracked or blistered, or isn’t completely bright orange during usage, then it is most likely damaged. It is important to understand how to replace an oven’s heating element because keeping it damaged can lead to many issues, such as food not being cooked properly, or at all. As for the process itself, having prior experience with using screwdrivers and voltage meters will make things easier for you. Also, it is important for safety reasons to always ensure that the power to the stove is off when trying to repair it.
Consult the manual for your oven or stove to determine what type of replacement element you need.
Before replacing the heating element, try replacing the fuses.
Was du brauchst
-
-
Before purchasing your replacement element, make sure it matches the size of the first element.
-
-
-
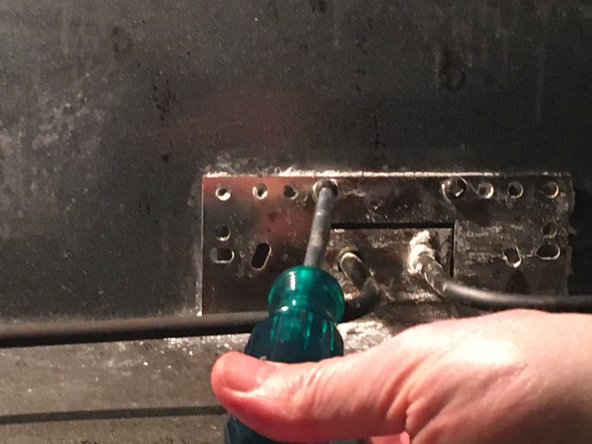
Open the oven door and unscrew the 5 mm Robertson head screws that keep the element in place.
-
-
-
-
Using your voltmeter, place it on the two wires to make sure there is no electrical current.
-
Gently pull out the element two or three inches to expose the connecting wires.
-
-
-
Remove the damaged element from the stove. It should slide out easily.
-
If possible, try to locate where the damage on the element took place for future reference.
-
Begin installing the new element.
-
-
-
Connect the power wires by matching the same color as the original element. (Refer to Step 5 for more information.)
-
Gently re-insert the element back into the stove opening.
-
Refasten the two screws at the front to secure the element in place.
-
-
-
Turn the power on and turn the oven on to make sure the element is functioning properly.
-


Rückgängig: Ich habe diese Anleitung nicht absolviert.
Eine weitere Person hat diese Anleitung absolviert.

Team

York University, Team S1-G2, Woodhouse Winter 2021 Mitglied von York University, Team S1-G2, Woodhouse Winter 2021
YORK-WOODHOUSE-W21S1G2
1 Mitglied
1 Anleitung geschrieben