Einleitung
Something unmentionably horrible has happened to your PSp 300xc. The motherboard is fried for one reason or another, but have no fear! This guide allows you to replace the dead board with a brand new one!
Was du brauchst
-
-
Press the button securing the battery door to the PSP 300xc, and lift the battery door off.
-
Lift the battery out of the PSP.
-
-
-
Use a spudger or your fingernail to remove the warranty sticker stuck to the inside of the battery tray
-
-
-
Insert a spudger between the front case and PSP, and slide the spudger along the perimeter of the front case to remove it.
-
-
-
Push the home bar to the right about 1cm to release a tab, and begin to lift the right end of the home bar slightly.
-
-
-
Insert a spudger under the LCD, beside the black plastic tab.
-
Push the LCD to the left and pry up to release the left edge of the LCD from under the plastic tab.
-
-
-
Insert a spudger under the LCD, beside the black plastic tab.
-
Push the LCD to the right and pry up to release the right edge of the LCD from under the plastic tab.
-
-
-
-
Rotate the LCD away from the PSP to reveal the LCD and home bar ribbon cables.
-
Use your fingernail or the edge of a plastic opening tool to flip up the retaining flap on the following four ZIF connectors:
-
Home bar cable
-
Microphone cable
-
LCD display data cable
-
Touchscreen cable
-
After flipping up the locking tabs on all four connectors, use your fingers or a spudger to gently pull the cables straight out of the connectors.
-
-
-
Lift the home bar up as high as it will go, but not so high that the wires disconnect.
-
Twist the home bar counter clockwise while carefully lifting it further. The left edge has to lift over the black plastic frame to allow it to rotate.
-
The home bar should now lift out of the PSP 300xc.
-
-
-
Remove both trigger buttons by lifting them off the PSP 300xc.
-
-
-
Using a finger or spudger, flip up the retaining flap on the power switch board ribbon cable socket.
-
Pull the ribbon cable out of its socket.
-
-
-
Using the flat end of a spudger, pry the power switch board up and off the PSP 300xc.
-
Remove the power switch board from the PSP.
-
-
-
Using the flat edge of a spudger, pry the small black tab away from the power jack to free it from the case.
-
-
-
Disconnect the power jack from its connector on the motherboard by pulling it straight out of its socket.
-
-
-
Using the flat end of a spudger, peel the 'L' trigger contact pad up from the case.
-
-
-
Using a fingernail or spudger, flip up the retaining flap on the d-pad and 'L' trigger ribbon cable.
-
Lift the black plastic bracket along with the d-pad contact pad, disconnecting the ribbon cable as you lift.
-
-
-
Use your fingernail or the edge of a plastic opening tool to flip up the retaining flap on the analog stick ribbon connector.
-
Lift the analog stick out of the PSP 300xc, disconnecting the ribbon cable as you remove it.
-
-
-
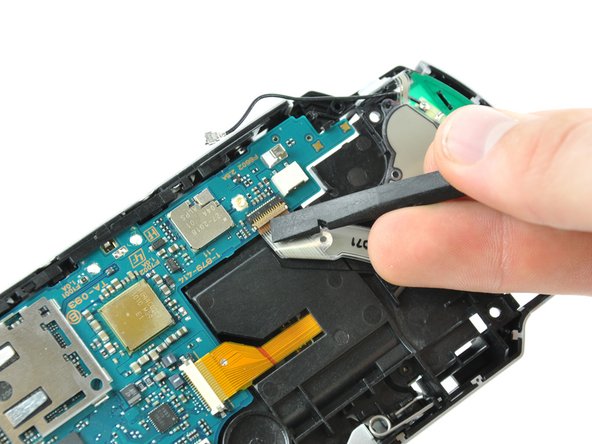
Using the flat edge of a spudger, pry the wireless board cable connector straight up and off the motherboard.
-
-
-
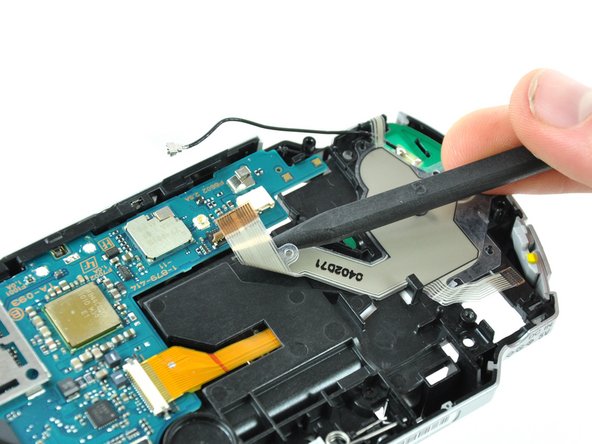
Using a fingernail or spudger, flip up the retaining flap on the following three ZIF connectors.
-
Action button contact pad ribbon
-
UMD drive ribbon
-
Use your fingernail or tip of a spudger to push both sides of the black retaining flap on the UMD laser ribbon socket to the right.
-
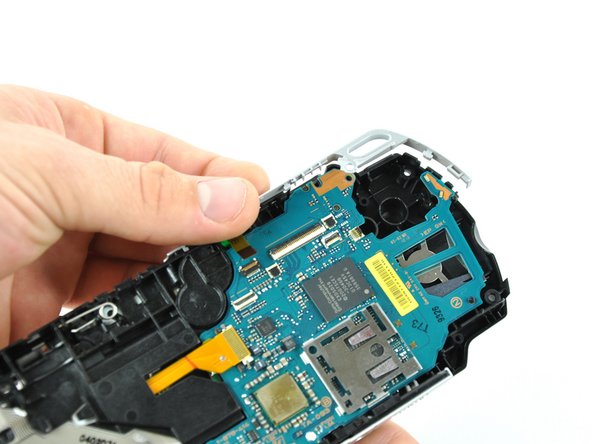
Use your fingers or a spudger to gently pull all three ribbon cables straight out of their sockets.
-
-
-
Lift the right silver rim up and off the PSP 300xc
-
Lift the left silver rim up and off the PSP 300xc
-
-
-
Lift the motherboard up from its bottom edge about 45 degrees from the case.
-
Slowly attempt to pull the motherboard out at roughly a 45 degree angle from the case.
-


To reassemble your device, follow these instructions in reverse order.
To reassemble your device, follow these instructions in reverse order.
Rückgängig: Ich habe diese Anleitung nicht absolviert.
13 weitere Nutzer:innen haben diese Anleitung absolviert.

3 Kommentare
looking for bottom stick board
part No. 0402071
buttons is not working the right side