Diese Version enthält möglicherweise inkorrekte Änderungen. Wechsle zur letzten geprüften Version.
Was du brauchst
-
Dieser Schritt ist noch nicht übersetzt. Hilf mit, ihn zu übersetzen!
-
Remove the battery cover by pressing on the small rectangular button located on the back of the phone.
-
-
Dieser Schritt ist noch nicht übersetzt. Hilf mit, ihn zu übersetzen!
-
Remove the battery by pulling it out towards you.
-
-
Dieser Schritt ist noch nicht übersetzt. Hilf mit, ihn zu übersetzen!
-
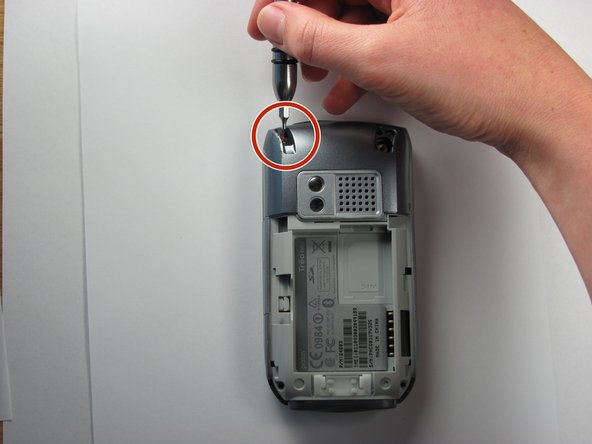
Remove the stylus in order to access the screw.
-
Remove the 27mm top-left screw using a T6 Torx screwdriver.
-
-
-
Dieser Schritt ist noch nicht übersetzt. Hilf mit, ihn zu übersetzen!
-
Using the spudger, remove the rubber rectangular cover located in the upper rear, right-hand corner.
-
Remove the 27mm screw using the T6 Torx screwdriver.
-
-
Dieser Schritt ist noch nicht übersetzt. Hilf mit, ihn zu übersetzen!
-
Remove the remaining two 27mm screws from the bottom using the T6 screwdriver.
-
-
Dieser Schritt ist noch nicht übersetzt. Hilf mit, ihn zu übersetzen!
-
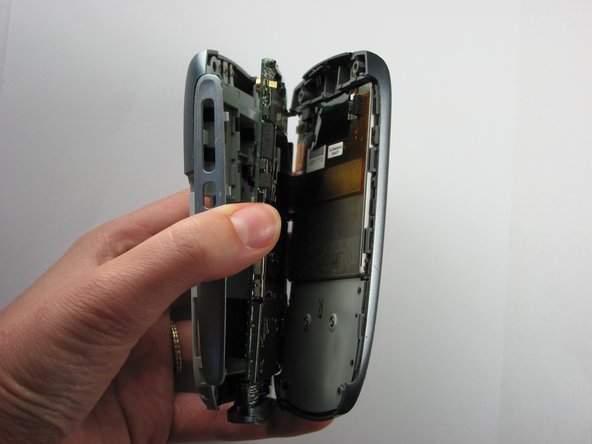
Turn the phone so the screen is facing the right side.
-
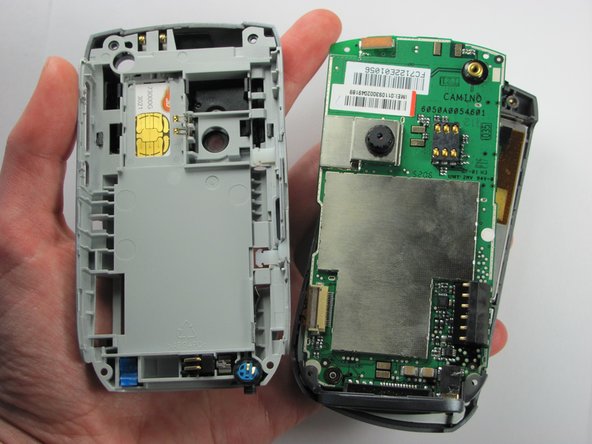
Use a spudger to carefully separate the back panel from the front panel to access components inside the phone.
-
Separate the covers from the left side of the device as indicated in the picture.
-
-
Dieser Schritt ist noch nicht übersetzt. Hilf mit, ihn zu übersetzen!
-
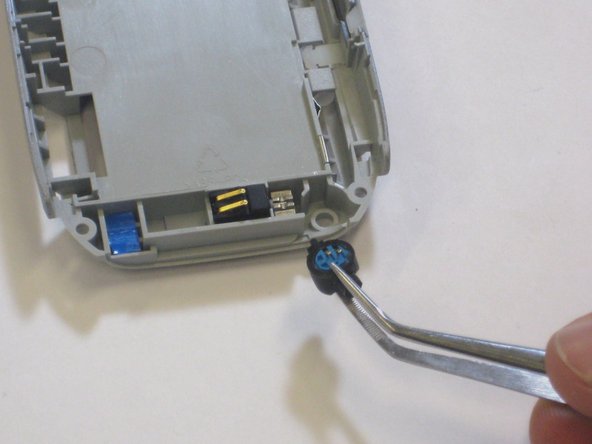
Using a pair of tweezers, grasp the blue rubber microphone.
-
Pull the rubber microphone up and back to remove it.
-
Now you have successfully removed the microphone.
-


Rückgängig: Ich habe diese Anleitung nicht absolviert.
2 weitere Nutzer:innen haben diese Anleitung absolviert.
Team

Cal Poly, Team 6-4, Maness Fall 2009 Mitglied von Cal Poly, Team 6-4, Maness Fall 2009
CPSU-MANESS-F09S6G4
4 Mitglieder
12 Anleitungen geschrieben