Zum Hauptinhalt wechseln

Panasonic EB-GD88 Initial Steps to replacing the camera and screen assembly

Was du brauchst

  1. Panasonic EB-GD88 Initial Steps to replacing the camera and screen assembly, Prerequisite Guide for Camera, Screen Assembly: Schritt 1, Bild 1 von 3 Panasonic EB-GD88 Initial Steps to replacing the camera and screen assembly, Prerequisite Guide for Camera, Screen Assembly: Schritt 1, Bild 2 von 3 Panasonic EB-GD88 Initial Steps to replacing the camera and screen assembly, Prerequisite Guide for Camera, Screen Assembly: Schritt 1, Bild 3 von 3
    • Flip cellphone open.

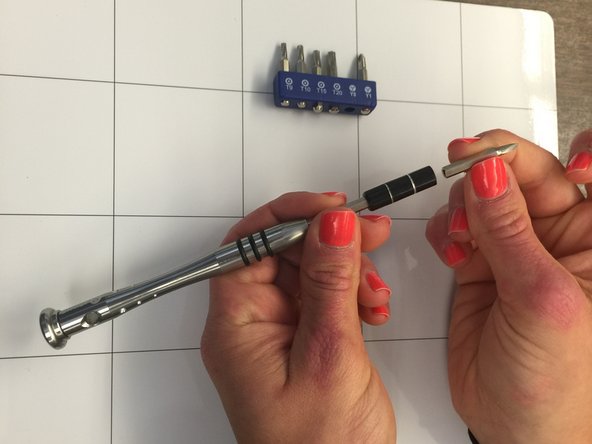
    • Out of the iFixit tool kit remove the black plastic opening tool, curved tweezers, and 54 bit driver kit.

  2. Panasonic EB-GD88 Initial Steps to replacing the camera and screen assembly: Schritt 2, Bild 1 von 1
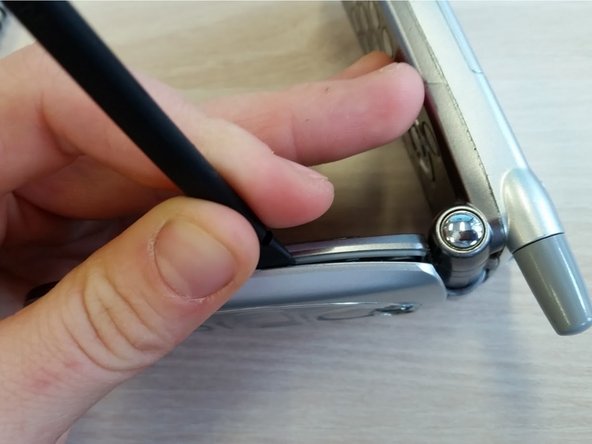
    • Remove 4 rubber covers on the corners of the cellphone screen by prying them off with flat end of nylon spudger.

    • The rubber covers are glued on, but they should pop off easily.

    • These rubber covers may or may not be present.

  3. Panasonic EB-GD88 Initial Steps to replacing the camera and screen assembly: Schritt 3, Bild 1 von 3 Panasonic EB-GD88 Initial Steps to replacing the camera and screen assembly: Schritt 3, Bild 2 von 3 Panasonic EB-GD88 Initial Steps to replacing the camera and screen assembly: Schritt 3, Bild 3 von 3
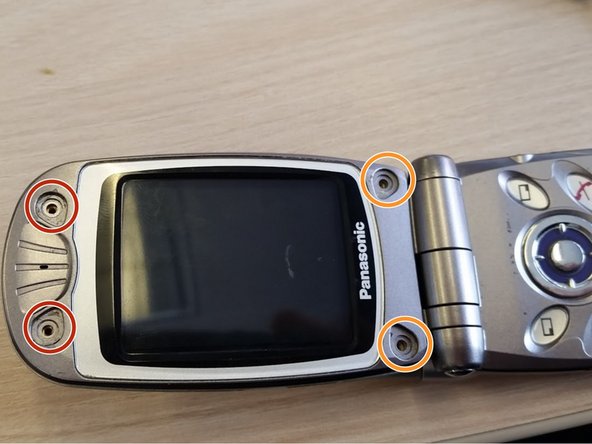
    • Using a Y0 tri-wing screwdriver, found in the 54 bit driver kit, remove the two screws above the screen. Twist the screws counterclockwise to remove.

    • These two screws are blueish

    • Using a Y0 tri-wing screwdriver, remove the two screws below the screen. Twist the screws counterclockwise to remove.

    • These two screws are silver and longer than the bluish.

  4. Panasonic EB-GD88 Initial Steps to replacing the camera and screen assembly: Schritt 4, Bild 1 von 3 Panasonic EB-GD88 Initial Steps to replacing the camera and screen assembly: Schritt 4, Bild 2 von 3 Panasonic EB-GD88 Initial Steps to replacing the camera and screen assembly: Schritt 4, Bild 3 von 3
    • Carefully pry front cover of cellphone off with flat end of nylon spudger.

  5. Panasonic EB-GD88 Initial Steps to replacing the camera and screen assembly: Schritt 5, Bild 1 von 3 Panasonic EB-GD88 Initial Steps to replacing the camera and screen assembly: Schritt 5, Bild 2 von 3 Panasonic EB-GD88 Initial Steps to replacing the camera and screen assembly: Schritt 5, Bild 3 von 3
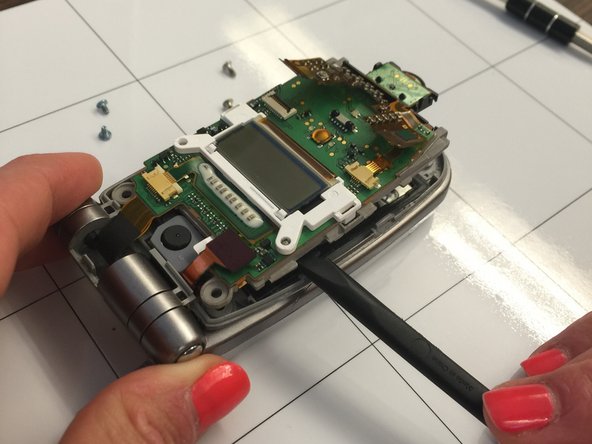
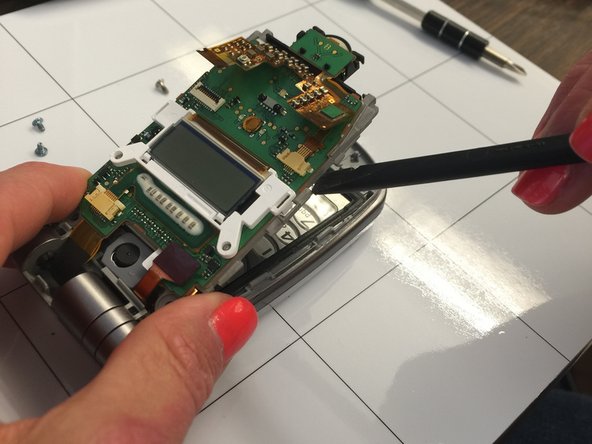
    • Insert nylon spudger or curved tweezers into small gap between the phone's outer gray casing and the inner gray plastic compartment (which holds the green circuit board and screen together). This gap is indicated by red arrows.

    • Use the tools as leverage to pop out inner gray compartment unit (screen, gray plastic, and circuit board) away from the phones outer casing .

    • Place nylon spudger and tweezers in the space between the outer phone casing and the inner gray compartment.

Abschluss

To reassemble your device, follow these instructions in reverse order.

Patricia Taggart

Mitglied seit: 02/19/16

1 Reputation

3 Anleitungen geschrieben

Team

Ohio State, Team 1-4, Garvin Spring 2016 Mitglied von Ohio State, Team 1-4, Garvin Spring 2016

OSU-GARVIN-S16S1G4

2 Mitglieder

6 Anleitungen geschrieben

0 Kommentare

Kommentar hinzufügen

Seitenaufrufe:

Letzte 24 Stunden: 0

Letzte 7 Tage: 0

Letzte 30 Tage: 0

Insgesamt: 136