Diese Anleitung enthält neuere Änderungen. Wechsel zur neuesten unüberprüften Version.
Einleitung
Steps for removing the back half of the case and replacing it with a new one.
Was du brauchst
-
-
Slide the lock switch to the right so that it is in the unlocked position.
-
Use your finger to slide the battery hatch in the direction of the downward arrow so that the hatch is open.
-
-
-
Open the battery hatch and then the black cover to expose the battery compartment.
-
Remove the battery.
-
-
-
-
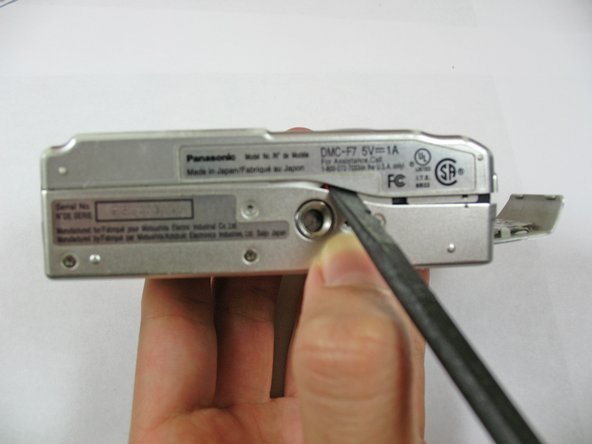
Use a Phillips screwdriver to remove the three 2.8 mm screws on the bottom of the camera.
-
-
-
Remove the two 2.8 mm Phillips screws on the side of the camera as shown in picture.
-
-
-
Use your fingers to carefully pry off the back casing from the camera assembly.
-
-
-
Lay the camera on its front side. Use the spudger to open the film strip locking mechanism and remove strip.
-
Hold down on the camera's metal casing with one hand. Use your other hand to completely lift the back case off the rest of the camera, making sure the film strip separates.
-


To reassemble your device, follow these instructions in reverse order.
To reassemble your device, follow these instructions in reverse order.
Rückgängig: Ich habe diese Anleitung nicht absolviert.
Ein:e weitere:r Nutzer:in hat diese Anleitung absolviert.
Team

Cal Poly, Team 7-35, Regan Winter 2011 Mitglied von Cal Poly, Team 7-35, Regan Winter 2011
CPSU-REGAN-W11S7G35
4 Mitglieder
10 Anleitungen geschrieben