Zum Hauptinhalt wechseln

Panasonic Lumix DMC-G5 Diopter Adjustment Dial Replacement

Was du brauchst

  1. Panasonic Lumix DMC-G5 Diopter Adjustment Dial Replacement, Diopter Adjustment Dial: Schritt 1, Bild 1 von 3 Panasonic Lumix DMC-G5 Diopter Adjustment Dial Replacement, Diopter Adjustment Dial: Schritt 1, Bild 2 von 3 Panasonic Lumix DMC-G5 Diopter Adjustment Dial Replacement, Diopter Adjustment Dial: Schritt 1, Bild 3 von 3
    • Remove the four 4.6mm J000 Phillips screws from the sides and two 3.2mm J000 Phillips screws along the bottom.

  2. Panasonic Lumix DMC-G5 Diopter Adjustment Dial Replacement: Schritt 2, Bild 1 von 3 Panasonic Lumix DMC-G5 Diopter Adjustment Dial Replacement: Schritt 2, Bild 2 von 3 Panasonic Lumix DMC-G5 Diopter Adjustment Dial Replacement: Schritt 2, Bild 3 von 3
    • Remove the two 3.2mm J000 Phillips screws located on the bottom edge of the viewfinder cover.

    • Carefully remove the viewfinder cover.

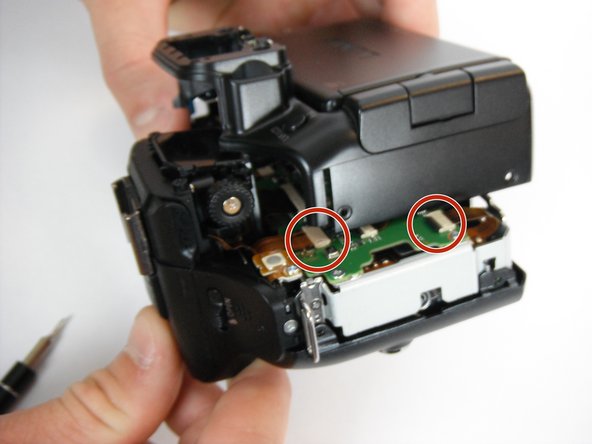
    • Remove the two 4.4mm J000 Phillips screws located near the top edge of the viewfinder.

  3. Panasonic Lumix DMC-G5 Diopter Adjustment Dial Replacement: Schritt 3, Bild 1 von 3 Panasonic Lumix DMC-G5 Diopter Adjustment Dial Replacement: Schritt 3, Bild 2 von 3 Panasonic Lumix DMC-G5 Diopter Adjustment Dial Replacement: Schritt 3, Bild 3 von 3
    • Slide the Wide Plastic Opening Tool upwards along the underside of the rear casing.

    • Be careful not to disconnect the filament connections. Reinserting them can be difficult.

    • Slowly lower the casing into the position shown.

  4. Panasonic Lumix DMC-G5 Diopter Adjustment Dial Replacement: Schritt 4, Bild 1 von 2 Panasonic Lumix DMC-G5 Diopter Adjustment Dial Replacement: Schritt 4, Bild 2 von 2
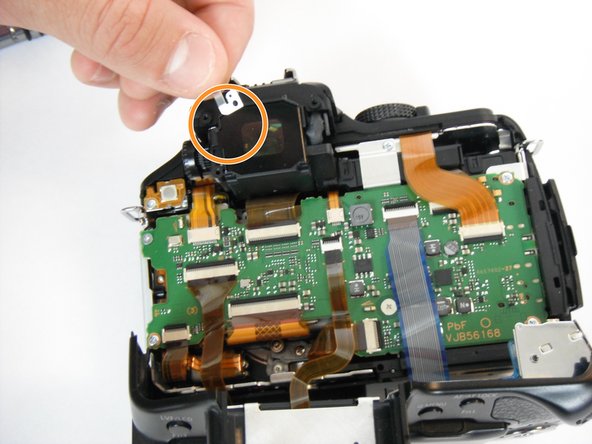
    • Use the Screwdriver J000 Phillips Head to remove the screw located at the lower-left corner of the face of the viewfinder glass.

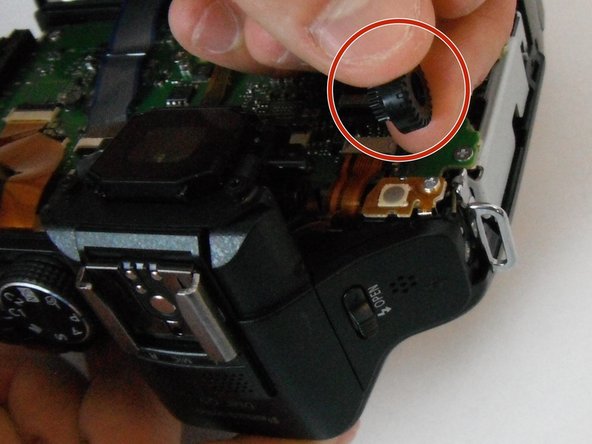
    • Carefully lift the L-shaped clicker underneath the previously removed screw.

  5. Panasonic Lumix DMC-G5 Diopter Adjustment Dial Replacement: Schritt 5, Bild 1 von 2 Panasonic Lumix DMC-G5 Diopter Adjustment Dial Replacement: Schritt 5, Bild 2 von 2
    • Slide the faulty diopter adjustment dial off the rod.

    • Replace the diopter dial with a 1-cm wheel.

Abschluss

To reassemble your device, follow these instructions in reverse order.

Ein:e weitere:r Nutzer:in hat diese Anleitung absolviert.

Team

USF Tampa, Team 1-3, Kass Spring 2017 Mitglied von USF Tampa, Team 1-3, Kass Spring 2017

USFT-KASS-S17S1G3

4 Mitglieder

6 Anleitungen geschrieben

0 Kommentare

Kommentar hinzufügen

Seitenaufrufe:

Letzte 24 Stunden: 0

Letzte 7 Tage: 3

Letzte 30 Tage: 9

Insgesamt: 1,017