Einleitung
This guide requires the use of a screw driver and close attention to which screws need to be removed.
Was du brauchst
-
-
On the bottom of the camera, use your finger to push the lock button to the open position which will cause the hinged door to swing open.
-
-
-
Push the small black tab that holds the battery with your finger to release the battery.
-
Use your fingers to pull the battery out of the camera.
-
-
-
-
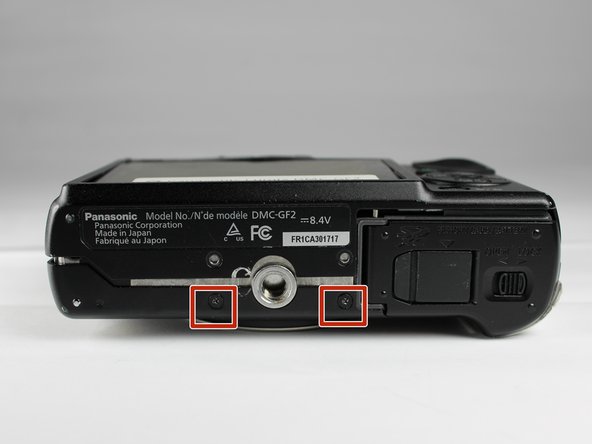
Using a Philips #00 screwdriver, remove six 2.69 mm screws located on the two short sides and on the bottom of the camera.
-
-
-
Using a Phillips #00 screwdriver, remove four black 2.69 mm screws from the front of the camera.
-
-
-
Using your hand, gently lift up the front cover and separate it from the camera.
-


To reassemble your device, follow these instructions in reverse order.
To reassemble your device, follow these instructions in reverse order.
Team

Baylor, Team 5-9, Williams Fall 2016 Mitglied von Baylor, Team 5-9, Williams Fall 2016
BU-WILLIAMS-F16S5G9
3 Mitglieder
11 Anleitungen geschrieben