Zum Hauptinhalt wechseln

Panasonic Lumix DMC-ZS19 Menu/Set Button Replacement

Was du brauchst

  1. Panasonic Lumix DMC-ZS19 Menu/Set Button  Replacement, Menu/Set Button: Schritt 1, Bild 1 von 3 Panasonic Lumix DMC-ZS19 Menu/Set Button  Replacement, Menu/Set Button: Schritt 1, Bild 2 von 3 Panasonic Lumix DMC-ZS19 Menu/Set Button  Replacement, Menu/Set Button: Schritt 1, Bild 3 von 3
    • Start by removing the screws located on the left and right hand side panels of the camera (two sets of pairs of screws). Next remove the pair of screws on the bottom of the camera. (6 in total)

  2. Panasonic Lumix DMC-ZS19 Menu/Set Button  Replacement: Schritt 2, Bild 1 von 1
    • Gently remove the loosened panel from the LCD screen.

  3. Panasonic Lumix DMC-ZS19 Menu/Set Button  Replacement: Schritt 3, Bild 1 von 3 Panasonic Lumix DMC-ZS19 Menu/Set Button  Replacement: Schritt 3, Bild 2 von 3 Panasonic Lumix DMC-ZS19 Menu/Set Button  Replacement: Schritt 3, Bild 3 von 3
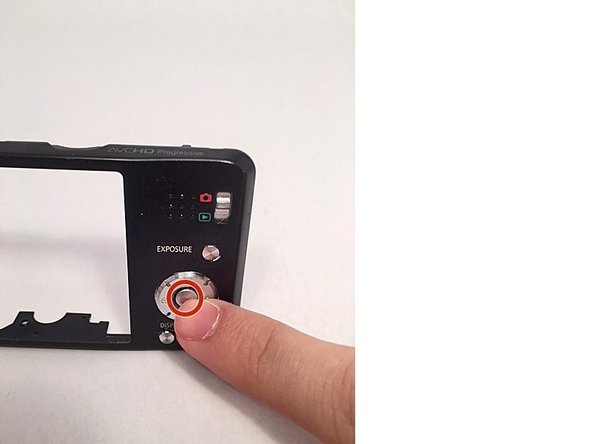
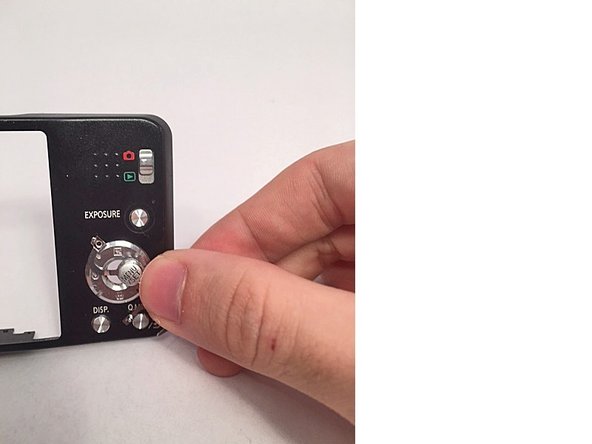
    • Carefully use a finger to pop out the Menu/Set button from the panel by pushing on it.

Abschluss

To reassemble your device, follow these instructions in reverse order.

2 weitere Nutzer:innen haben diese Anleitung absolviert.

Team

USF Tampa, Team 14-1, Meier Fall 2015 Mitglied von USF Tampa, Team 14-1, Meier Fall 2015

USFT-MEIER-F15S14G1

4 Mitglieder

10 Anleitungen geschrieben

0 Kommentare

Kommentar hinzufügen

Seitenaufrufe:

Letzte 24 Stunden: 0

Letzte 7 Tage: 0

Letzte 30 Tage: 3

Insgesamt: 267