Diese Version enthält möglicherweise inkorrekte Änderungen. Wechsle zur letzten geprüften Version.
Was du brauchst
-
Dieser Schritt ist noch nicht übersetzt. Hilf mit, ihn zu übersetzen!
-
Remove the battery and the SD card.
-
-
Dieser Schritt ist noch nicht übersetzt. Hilf mit, ihn zu übersetzen!
-
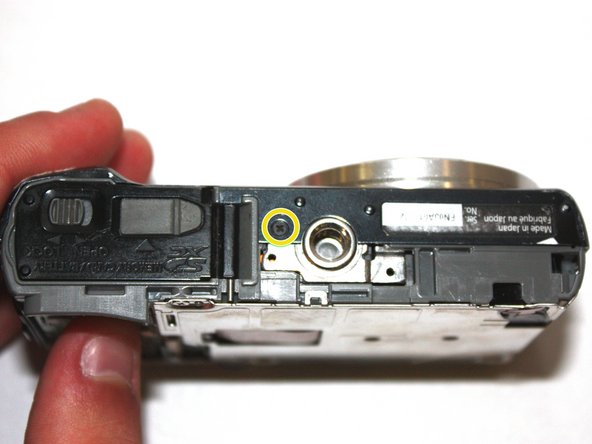
Remove the two bottom 1.0 mm screws with a Phillips #000 screwdriver.
-
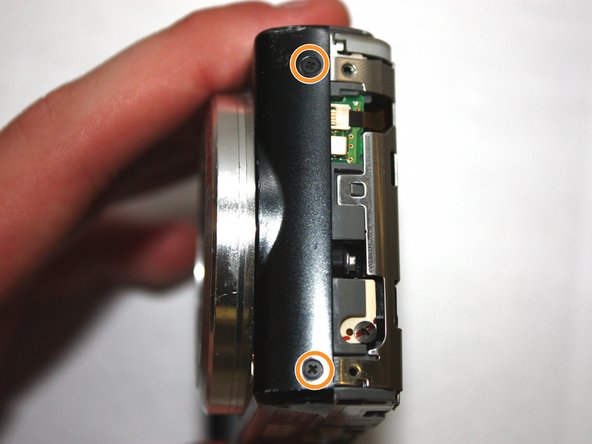
Remove the two 1.0 mm screws on the left with a Phillips #000 screwdriver.
-
Remove the two 1.0 mm screws on the right with a Phillips #000 screwdriver.
-
-
Dieser Schritt ist noch nicht übersetzt. Hilf mit, ihn zu übersetzen!
-
Carefully separate the back of the camera from the main body.
-
-
Dieser Schritt ist noch nicht übersetzt. Hilf mit, ihn zu übersetzen!
-
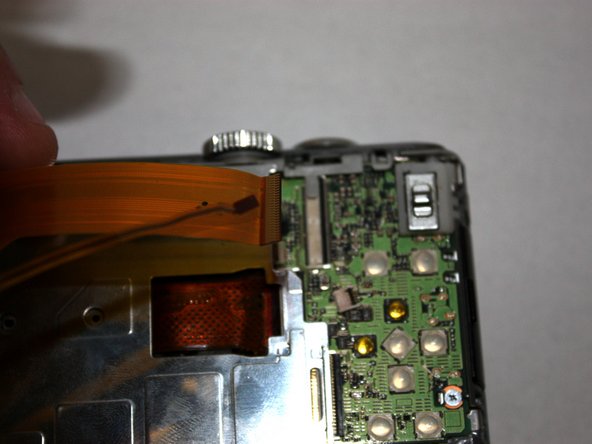
Use the tip of a spudger to flip up the black tabs on the ribbon cables.
-
Pull the ribbon cables gently to unseat them.
-
-
-
Dieser Schritt ist noch nicht übersetzt. Hilf mit, ihn zu übersetzen!
-
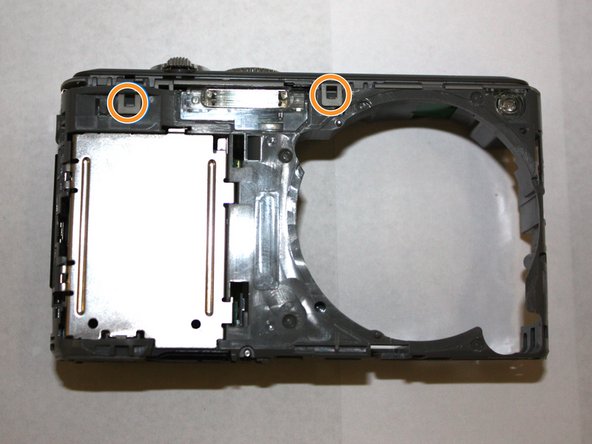
Remove the two 1.0 mm screws on the right with a Phillips #000 screwdriver.
-
Remove the two 1.0 mm screws on the left with a Phillips #000 screwdriver.
-
Remove one 1.0 mm screw from the bottom with a Phillips #000 screwdriver.
-
-
Dieser Schritt ist noch nicht übersetzt. Hilf mit, ihn zu übersetzen!
-
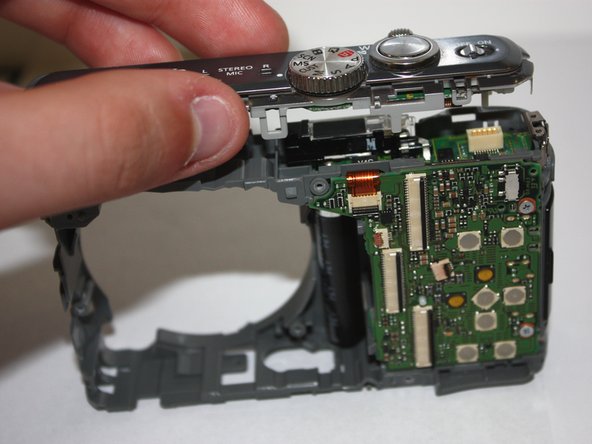
Carefully separate the front of the camera from the main body.
-
-
Dieser Schritt ist noch nicht übersetzt. Hilf mit, ihn zu übersetzen!
-
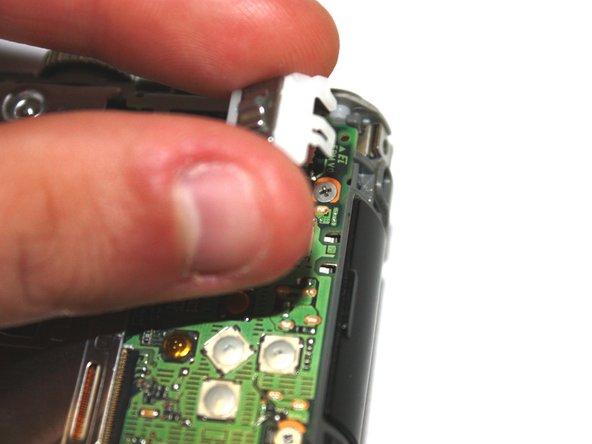
Use the tip of the spudger to disengage the plastic tab.
-
Carefully lift the selector switch away from the motherboard.
-
-
Dieser Schritt ist noch nicht übersetzt. Hilf mit, ihn zu übersetzen!
-
Remove three 1.0 mm screws with a Phillips #000 screwdriver.
-
Use the tip of the spudger to disengage the metal tab. Carefully lift the shield away from the motherboard.
-
-
Dieser Schritt ist noch nicht übersetzt. Hilf mit, ihn zu übersetzen!
-
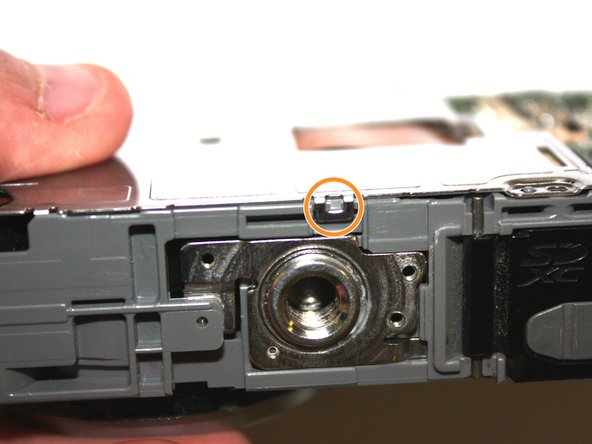
Insert the tip of the spudger into the center hole of the tripod mount. Apply force in the direction facing away from the button.
-
Carefully lift the tripod mount out of the camera body.
-
-
Dieser Schritt ist noch nicht übersetzt. Hilf mit, ihn zu übersetzen!
-
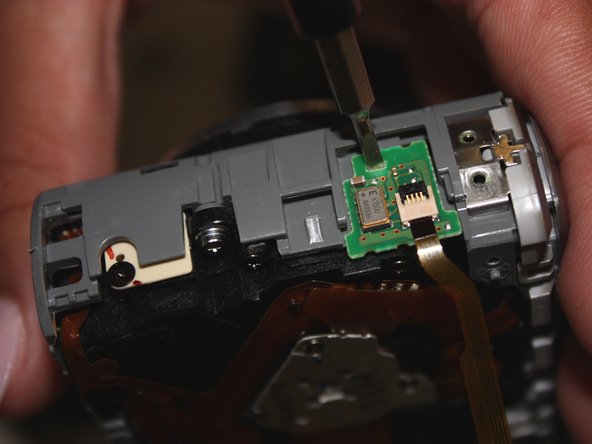
Use the spudger to flip up the brown tab on the motherboard. Carefully unseat the ribbon cable.
-
Insert the tip of the spudger into the hole on the daughterboard. Apply upward force to remove the daughterboard from the main case.
-
-
Dieser Schritt ist noch nicht übersetzt. Hilf mit, ihn zu übersetzen!
-
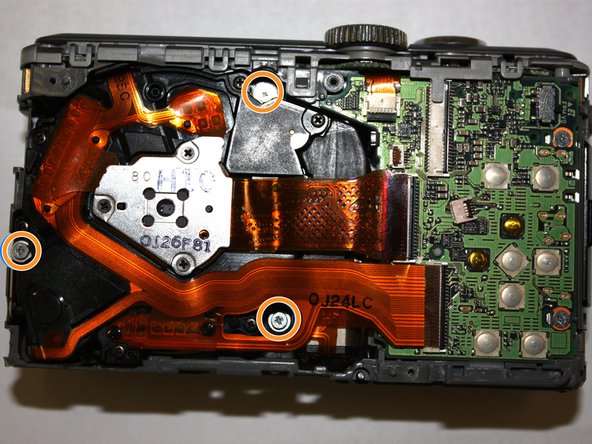
Use the spudger to flip up the two tabs on the motherboard. Carefully unseat the ribbon cables.
-
Use the Phillips #000 screwdriver to remove the three silver screws.
-
Carefully lift the lens assembly out of the camera.
-
-
Dieser Schritt ist noch nicht übersetzt. Hilf mit, ihn zu übersetzen!
-
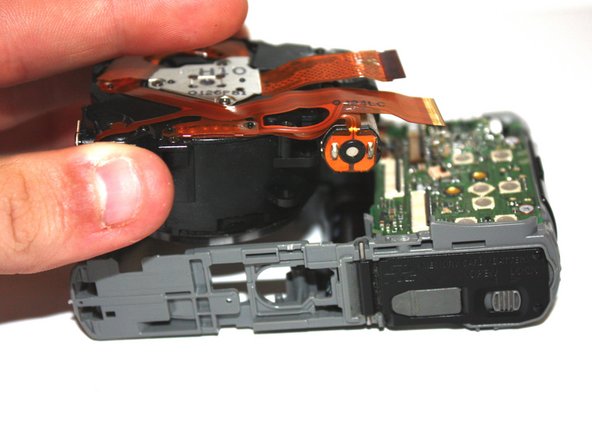
Use the tip of the spudger to disengage the tab on the back of the camera.
-
Use the tip of the spudger to disengage the two tabs on the front of the camera.
-
Carefully lift the top assembly out of place.
-


Team

Baylor, Team S2-G5, Johnson Spring 2018 Mitglied von Baylor, Team S2-G5, Johnson Spring 2018
BU-JOHNSON-S18S2G5
3 Mitglieder
10 Anleitungen geschrieben