Was du brauchst
-
-
Locate the pair (2) of screws on each side of the camera and remove them. Then locate the pair (2) of screws on the bottom of the camera, located on each side of the tripod screw-in area, and remove them.
-
-
-
Using the plastic prying tool, remove the cover of the camera that is on the same side as your LCD screen. This cover should come off relatively easily, and will expose the motherboard that the screen is connected to.
-
-
-
Disconnect the motherboard that the LCD screen is connected to from the main motherboard.
-
-
-
-
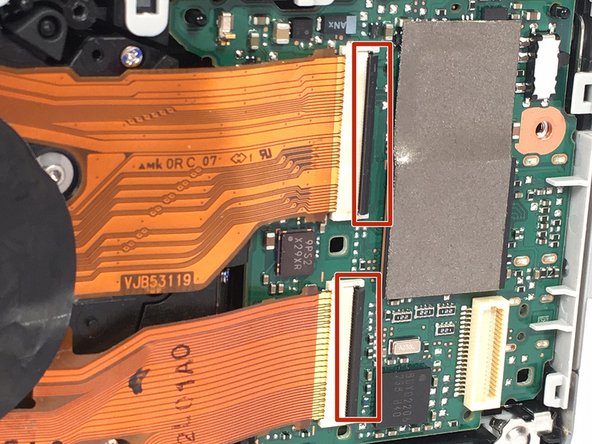
Using your hand, follow the two data-strips that connect the LCD screen to the motherboard and unclip them. Once the data-strips are unclipped, remove them from the motherboard and the screen will be free.
-
-
-
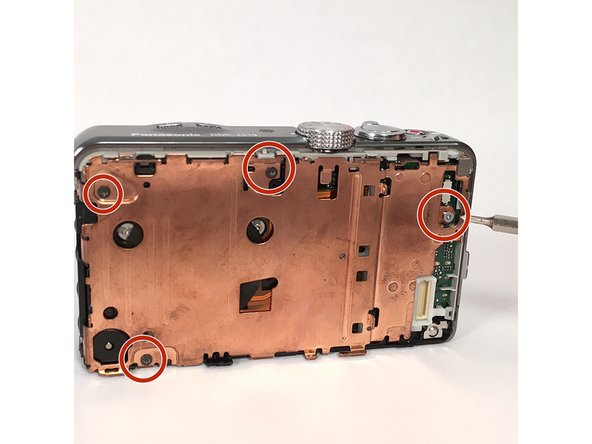
After the screen has been removed, the main motherboard is directly underneath it. There is a bronze, metal separation piece that separates the main motherboard from the one connected to the lens. This metal piece is held in with 3 screws. Remove these 3 screws and the metal piece will be free.
-
-
-
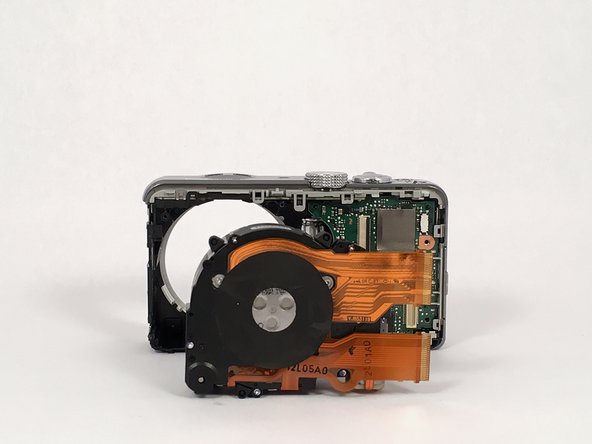
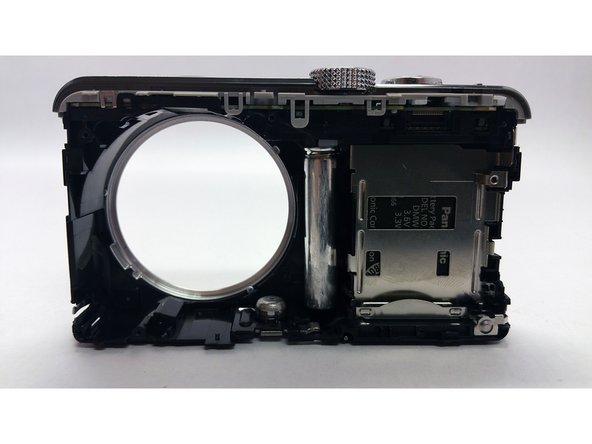
Once the bronze metal plate is removed, the main motherboard will be exposed. There is a plastic riser (it looks like a lowercase "b" on the right side of the camera) that separates the metal plate from the motherboard. Remove this plastic riser.
-
-
-
Once the plastic riser is removed, it is time to remove the lens. To do this, simply follow the data strips (2) that connect the lens to the main motherboard and unclip them by turning the black bar into a position that is perpendicular to the motherboard. Once these clips are open, the data strips and the lens should simply slide out.
-
-
-
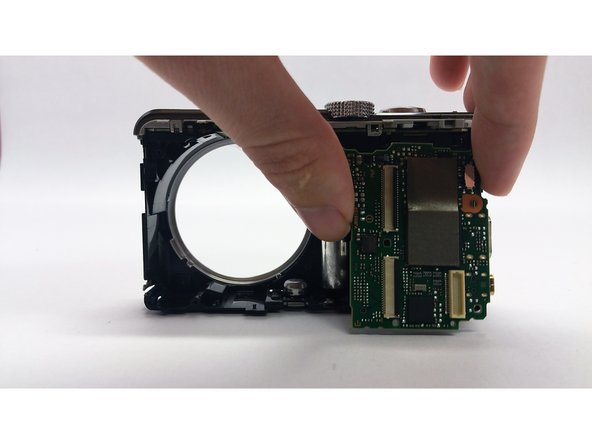
After the lens has been removed, there is only one screw that holds the main motherboard in place. Remove this screw, located on the right side of the motherboard, and remove it.
-
-
-
Once the screw has been removed, the motherboard should pop right out. If you're having difficulties, use the plastic prying tool.
-


To reassemble your device, follow these instructions in reverse order.
To reassemble your device, follow these instructions in reverse order.
Rückgängig: Ich habe diese Anleitung nicht absolviert.
2 weitere Personen haben diese Anleitung absolviert.
Team

USF Tampa, Team 14-1, Meier Fall 2015 Mitglied von USF Tampa, Team 14-1, Meier Fall 2015
USFT-MEIER-F15S14G1
4 Mitglieder
10 Anleitungen geschrieben