Einleitung
You should try to replace the battery if you have poor battery life, your device won't charge, or your device won't turn on. Be careful when working with the motherboard, as any damage to it could harm the performance of the device.
Was du brauchst
-
-
Pry off the second white panel, removing two clips underneath.
-
Start from the middle, and then work on the sides. The sides may be difficult to remove, so try to focus on one side and work your way around.
-
-
-
-
Using a Phillips #0 screwdriver, remove the 12 4mm screws on the outer area of the gray area exposed by removing the back panels.
-
-
-
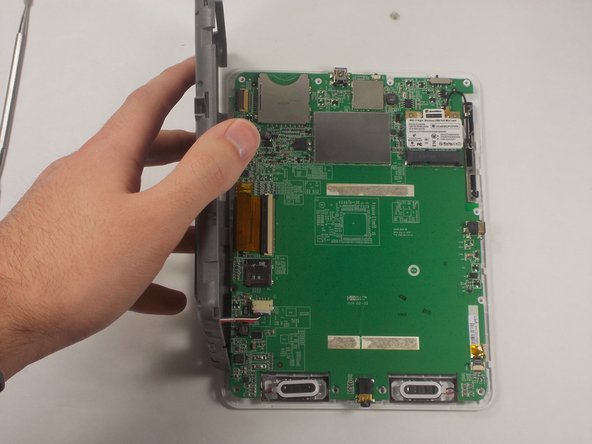
Carefully pry the back of the device from the front panel and motherboard. There are a series of clips holding them together that need to be separated.
-
-
-
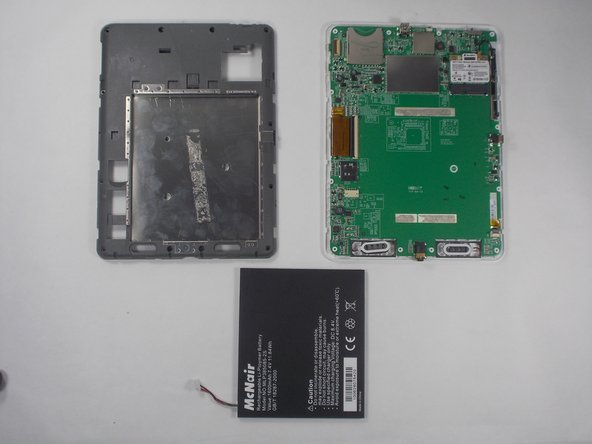
Now, lift up the gray piece, unplug the battery connector, and the battery can be removed from the case.
-


To reassemble your device, follow these instructions in reverse order.
To reassemble your device, follow these instructions in reverse order.
Rückgängig: Ich habe diese Anleitung nicht absolviert.
Eine weitere Person hat diese Anleitung absolviert.
Team

UMass Dartmouth, Team 3-7, Isaacson Fall 2016 Mitglied von UMass Dartmouth, Team 3-7, Isaacson Fall 2016
UMASSD-ISAACSON-F16S3G7
3 Mitglieder
10 Anleitungen geschrieben