Zum Hauptinhalt wechseln

Pantech Matrix Motherboard Replacement

Was du brauchst

  1. Pantech Matrix Motherboard Replacement, Phone Orientation: Schritt 1, Bild 1 von 1
    • Place phone with screen side facing toward you.

  2. Pantech Matrix Motherboard Replacement, Phone Orientation: Schritt 2, Bild 1 von 1
    • Flip phone over so screen side is now facing down.

  3. Pantech Matrix Motherboard Replacement, Remove Back Cover: Schritt 3, Bild 1 von 2 Pantech Matrix Motherboard Replacement, Remove Back Cover: Schritt 3, Bild 2 von 2
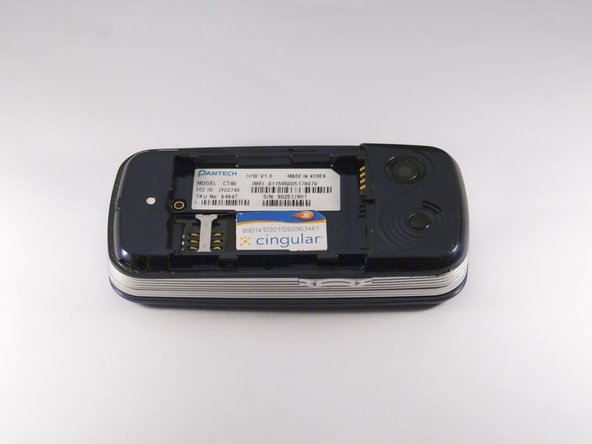
    • Gently slide the backside phone cover off exposing the battery underneath.

  4. Pantech Matrix Motherboard Replacement, Lift Battery: Schritt 4, Bild 1 von 1
    • Carefully lift the battery up from where the spudger is pointed.

  5. Pantech Matrix Motherboard Replacement, Remove Battery: Schritt 5, Bild 1 von 1
    • Remove the battery from its dock.

  6. Pantech Matrix Motherboard Replacement, Slide SIM Card Out: Schritt 6, Bild 1 von 3 Pantech Matrix Motherboard Replacement, Slide SIM Card Out: Schritt 6, Bild 2 von 3 Pantech Matrix Motherboard Replacement, Slide SIM Card Out: Schritt 6, Bild 3 von 3
    • Slide the SIM Card out of its dock.

  7. Pantech Matrix Motherboard Replacement, Remove Phone Screws: Schritt 7, Bild 1 von 2 Pantech Matrix Motherboard Replacement, Remove Phone Screws: Schritt 7, Bild 2 von 2
    • Use a Phillips screwdriver to remove the four 2mm Phillips #000 screws from each corner of the device.

  8. Pantech Matrix Motherboard Replacement, Remove Phone Casing: Schritt 8, Bild 1 von 2 Pantech Matrix Motherboard Replacement, Remove Phone Casing: Schritt 8, Bild 2 von 2
    • Rotate the phone so the base is facing you.

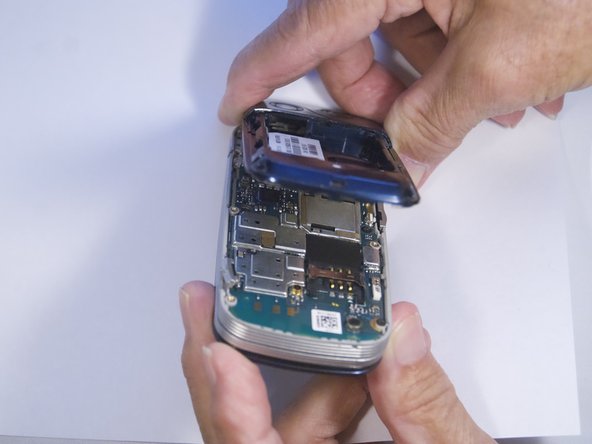
    • Use spudger to separate phone casing and inside as shown.

    • Remove the casing carefully and set aside.

  9. Pantech Matrix Motherboard Replacement, Remove Camera Screws: Schritt 9, Bild 1 von 2 Pantech Matrix Motherboard Replacement, Remove Camera Screws: Schritt 9, Bild 2 von 2
    • Place phone with exposed motherboard facing you.

    • Use a Phillips screwdriver to remove the five 2mm Phillips #000 screws holding the camera in place.

  10. Pantech Matrix Motherboard Replacement, Expose Keypad: Schritt 10, Bild 1 von 1
    • Carefully lift up the motherboard to expose the back of the keypad.

  11. Pantech Matrix Motherboard Replacement, Remove Keypad: Schritt 11, Bild 1 von 2 Pantech Matrix Motherboard Replacement, Remove Keypad: Schritt 11, Bild 2 von 2
    • Use spudger to gently pry the keypad away from the rest of the phone.

  12. Pantech Matrix Motherboard Replacement, Remove Motherboard: Schritt 12, Bild 1 von 3 Pantech Matrix Motherboard Replacement, Remove Motherboard: Schritt 12, Bild 2 von 3 Pantech Matrix Motherboard Replacement, Remove Motherboard: Schritt 12, Bild 3 von 3
    • Grip the motherboard and gently pull to separate it from the rest of the phone.

Abschluss

To reassemble your device, follow these instructions in reverse order.

Ein:e weitere:r Nutzer:in hat diese Anleitung absolviert.

Zeel Patel

Mitglied seit: 10/13/14

1.078 Reputation

9 Anleitungen geschrieben

0 Kommentare

Kommentar hinzufügen

Seitenaufrufe:

Letzte 24 Stunden: 0

Letzte 7 Tage: 1

Letzte 30 Tage: 1

Insgesamt: 200