Zum Hauptinhalt wechseln

Parrot FLYPAD Joystick Replacement

Was du brauchst

  1. Parrot FLYPAD Joystick Replacement, Joystick: Schritt 1, Bild 1 von 1
    In diesem Schritt verwendetes Werkzeug:
    Magnetic Project Mat
    $19.95
    Kaufen
    • Total of 6 Screws are located in the back of the controller.

    • Four 0.9mm T6 screws

    • Two 0.1mm T6 screws

    • Flip the Flypad over.

    • Remove the six screws using a T6 screwdriver.

    • Use a Magnetic Mat to prevent loss of screws. Set aside.

  2. Parrot FLYPAD Joystick Replacement: Schritt 2, Bild 1 von 1
    • Flip the Flypad over again and separate the front and back. Be sure to remove the foam adhesive that connects the front plate to the motherboard.

    • Be aware that the Buttons (L1,R1) may fall out. Remember to put them back in place during reassembly.

    • Use Ph0 tool to remove the screws holding the motherboard in place.

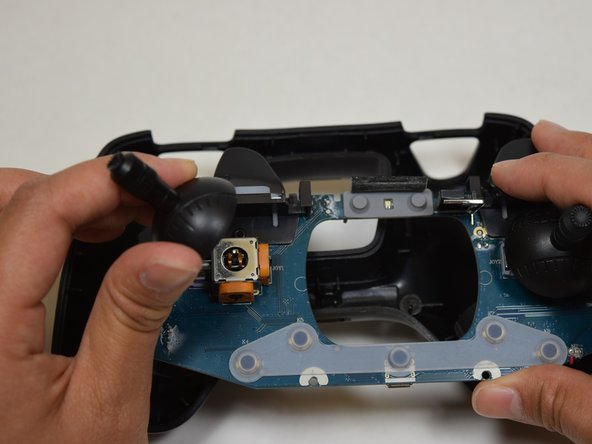
    • Gently remove the motherboard from the front plate.

  3. Parrot FLYPAD Joystick Replacement: Schritt 3, Bild 1 von 2 Parrot FLYPAD Joystick Replacement: Schritt 3, Bild 2 von 2
    • Pop the joysticks out by pulling gently.

  4. Parrot FLYPAD Joystick Replacement: Schritt 4, Bild 1 von 1
    • Unscrew and replace joystick caps for a more comfortable grip.

Abschluss

To reassemble your device, follow these instructions in reverse order.

HUY NGUYEN

Mitglied seit: 04/10/17

376 Reputation

3 Anleitungen geschrieben

Team

UW Tacoma, Team S3-G5, Liner Spring 2017 Mitglied von UW Tacoma, Team S3-G5, Liner Spring 2017

UWT-LINER-S17S3G5

5 Mitglieder

3 Anleitungen geschrieben

2 Kommentare

Do you know where I can find replacement joystick caps like the one shown in Step 4, please?

cbeilstein - Antwort

Same question as above regarding joystick caps please

Alex - Antwort

Kommentar hinzufügen

Seitenaufrufe:

Letzte 24 Stunden: 1

Letzte 7 Tage: 6

Letzte 30 Tage: 10

Insgesamt: 694