Einleitung
The audio video ports on the DVD player can become unresponsive over time. This guide will show you how to replace the audio video ports on your DVD player.
Was du brauchst
-
-
Remove the three 6.4 mm Phillips #1 screws on the back of the device with a Phillips head screwdriver.
-
Remove the 6.4 mm Phillips #1 screws on each side of the device.
-
-
-
Remove the top plate of the DVD by firmly grasping the player on both sides.
-
Shift the top plate towards the backside of the player.
-
Lift the back half of the top plate up to remove it from the player.
-
-
-
-
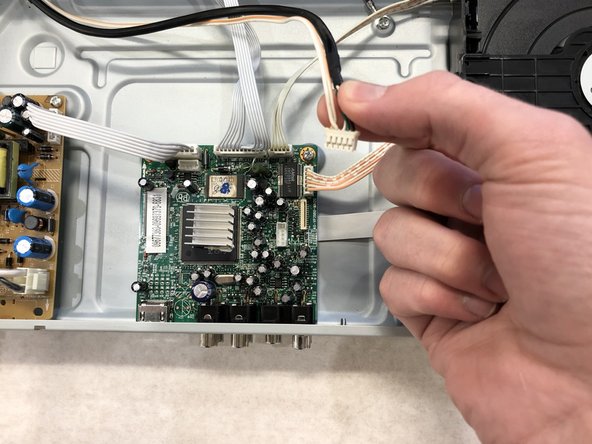
Unplug the one ribbon wire and the five bundled cable connectors that are plugged into the motherboard.
-
-
-
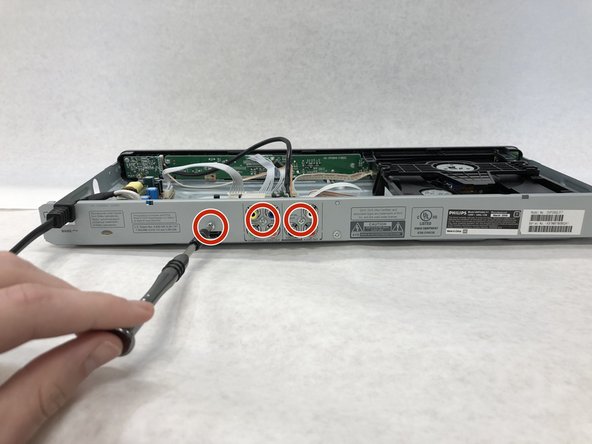
Remove the three 4.76 mm #1 Phillips head screws located on the back of the DVD player.
-


To reassemble your device, follow these instructions in reverse order.
To reassemble your device, follow these instructions in reverse order.
Rückgängig: Ich habe diese Anleitung nicht absolviert.
3 weitere Nutzer:innen haben diese Anleitung absolviert.
Team

Western Carolina University, Team S1-G6, Virtue Fall 2018 Mitglied von Western Carolina University, Team S1-G6, Virtue Fall 2018
WCU-VIRTUE-F18S1G6
3 Mitglieder
9 Anleitungen geschrieben