Diese Version enthält möglicherweise inkorrekte Änderungen. Wechsle zur letzten geprüften Version.
Was du brauchst
-
Dieser Schritt ist noch nicht übersetzt. Hilf mit, ihn zu übersetzen!
-
Remove four 7.5 mm Phillips screws on the both sides (2 on each side).
-
Remove five 7.5 mm Phillips screws on the back of the player.
-
-
Dieser Schritt ist noch nicht übersetzt. Hilf mit, ihn zu übersetzen!
-
Lift the top panel from the back and remove. It should come off without being forced. There is a lip near the front so you many need to slide the top panel back slightly to remove it.
-
-
-
Dieser Schritt ist noch nicht übersetzt. Hilf mit, ihn zu übersetzen!
-
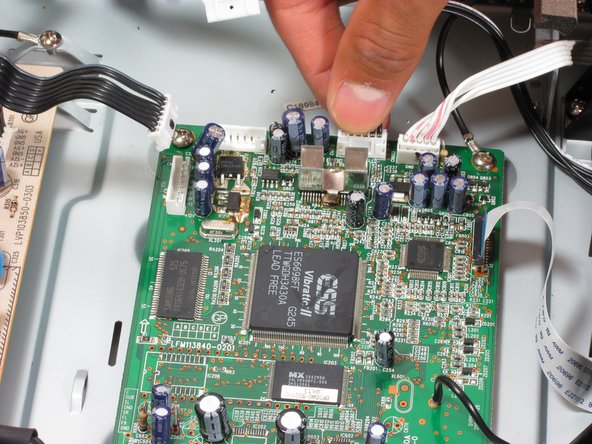
Locate the first three ribbon wires.
-
Remove the ribbon wires by grasping firmly as near to the plastic head as possible and pulling.
-
-
Dieser Schritt ist noch nicht übersetzt. Hilf mit, ihn zu übersetzen!
-
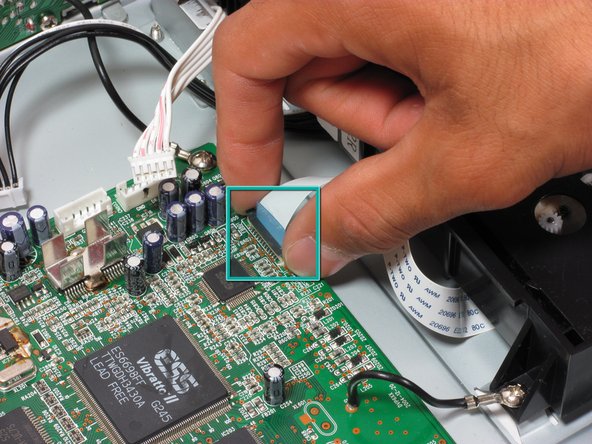
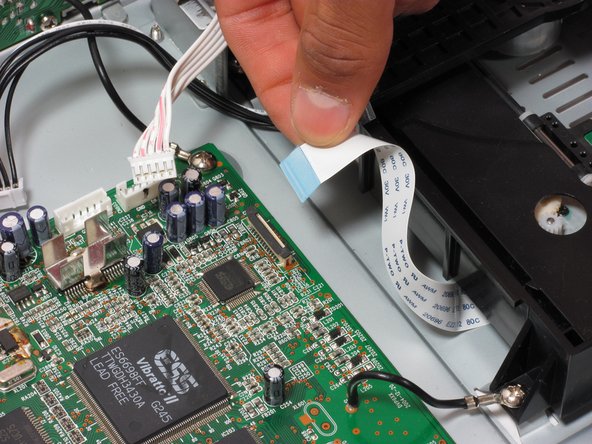
Remove the fourth ribbon wire as in step 2.
-
Remove the fifth ribbon wire by grasping both sides of the black clip and pulling up. When reinserting, pull black clip up, insert the ribbon wire, and push the black clip back down.
-
-
Dieser Schritt ist noch nicht übersetzt. Hilf mit, ihn zu übersetzen!
-
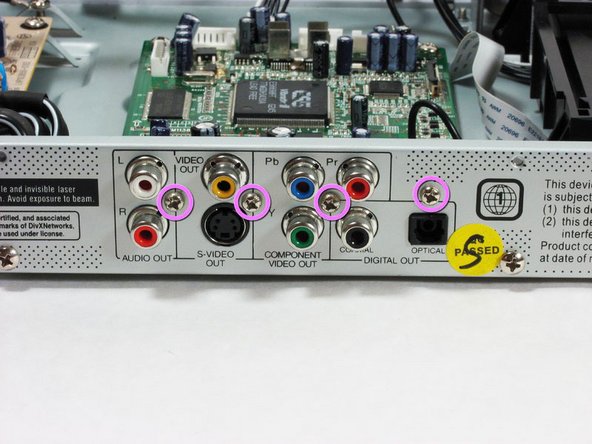
Remove the following screws:
-
7.5 mm Phillips screws (2) that secure the motherboard to the bottom panel. The screw on the top right will also be attached to a grounding wire, it is okay to remove this screw.
-
Remove the 7.5 mm Phillips screw on the bottom right that attaches the grounding wire to the disc tray.
-
7.5 mm Phillips screws (4) on outside of player near input/output plugs.
-
-
Dieser Schritt ist noch nicht übersetzt. Hilf mit, ihn zu übersetzen!
-
Remove the motherboard by pulling it back and then up gently.
-
The input/output plugs should slide out easily from the holes in the back panel.
-


Rückgängig: Ich habe diese Anleitung nicht absolviert.
6 weitere Nutzer:innen haben diese Anleitung absolviert.
Team

Cal Poly, Team 21-20, Maness Fall 2011 Mitglied von Cal Poly, Team 21-20, Maness Fall 2011
CPSU-MANESS-F11S21G20
4 Mitglieder
7 Anleitungen geschrieben