Zum Hauptinhalt wechseln

Philips Norelco Shaver 2100 Battery Replacement

Was du brauchst

  1. Philips Norelco Shaver 2100 Battery Replacement, Casing: Schritt 1, Bild 1 von 1
    • Remove the single screw on the back casing using a T8 Torx screwdriver.

  2. Philips Norelco Shaver 2100 Battery Replacement: Schritt 2, Bild 1 von 2 Philips Norelco Shaver 2100 Battery Replacement: Schritt 2, Bild 2 von 2
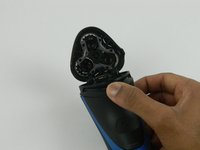
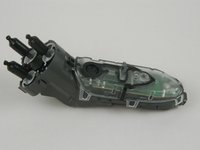
    • Turn the shaver so that it is facing you.

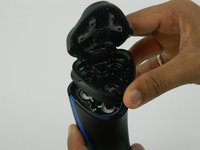
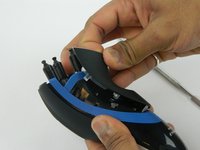
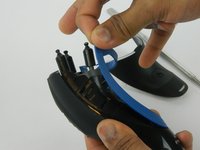
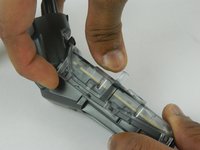
    • Press the button on the shaver head to open it.

  3. Philips Norelco Shaver 2100 Battery Replacement: Schritt 3, Bild 1 von 1
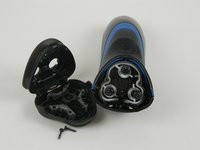
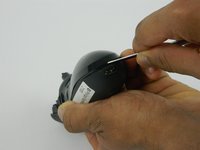
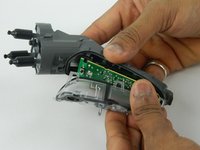
    • Remove the two 10.1 mm screws inside the shaver head using a T8 Torx screwdriver.

  4. Philips Norelco Shaver 2100 Battery Replacement: Schritt 4, Bild 1 von 2 Philips Norelco Shaver 2100 Battery Replacement: Schritt 4, Bild 2 von 2
    • Lift the shaver head off of the casing.

  5. Philips Norelco Shaver 2100 Battery Replacement: Schritt 5, Bild 1 von 3 Philips Norelco Shaver 2100 Battery Replacement: Schritt 5, Bild 2 von 3 Philips Norelco Shaver 2100 Battery Replacement: Schritt 5, Bild 3 von 3
    • Gently pull the black and blue casing apart using a metal spudger.

  6. Philips Norelco Shaver 2100 Battery Replacement: Schritt 6, Bild 1 von 3 Philips Norelco Shaver 2100 Battery Replacement: Schritt 6, Bild 2 von 3 Philips Norelco Shaver 2100 Battery Replacement: Schritt 6, Bild 3 von 3
    • Pry the remaining casing open using a metal spudger.

    • Be careful using a metal spudger, as it may result in damaging the case.

  7. Philips Norelco Shaver 2100 Battery Replacement, Battery: Schritt 7, Bild 1 von 3 Philips Norelco Shaver 2100 Battery Replacement, Battery: Schritt 7, Bild 2 von 3 Philips Norelco Shaver 2100 Battery Replacement, Battery: Schritt 7, Bild 3 von 3
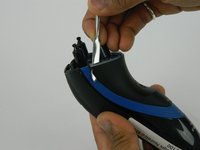
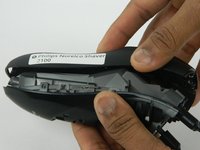
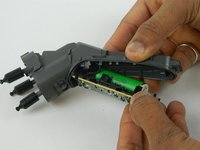
    • Remove the clear case that holds the circuit board by lifting the latches on the sides and then pulling gently.

  8. Philips Norelco Shaver 2100 Battery Replacement: Schritt 8, Bild 1 von 1
    • Located directly behind the circuit board, remove the battery from the device.

Abschluss

To reassemble your device, follow these instructions in reverse order.

11 weitere Nutzer:innen haben diese Anleitung absolviert.

Team

USF Tampa, Team S1-G4, Thompson Fall 2017 Mitglied von USF Tampa, Team S1-G4, Thompson Fall 2017

USFT-THOMPSON-F17S1G4

3 Mitglieder

5 Anleitungen geschrieben

14 Kommentare

To remove the battery you have to actually desolder both ends from the chip.

AGUSTIN CABRA - Antwort

What are the dimensions/specs of the battery?

Haley Pearse - Antwort

regular AA rechargeable batteries will not work and can be a fire hazard.

steven - Antwort

The tricky part is taking the case appart. You have to gently pry on tabs to get it appart. You may break some pieces which probably won’t be a problem. May make it no longer waterproof. The battery is custom but is close to a 14450 Lion battery, do searches on ebay and aliexpress you will find them. Good luck.

Don - Antwort

I have a similar Norelco razor and replaced the battery. I can’t believe the stupid company didn’t mark the battery polarity on the board!

I think this is the first time I have ever seen a company not mark polarity.

Laz - Antwort

Kommentar hinzufügen

Seitenaufrufe:

Letzte 24 Stunden: 3

Letzte 7 Tage: 21

Letzte 30 Tage: 147

Insgesamt: 20,680