Einleitung
The speakers are the two circular objects inside the device. This guide will detail the steps in how to replace a damaged speaker.
Was du brauchst
-
-
Remove the back cover by sliding it off.
-
Remove the 3 AAA batteries.
-
-
-
Unscrew the nine exterior screws on the back panel using a PH0-size Philips-head screwdriver.
-
Remove the triangular end piece by pulling it straight off.
-
-
-
Remove the colored grill by sliding it off in the direction of the removed end piece.
-
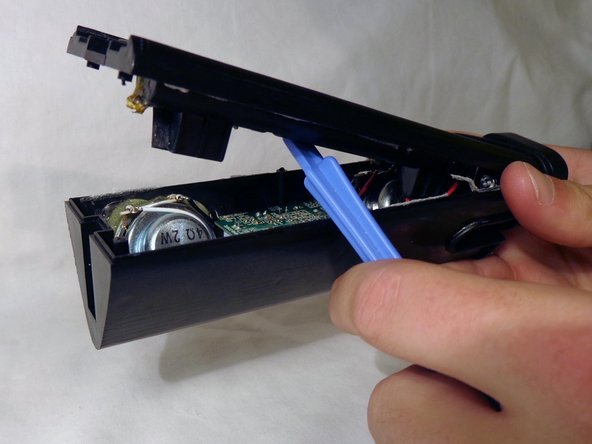
Pry off the back battery panel with the plastic opening tool.
-
-
-
-
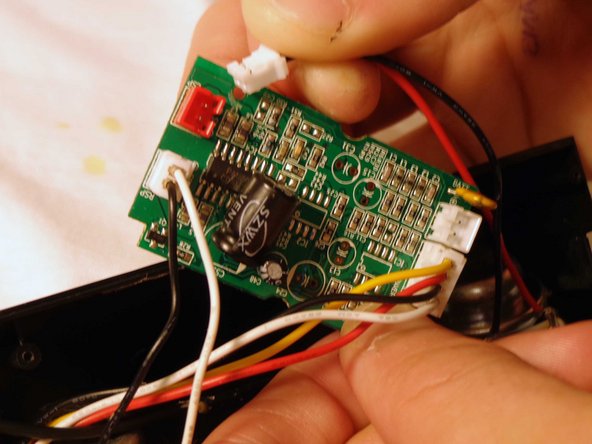
Remove the circuit board by unscrewing the two interior screws located on the circuit board.
-
Pull out the battery plugs from the circuit board by pulling out the plugs to fully remove the back panel from the rest of the speaker.
-
-
-
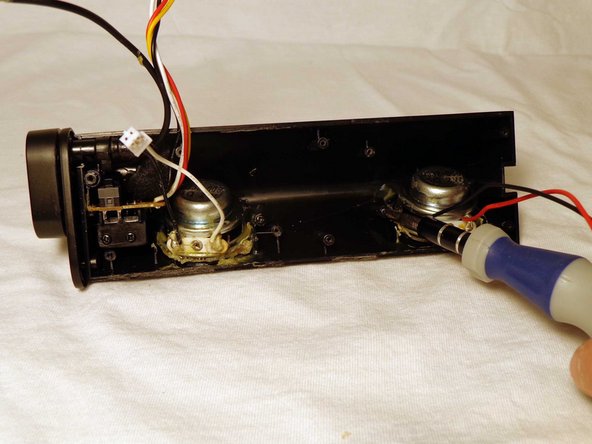
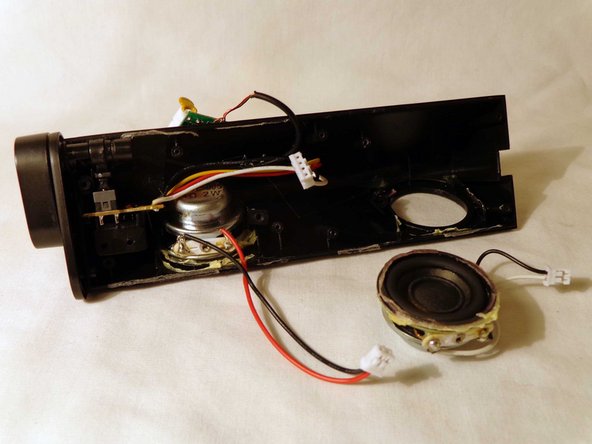
Locate the speaker needing replacing.
-
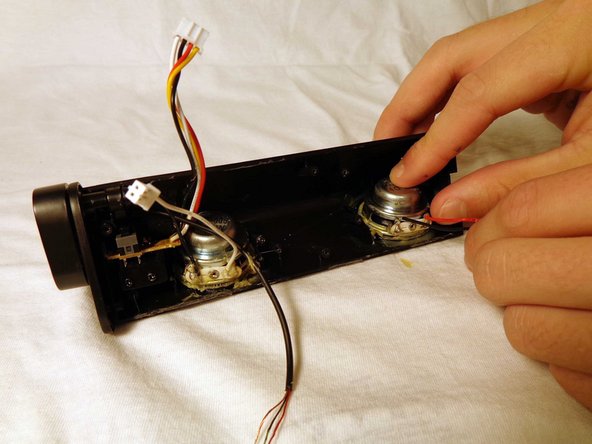
Remove the one screw holding the speaker in place with a PH0 size philips head screw driver.
-
-
-
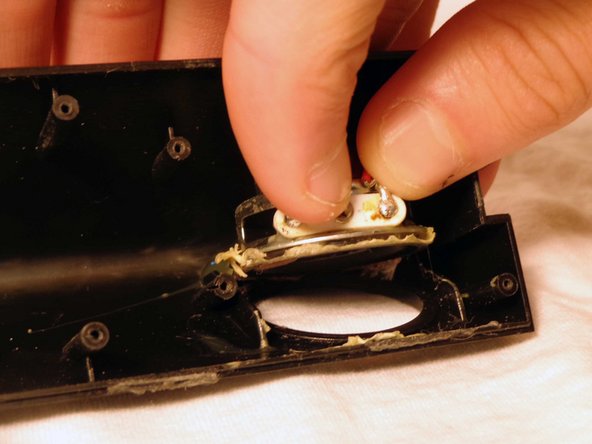
Score the glue that is holding the speaker in place with the spudger, and use your hands to pry off the speaker.
-
-
-
Using a non-conductive glue, carefully seal the speaker to the casing.
-
Follow the glue instructions as set by the manufacturers. Let the glue set the appropriate amount of time.
-
Reassemble the device
-


To reassemble your device, follow these instructions in reverse order.
To reassemble your device, follow these instructions in reverse order.
Rückgängig: Ich habe diese Anleitung nicht absolviert.
Ein:e weitere:r Nutzer:in hat diese Anleitung absolviert.
Team

Clemson, Team 14-4, Benson Fall 2013 Mitglied von Clemson, Team 14-4, Benson Fall 2013
CLEM-BENSON-F13S14G4
3 Mitglieder
4 Anleitungen geschrieben