Was du brauchst
-
-
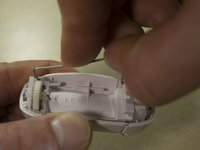
Remove Tweezer Head by pushing to the left with thumb.
-
-
-
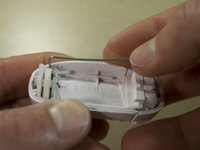
Locate the Tension Clip on the removable tweezer head.
-
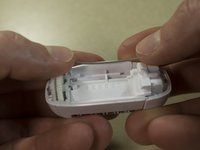
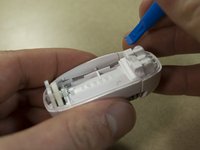
Begin prying from the right side of the Tension Clip.
-
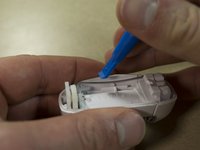
Finish removal by prying the left side of the Tension Clip.
-
-
-
-
Replace the Tension Clip
-
Insert left side of clip roughly half way in.
-
Insert right side of clip and push both sides down with thumbs.
-


Contact the manufacturer for a replacement Tension Clip.
To reassemble your device, follow these instructions in reverse order.
Contact the manufacturer for a replacement Tension Clip.
To reassemble your device, follow these instructions in reverse order.

Team

IUPUI, Team S5-G5, Wilson Fall 2017 Mitglied von IUPUI, Team S5-G5, Wilson Fall 2017
IUPUI-WILSON-F17S5G5
3 Mitglieder
8 Anleitungen geschrieben