Einleitung
Pillows quickly wear out and can start to smell, and replacing them can get very expensive. One inexpensive and quick way to bring the life back to your pillow is to simply replace the stuffing. Pillow stuffing can be found at local craft stores, and even at some mass retailers like Walmart. This guide explains the process of replacing the stuffing of a pillow that does not have a zipper, explaining the process of opening up the pillow without damaging the fabric, and providing simple instructions on restitching the seam.
Was du brauchst
-
-
Measure the length and width of the pillow to determine how much stuffing is needed.
-
-
-
With the seam ripper, create a 4-6 inch opening in the pillow about 2 inches from the corner.
-
-
-
-
Place a tennis ball-sized amount of new stuffing firmly into the 3 intact corners of the pillow.
-
Continue adding stuffing to the pillow to desired stiffness.
-
-
-
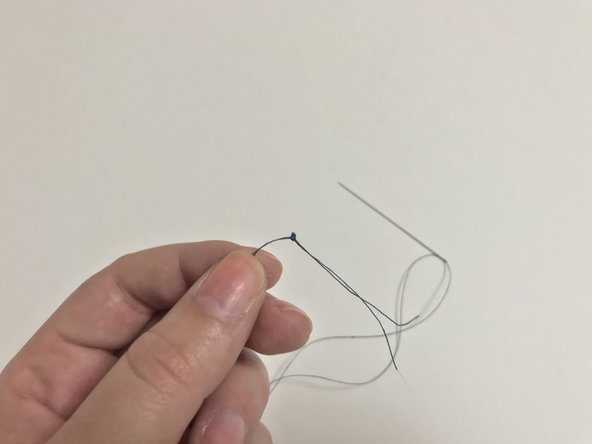
Use the scissors to cut a length of thread approximately 24 inches long.
-
Thread the needle and slide it to the center of the length of thread.
-
Triple knot the two loose ends together.
-
-
-
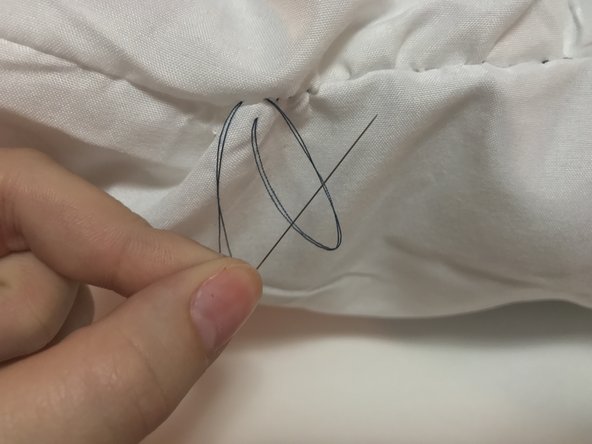
Start a ladder stitch from the inside of the pillow by pulling the thread through the folded seam, right behind the opening that you created.
-
Make a small stitch through side of the opening.
-
Make an identical stitch directly across from your first stitch, on the opposite side of the opening. Pull the thread taut to begin the new seam.
-
Repeat, alternating from one side to the other until you have reached the end of the opening.
-
-
-
To compete the ladder stitch and close the pillow, pierce the needle through both sides of the seam and slowly pull the thread through until a loop is created.
-
Feed the needle through the loop and pull the thread tight.
-
Repeat this once more to ensure that the pillow is closed tightly, and cut off any excess thread with the scissors.
-


Team

Eastern Washington University, Team S27-G4, Crane Winter 2018 Mitglied von Eastern Washington University, Team S27-G4, Crane Winter 2018
EWU-CRANE-W18S27G4
2 Mitglieder
2 Anleitungen geschrieben
Ein Kommentar
Thanks for sharing. Informative post. Keep up the good work.