Diese Anleitung enthält neuere Änderungen. Wechsel zur neuesten unüberprüften Version.
Einleitung
The microphone assembly is easily distinguished by its "boom-like" shape. The actual assembly is comprised of a voice-tube, and a circuit board system. The microphone replacement guide will detail how to carefully disassemble the microphone unit, and remove and replace the different components that comprise it.
Was du brauchst
-
-
Loosen snaps that hold the assembly together.
-
Use the pointed end of a small, metal spudger to begin separation of the snaps, at the end of the unit.
-
After initial separation, use the flat end of a plastic spudger to continue loosening the snaps, by following along the circumference of the microphone unit.
-
-
-
Reveal the metal, protective plate by completely removing the top piece of the plastic housing.
-
Use precision tweezers to remove the metal protective plate. This is done by lifting the plate out of place.
-
-
-
Locate the volume button at the rear of the microphone assembly, near the earpiece assembly.
-
Use precision tweezers to lift the volume button out of place and remove it.
-
-
-
-
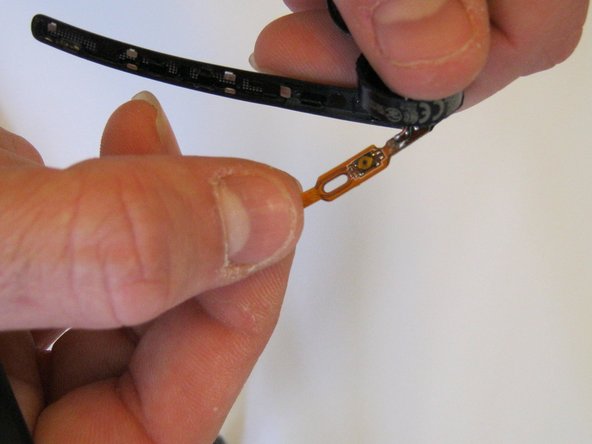
Remove the voice-tube.
-
Insert the pointed end of a plastic ppudger to lift the voice-tube out of position.
-
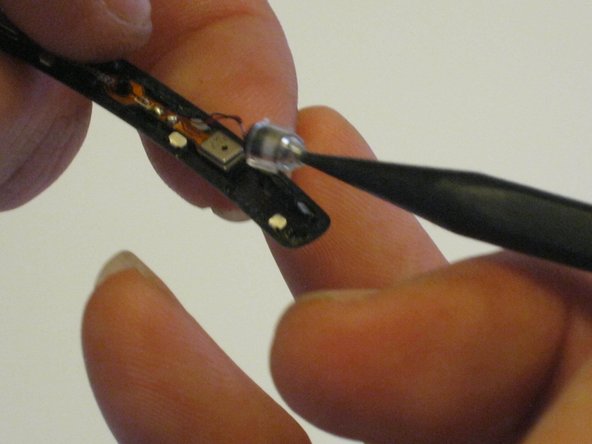
Disconnect the leads that attach to the voice-tube.
where can I buy that circuit board?
Do you have a source for the 3x1.5mm electret mic to replace a damaged mic?
-
-
-
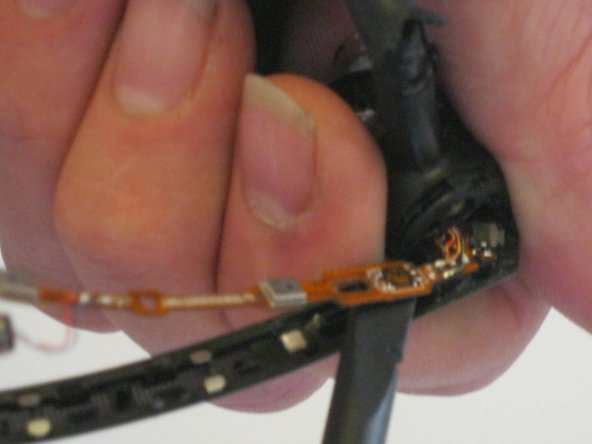
Remove the circuit board.
-
Use the pointed-end of a plastic spudger to begin lifting the circuit board out of place. Begin at the end nearest the voice-tube location.
-
Use the flat-end of a plastic spudger to continue lifting the circuit board out of position.
-
-
-
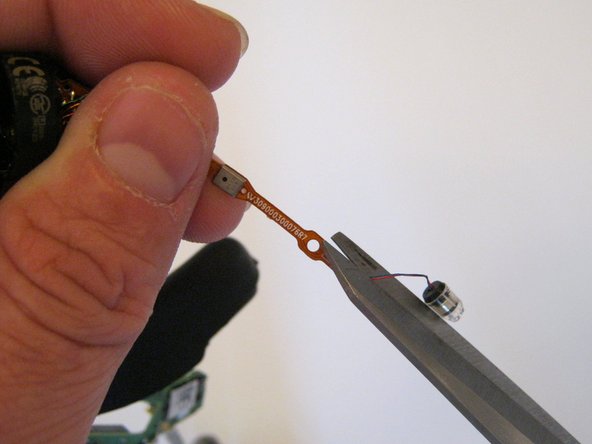
Access the leads that connect the circuitry.
-
Use the spudger to make sure the circuit board is completely free.
-
Expose the leads so they can be disconnected.
-
-
-
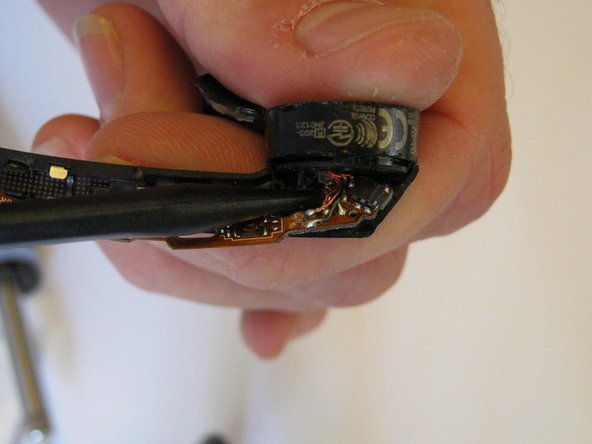
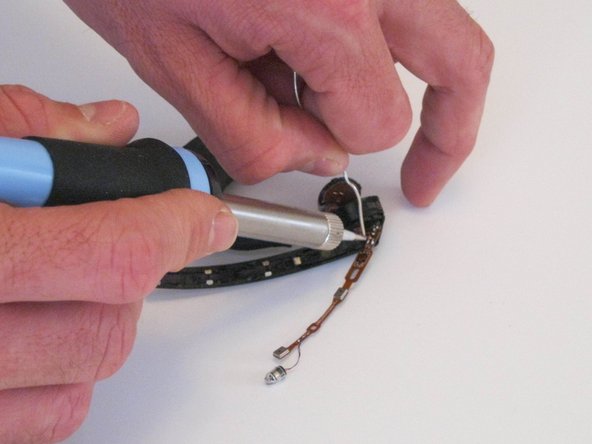
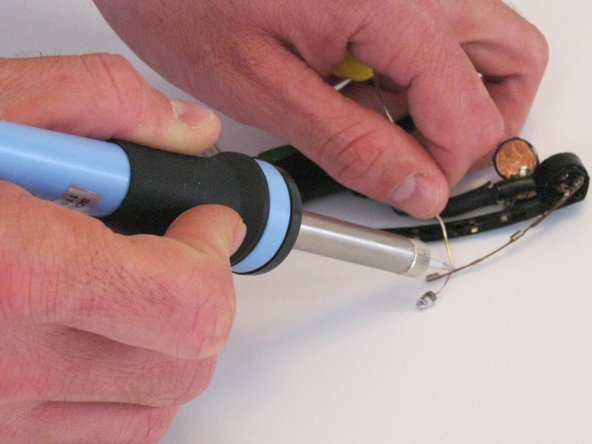
Install a new circuit board.
-
Disconnect the leads using a pair of wire cutters. Scissors will work if no wire cutters are available.
-
Solder the leads into the correct location on the new circuit board.
-


To reassemble your device, follow these instructions in reverse order.
To reassemble your device, follow these instructions in reverse order.
Rückgängig: Ich habe diese Anleitung nicht absolviert.
19 weitere Nutzer:innen haben diese Anleitung absolviert.
Team

USF Sarasota-Manatee, Team 1-2, Stewart Fall 2015 Mitglied von USF Sarasota-Manatee, Team 1-2, Stewart Fall 2015
USFSM-STEWART-F15S1G2
5 Mitglieder
17 Anleitungen geschrieben
13 Kommentare
Where do I locate the parts for the Plantronics Bluetooth hardware?
You can not get the parts.. At least not on Ebay, Amazon and just about any other place that I searched.. Maybe Alibaba if you want to take the chance of having your credit card or any other form of payment jacked.. This fix is a joke due to the size of the components and wires that need to be soldered.. If only the "Voice tube" or cone shaped thing inside of the plastic tube is bad they its ok.. I will mention though that this type wire is coated which is why you can have the two "bare" wires touching and not have a short.. You must but this off in order to be able to solder first.. Burn too much and you will have crispy wires not worth crap.. I know this because I have pick up more than a few sets up beats head phones on Ebay for 20-30 and fixed.. You can pick this headset up on Ebay on the dirt cheap now that the new one is out, its not worth the hassle to fix or attempt to fix and it is misleading in the sense that it makes it seam like a no big deal kind of thing..
I used this repair guide to take it apart and clean the mike and board and now people can hear me a lot better.
How did you clean it
I used this guide to clean my plantronics headset and it is working great … many thanks for sharing …
DB
How did you clean it
Wow… I used the guide to clean the fine dust in the boom. You have to be careful removing the circular piece from the main body, but head set now works perfectly. The holes and gauze were fouled by fine dust. Took a while but great now. Many thanks
I found this guide and was hoping for help. I have a couple of Voyagers laying around. I now use IEM’s for better audio but have yet to find anything that rivals the Voyagers noise-cancelling microphone. Is it possible to hack the voyager so that I could use just the microphone and noise cancelling circuitry alone? Preferably adding an MMCX connector onto the Voyager and possibly hacking a FiiP RC-BT so that I could plug the voyager mic into it via an MMCX cable. I love my IEM’s and I love the Voyager for calls, I hate having to rip these out of my ears so that I can go from one to the other. My hope is that someone will know how to adapt the Voyager so that I can use the moise cancelling mic with a pair of IEM’s simultaneously. Any guidence would be helpful.
Here's an experiment from Louis Rossmann about something similar. Apparently the mic feeds back into its driver on the Plantronics and there was a mismatch in driver ohms which made his mod loud too easily.
Very interesting guide. In my case, I found that cleaning wasn’t the problem. The microphone boom is VERY sensitive to any air leaks along the edges that join the two halves to the metal protective plate. I carefully super glued each plastic boom half to the metal plate and made sure there was an airtight bond between all the pieces. That solved the problem for me.
DM
Very helpful. I think the microphone shifted and i was able to adjust it back. Now it's clear. Thank you
Anyone know where I can get a new voice tube? is that even what that kind of microphone is called?
This set of instructions does not work. I am unable to separate my mic boom past the point indicated in the third photo of Step 1. After much careful prying, I reached a point where my only option is to apply a lot of force to pull the halves of the boom apart. Even then, the rotary section of the boom where it meets the main housing, refuses to separate. Something is amiss in these instructions, there is a step missing that should explain how to get the rotary housing opened up.
Ashley Dando - Antwort
Update: on my Voyager Legend the solution was to follow this other iFixit guide to gain access to the speaker, and remove three small screws that hold the boom to the rotary assembly. Only then can the boom come apart at its base. Plantronics Voyager Legend Earpiece Replacement
Ashley Dando - Antwort