Zum Hauptinhalt wechseln

PlayStation 3 Wireless controller "Dualshock III" (replica) Disassembly

Was du brauchst

  1. PlayStation 3 Wireless controller "Dualshock III" (replica) Disassembly, PlayStation 3 Wireless controller "Dualshock III" (replica) Disassembly: Schritt 1, Bild 1 von 3 PlayStation 3 Wireless controller "Dualshock III" (replica) Disassembly, PlayStation 3 Wireless controller "Dualshock III" (replica) Disassembly: Schritt 1, Bild 2 von 3 PlayStation 3 Wireless controller "Dualshock III" (replica) Disassembly, PlayStation 3 Wireless controller "Dualshock III" (replica) Disassembly: Schritt 1, Bild 3 von 3
    • Remove the five 7.2 mm Phillips screws at the back of the controller.

  2. PlayStation 3 Wireless controller "Dualshock III" (replica) Disassembly: Schritt 2, Bild 1 von 2 PlayStation 3 Wireless controller "Dualshock III" (replica) Disassembly: Schritt 2, Bild 2 von 2
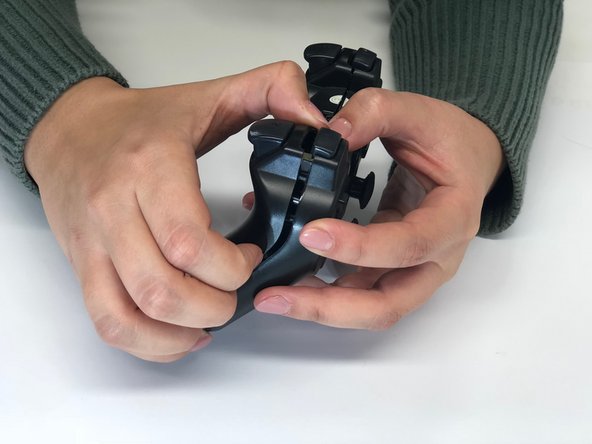
    • Separate the bottom case from the upper part. All the electronics stay in the upper part.

  3. PlayStation 3 Wireless controller "Dualshock III" (replica) Disassembly: Schritt 3, Bild 1 von 3 PlayStation 3 Wireless controller "Dualshock III" (replica) Disassembly: Schritt 3, Bild 2 von 3 PlayStation 3 Wireless controller "Dualshock III" (replica) Disassembly: Schritt 3, Bild 3 von 3
    • Remove the left and right bumper buttons (L1, L2, R1 and R2).

  4. PlayStation 3 Wireless controller "Dualshock III" (replica) Disassembly: Schritt 4, Bild 1 von 1
    • Remove the rubber underlays of the buttons L1, L2, R1 and R2.

  5. PlayStation 3 Wireless controller "Dualshock III" (replica) Disassembly: Schritt 5, Bild 1 von 1
    • Take the battery off the PCB (printed circuit board).

    • The battery sticks to the PCB through a sticking black surface.

  6. PlayStation 3 Wireless controller "Dualshock III" (replica) Disassembly: Schritt 6, Bild 1 von 1
    • Unscrew the remaining 7.2 mm Phillips screw from the PCB.

    • All screws are the same.

  7. PlayStation 3 Wireless controller "Dualshock III" (replica) Disassembly: Schritt 7, Bild 1 von 1
    • Take the vibrating components out.

  8. PlayStation 3 Wireless controller "Dualshock III" (replica) Disassembly: Schritt 8, Bild 1 von 1
    • Unplug the battery from the PCB by using a pair of pliers as shown in the photo.

  9. PlayStation 3 Wireless controller "Dualshock III" (replica) Disassembly: Schritt 9, Bild 1 von 2 PlayStation 3 Wireless controller "Dualshock III" (replica) Disassembly: Schritt 9, Bild 2 von 2
    • Take the motherboard (PCB) out of the plastic controller case.

  10. PlayStation 3 Wireless controller "Dualshock III" (replica) Disassembly: Schritt 10, Bild 1 von 3 PlayStation 3 Wireless controller "Dualshock III" (replica) Disassembly: Schritt 10, Bild 2 von 3 PlayStation 3 Wireless controller "Dualshock III" (replica) Disassembly: Schritt 10, Bild 3 von 3
    • Remove all loose parts from the body. (Consisting of white rubber button underlays, black plastic buttons and a black rubber underlay for the start and select button.)

  11. PlayStation 3 Wireless controller "Dualshock III" (replica) Disassembly: Schritt 11, Bild 1 von 1
    • Remove the transparent plastic part covering the LED-lights by taking it out with a pair of pliers.

  12. PlayStation 3 Wireless controller "Dualshock III" (replica) Disassembly: Schritt 12, Bild 1 von 1
    • Pull the joy sticks out.

  13. PlayStation 3 Wireless controller "Dualshock III" (replica) Disassembly: Schritt 13, Bild 1 von 3 PlayStation 3 Wireless controller "Dualshock III" (replica) Disassembly: Schritt 13, Bild 2 von 3 PlayStation 3 Wireless controller "Dualshock III" (replica) Disassembly: Schritt 13, Bild 3 von 3
    • Remove the thin flexible green PCB by pulling out the black plastic circuit board cover, relatively in the middle the motherboard (the hard PCB) and by pressing click fingers on top of the motherboard.

  14. PlayStation 3 Wireless controller "Dualshock III" (replica) Disassembly: Schritt 14, Bild 1 von 1
    • Remove the thin flexible green PCB by lifting and pushing the two outer flaps.

Abschluss

To reassemble your device, follow these instructions in reverse order.

Ein:e weitere:r Nutzer:in hat diese Anleitung absolviert.

Ein Kommentar

Can't put the backpanel back in. The metal parts are the issue. How do I reassemble the backpanel with the front panel?

Rayzorum - Antwort

Kommentar hinzufügen

Seitenaufrufe:

Letzte 24 Stunden: 1

Letzte 7 Tage: 12

Letzte 30 Tage: 35

Insgesamt: 817