Zum Hauptinhalt wechseln

Playstation 3 Optical Drive Replacement

Archivierte Anleitung
Diese Anleitung wurde ausschließlich für historische Zwecke erhalten. Verwende die aktualisierte Version dieser Anleitung, um deine Reparatur durchzuführen.

Was du brauchst

  1. Playstation 3 Optical Drive Replacement, Top Cover: Schritt 1, Bild 1 von 2 Playstation 3 Optical Drive Replacement, Top Cover: Schritt 1, Bild 2 von 2
    • Remove the rubber screw cover near the hard drive cover with a spudger.

  2. Playstation 3 Optical Drive Replacement: Schritt 2, Bild 1 von 1
    • Remove the screw holding the top cover in place with a Torx T10 screwdriver.

  3. Playstation 3 Optical Drive Replacement: Schritt 3, Bild 1 von 2 Playstation 3 Optical Drive Replacement: Schritt 3, Bild 2 von 2
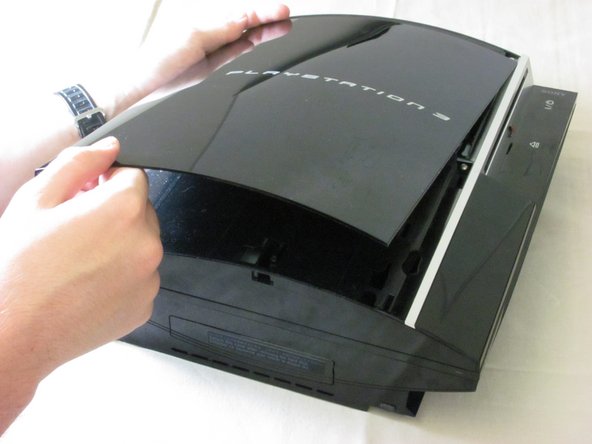
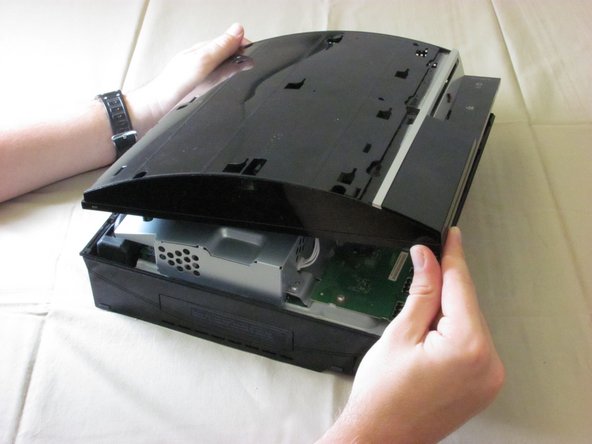
    • Slide the top cover down about half an inch.

    • Lift the cover off of the PS3.

  4. Playstation 3 Optical Drive Replacement: Schritt 4, Bild 1 von 2 Playstation 3 Optical Drive Replacement: Schritt 4, Bild 2 von 2
    • Remove the seven screws in the top cover with a Phillips #2 screwdriver.

    • One of the screws is shorter than the others. The short screw is marked in yellow.

    There is two additional small screws that need to be removed similar than the yellow one.

    Enrique Basulto - Antwort

  5. Playstation 3 Optical Drive Replacement: Schritt 5, Bild 1 von 3 Playstation 3 Optical Drive Replacement: Schritt 5, Bild 2 von 3 Playstation 3 Optical Drive Replacement: Schritt 5, Bild 3 von 3
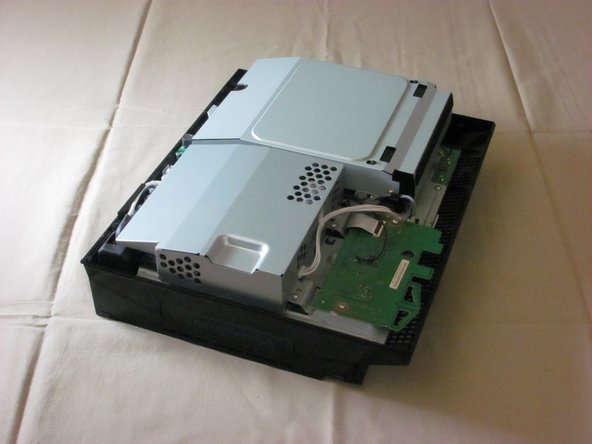
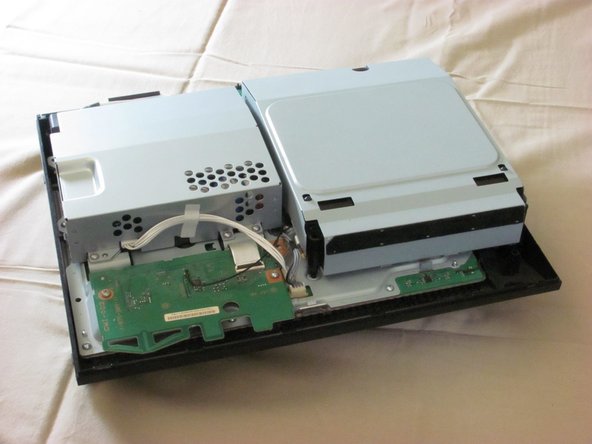
    • You can now lift off the top cover.

  6. Playstation 3 Optical Drive Replacement, Optical Drive: Schritt 6, Bild 1 von 3 Playstation 3 Optical Drive Replacement, Optical Drive: Schritt 6, Bild 2 von 3 Playstation 3 Optical Drive Replacement, Optical Drive: Schritt 6, Bild 3 von 3
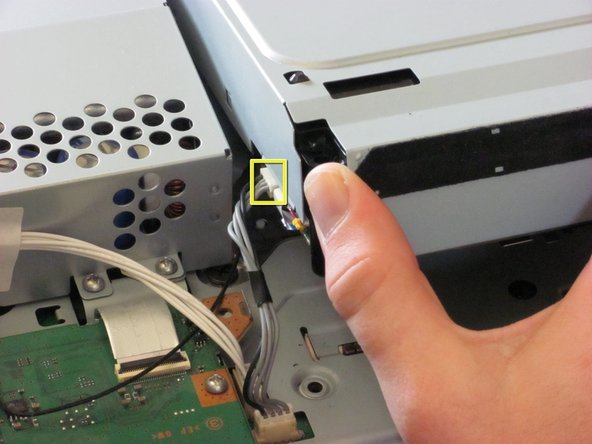
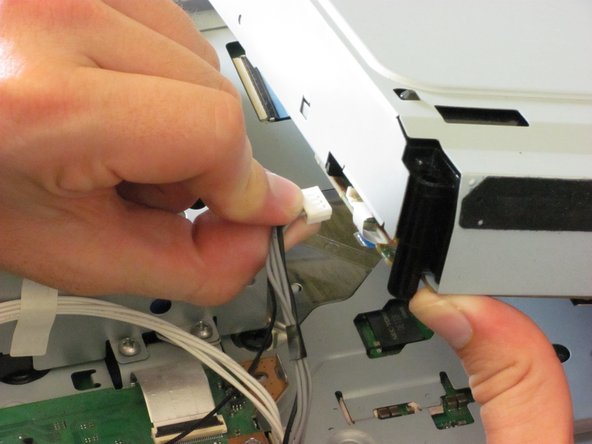
    • Lift the optical drive enclosure and disconnect the grey wires.

    • Do not lift it too far up before disconnecting the wires.

  7. Playstation 3 Optical Drive Replacement: Schritt 7, Bild 1 von 3 Playstation 3 Optical Drive Replacement: Schritt 7, Bild 2 von 3 Playstation 3 Optical Drive Replacement: Schritt 7, Bild 3 von 3
    • Tilt the front of the optical drive enslosure upwards.

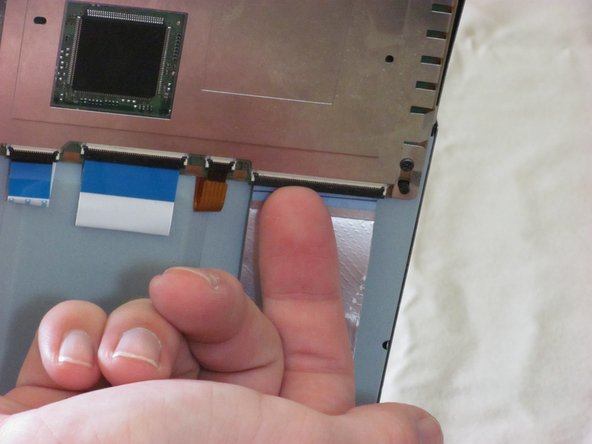
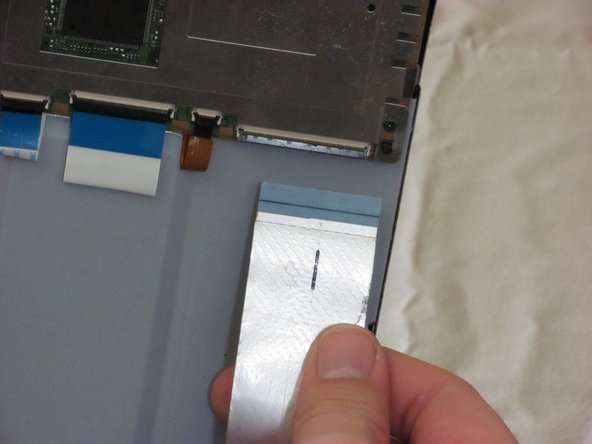
    • Lift the black ribbon cable latch on the back side with your finger or a spudger.

    • Disconnect the ribbon cable.

  8. Playstation 3 Optical Drive Replacement: Schritt 8, Bild 1 von 1
    • Remove the optical drive enclosure from the PS3.

  9. Playstation 3 Optical Drive Replacement: Schritt 9, Bild 1 von 3 Playstation 3 Optical Drive Replacement: Schritt 9, Bild 2 von 3 Playstation 3 Optical Drive Replacement: Schritt 9, Bild 3 von 3
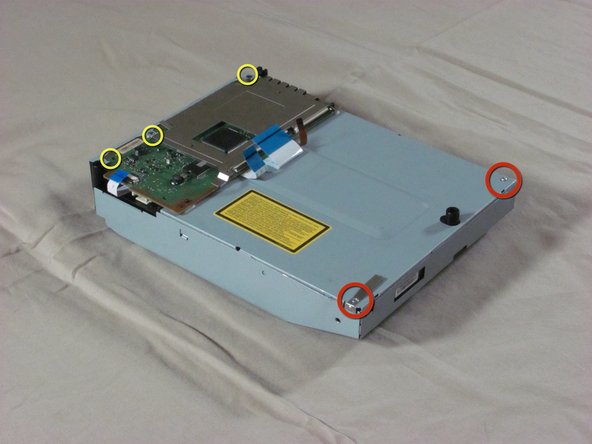
    • Flip over the optical drive enclosure. There are four ribbon cables connected to the circuit board. Using a spudger or your finger, lift each ribbon cable latch and disconnect each ribbon cable.

    • Remove the three screws on the board with a Phillips #00 screwdriver.

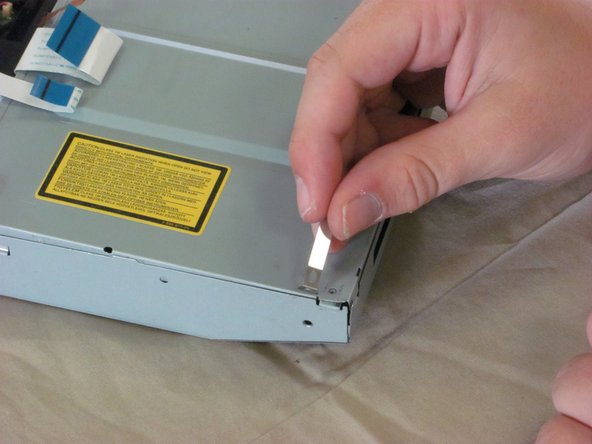
    • Remove the two silver screws on the bottom of the case. These screws are different from the ones on the board and should be kept separate.

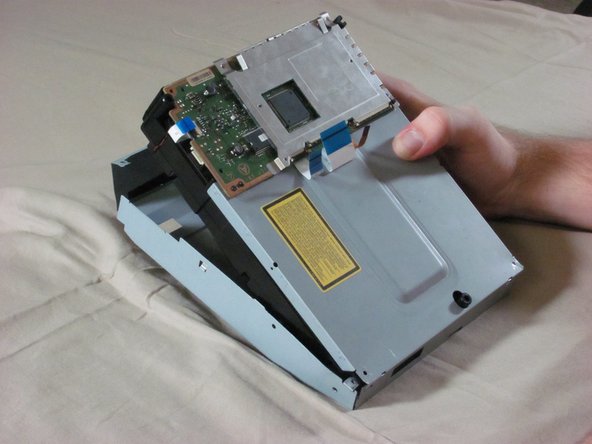
    • Note: The longer of these two screws holds down a metal tab that comes loose as seen in the third picture.

  10. Playstation 3 Optical Drive Replacement: Schritt 10, Bild 1 von 2 Playstation 3 Optical Drive Replacement: Schritt 10, Bild 2 von 2
    • Using your thumbs, carefully bend out the sides of the metal enclosure.

    • Lift the plastic enclosure out of the metal enclosure.

  11. Playstation 3 Optical Drive Replacement: Schritt 11, Bild 1 von 3 Playstation 3 Optical Drive Replacement: Schritt 11, Bild 2 von 3 Playstation 3 Optical Drive Replacement: Schritt 11, Bild 3 von 3
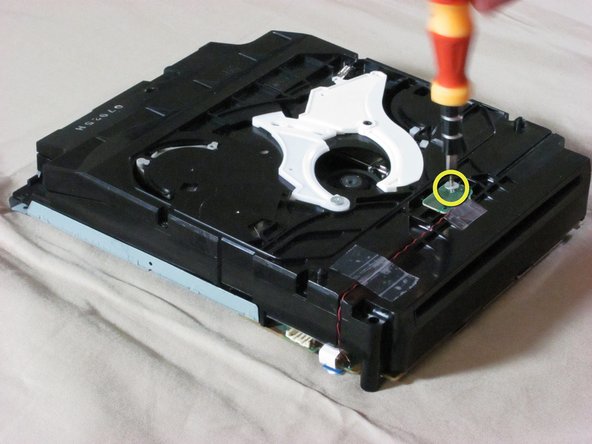
    • Flip over the enclosure so that the circuit board is on the bottom and the optical sensor is on top.

    • Remove the screw on the optical sensor using a Phillips #00 screwdriver.

    • Remove the tape on the red and black wires that connect to the optical sensor. With the wires still attached, take the sensor off the ensclosure.

    • The wires on the optical sensor are very weak. They will break easily if excessive force is applied to them.

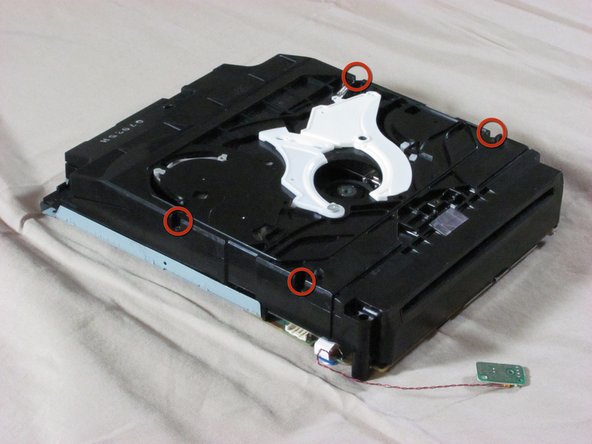
    • Remove the four black screws on the edges of the enclosure using a Phillips #00 screwdriver.

    • After taking out the screws, you don't have to open the enclosure just yet.

  12. Playstation 3 Optical Drive Replacement: Schritt 12, Bild 1 von 2 Playstation 3 Optical Drive Replacement: Schritt 12, Bild 2 von 2
    • Flip over the enclosure again.

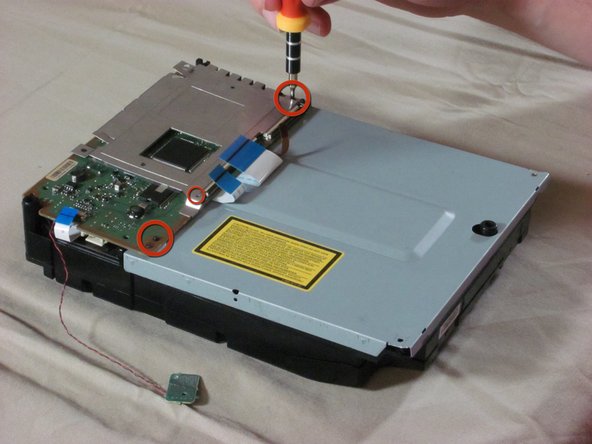
    • Remove the rest of the screws in the corners of the circuit board.

  13. Playstation 3 Optical Drive Replacement: Schritt 13, Bild 1 von 3 Playstation 3 Optical Drive Replacement: Schritt 13, Bild 2 von 3 Playstation 3 Optical Drive Replacement: Schritt 13, Bild 3 von 3
    • Lift the circuit board off the enclosure.

    • The metal EM shield on the circuit board is loose, so make sure to keep it together with the circuit board.

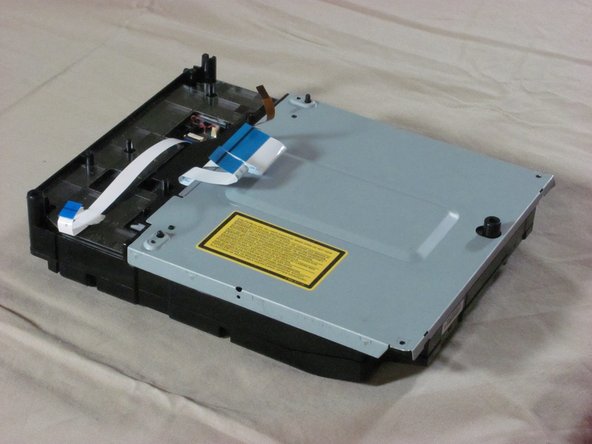
    • Remove the metal plate.

  14. Playstation 3 Optical Drive Replacement: Schritt 14, Bild 1 von 2 Playstation 3 Optical Drive Replacement: Schritt 14, Bild 2 von 2
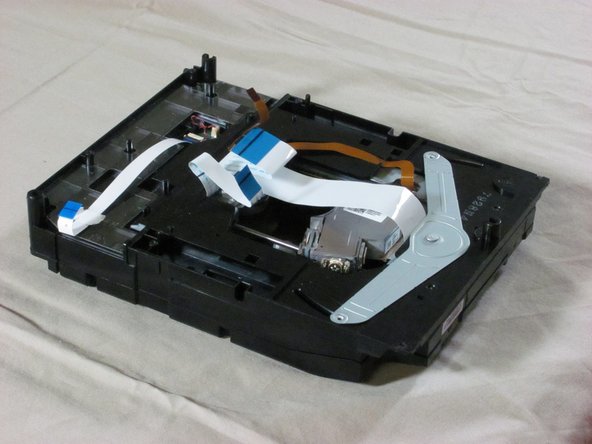
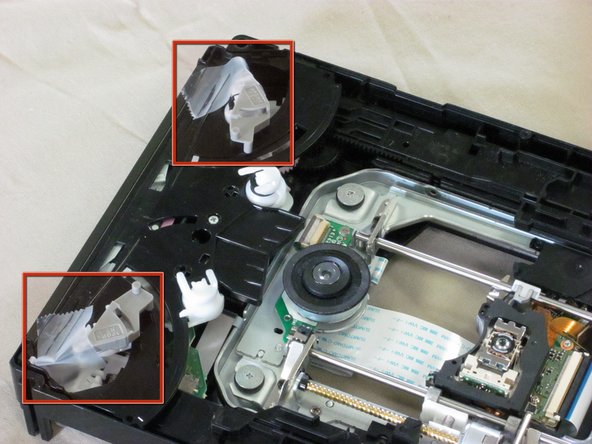
    • Flip over the enclosure. Remove the black, plastic cover so that the drive and its enclosure match the first picture.

    • Proceed carefully. There are loose parts inside the optical drive. We recommend that you tape these parts.

  15. Playstation 3 Optical Drive Replacement: Schritt 15, Bild 1 von 2 Playstation 3 Optical Drive Replacement: Schritt 15, Bild 2 von 2
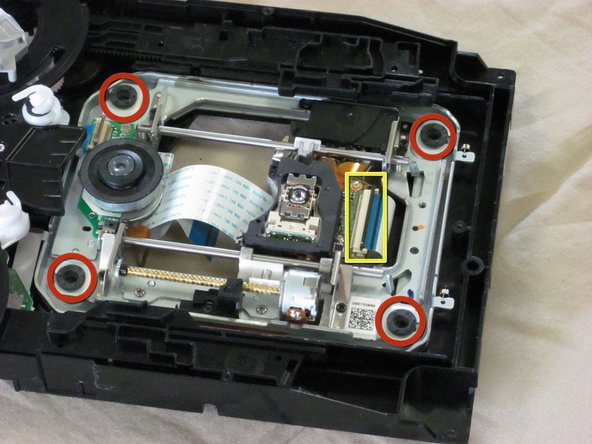
    • Using a spudger, lift the brown latch and disconnect the small ribbon cable.

    • Remove the four fat screws in the corners of the optical drive.

    • Using a spudger, lift the black latch and disconnect the larger ribbon cable.

  16. Playstation 3 Optical Drive Replacement: Schritt 16, Bild 1 von 2 Playstation 3 Optical Drive Replacement: Schritt 16, Bild 2 von 2
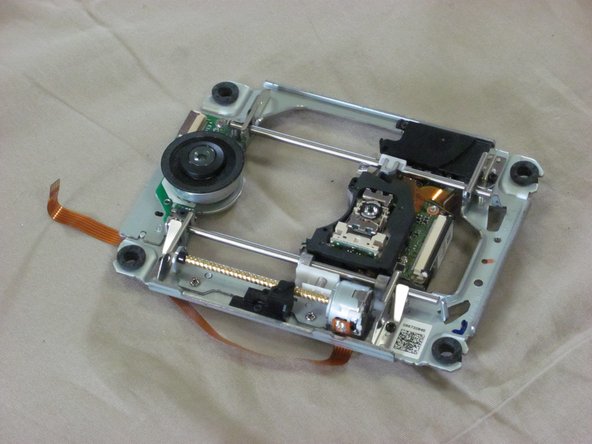
    • Carefully lift the optical drive out of the enclosure.

Abschluss

To reassemble your device, follow these instructions in reverse order.

2 weitere Nutzer:innen haben diese Anleitung absolviert.

iDeleted

Mitglied seit: 07/07/10

2.101 Reputation

39 Anleitungen geschrieben

Ein Kommentar

When reassembling it there is a key part that needs to be exactly inline. see this video for help: http://www.youtube.com/watch?v=hzHPRGHFj...

Paddy - Antwort

Kommentar hinzufügen

Seitenaufrufe:

Letzte 24 Stunden: 0

Letzte 7 Tage: 0

Letzte 30 Tage: 0

Insgesamt: 7,421