Diese Version enthält möglicherweise inkorrekte Änderungen. Wechsle zur letzten geprüften Version.
Was du brauchst
-
Dieser Schritt ist noch nicht übersetzt. Hilf mit, ihn zu übersetzen!
-
Begin by opening the top of the camera (flash assembly) to a slight angle.
-
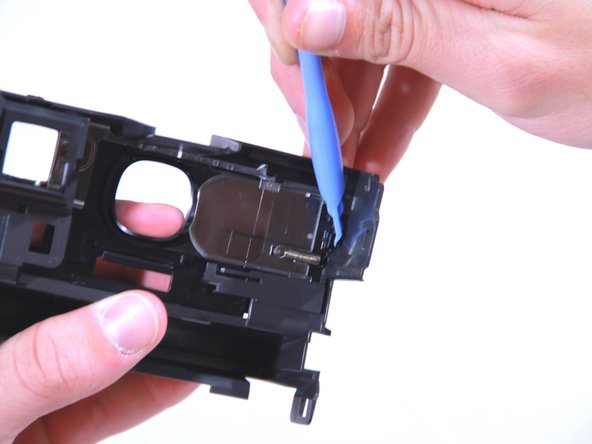
Next, angle the flash assembly slightly upward and pry off the connections carefully.
-
-
Dieser Schritt ist noch nicht übersetzt. Hilf mit, ihn zu übersetzen!
-
Slide the action button, on the bottom of the camera, to open the bottom.
-
-
-
Dieser Schritt ist noch nicht übersetzt. Hilf mit, ihn zu übersetzen!
-
Insert the blue plastic opening tool between the rear case and the plastic tabs directly under the shelf, and pry it loose.
-
Pull off the face plate.
-
-
Dieser Schritt ist noch nicht übersetzt. Hilf mit, ihn zu übersetzen!
-
Once you have the face plate removed the first thing to do is pry off the slider (the light grey bar near the bottom). The easiest way to accomplish this is to place the tweezers where the red circles are to pop the piece out.
-
-
Dieser Schritt ist noch nicht übersetzt. Hilf mit, ihn zu übersetzen!
-
Use the tweezers at the locations shown in the first two pictures to remove the face plate shown in the third picture.
-
This is a pretty secure fit in most cases so it might take a bit of tinkering to get the plate to pop off.
-
-
Dieser Schritt ist noch nicht übersetzt. Hilf mit, ihn zu übersetzen!
-
With the plate removed the lens should be easy enough to pop out.
-


Rückgängig: Ich habe diese Anleitung nicht absolviert.
Ein:e weitere:r Nutzer:in hat diese Anleitung absolviert.
Team

USF Tampa, Team 3-5, Brown Fall 2014 Mitglied von USF Tampa, Team 3-5, Brown Fall 2014
USFT-BROWN-F14S3G5
3 Mitglieder
6 Anleitungen geschrieben