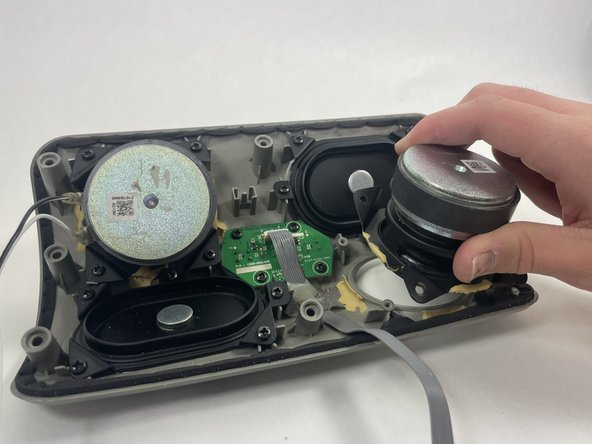
Zum Hauptinhalt wechseln

Polk Omni S2 Left Driver Replacement

Was du brauchst

  1. Polk Omni S2 Left Driver Replacement, Front Cover: Schritt 1, Bild 1 von 1
    • Pry off the grille by pulling on the top middle part of it.

    • Remove the grille carefully, but note that it takes a large amount of force to remove. If it seems like you're bending the grille too much, try pulling on it from the bottom instead.

  2. Polk Omni S2 Left Driver Replacement: Schritt 2, Bild 1 von 3 Polk Omni S2 Left Driver Replacement: Schritt 2, Bild 2 von 3 Polk Omni S2 Left Driver Replacement: Schritt 2, Bild 3 von 3
    • Remove the eight 12 mm screws securing the front cover using a Phillips #1 screwdriver.

    • Like the grille, pull from the top middle of the gray cover and slowly remove it from the speaker, like separating a sub roll.

    • Be careful of the wires between the cover and the motherboard. If you pull the cover apart too far, you might damage these wires.

  3. Polk Omni S2 Left Driver Replacement: Schritt 3, Bild 1 von 3 Polk Omni S2 Left Driver Replacement: Schritt 3, Bild 2 von 3 Polk Omni S2 Left Driver Replacement: Schritt 3, Bild 3 von 3
    • Remove the two square cotton pieces.

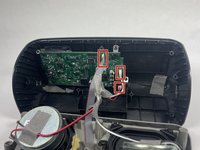
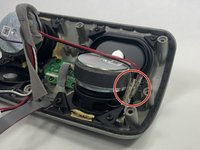
    • Unplug these three wires plugged into the motherboard by gently pulling and wiggling the wires until they're unplugged. Grip the wires close to the end to avoid damaging them.

  4. Polk Omni S2 Left Driver Replacement, Left Driver: Schritt 4, Bild 1 von 2 Polk Omni S2 Left Driver Replacement, Left Driver: Schritt 4, Bild 2 von 2
    • Remove the tape securing the two wires connected to the driver.

    • It helps to start under the portion of tape that's not stuck to the driver. Use a spudger if needed to pry the tape up without damaging it.

    • It's better not to damage the tape, but it's okay if you do. It can be replaced with any ordinary tape.

  5. Polk Omni S2 Left Driver Replacement: Schritt 5, Bild 1 von 3 Polk Omni S2 Left Driver Replacement: Schritt 5, Bild 2 von 3 Polk Omni S2 Left Driver Replacement: Schritt 5, Bild 3 von 3
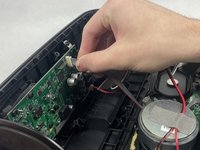
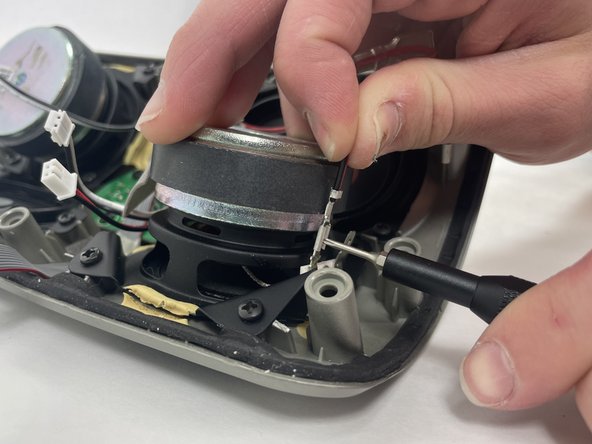
    • Use a spudger to push in the locking tab of the black wire while pulling up on it until it's unplugged.

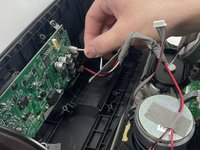
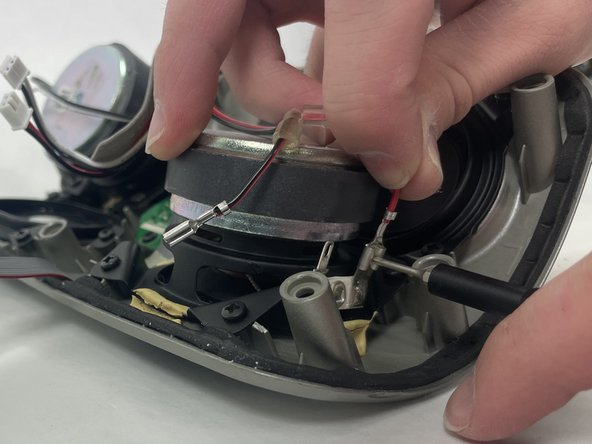
    • Do the same for the red wire until it's unplugged.

  6. Polk Omni S2 Left Driver Replacement: Schritt 6, Bild 1 von 3 Polk Omni S2 Left Driver Replacement: Schritt 6, Bild 2 von 3 Polk Omni S2 Left Driver Replacement: Schritt 6, Bild 3 von 3
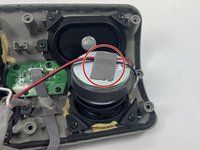
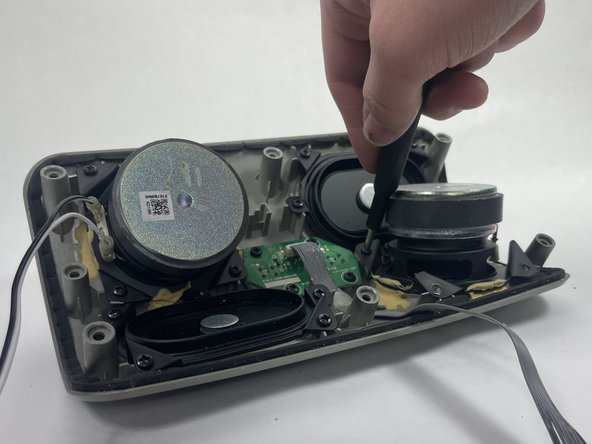
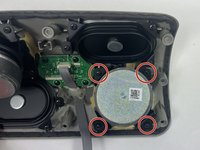
    • Use a Phillips #1 Screwdriver to remove the four 9.5 mm screws securing the driver.

    • The driver is magnetic, and will attract your screwdriver and screws. Unscrewing requires a bit of extra caution.

    • Remove the left driver.

Abschluss

To reassemble your device, follow these instructions in reverse order.

Team

UMass Dartmouth, Team 1-4, Konn Fall 2024 Mitglied von UMass Dartmouth, Team 1-4, Konn Fall 2024

UMASSD-KONN-F24S1G4

4 Mitglieder

7 Anleitungen geschrieben

0 Kommentare

Kommentar hinzufügen

Seitenaufrufe:

Letzte 24 Stunden: 0

Letzte 7 Tage: 0

Letzte 30 Tage: 0

Insgesamt: 71