Einleitung
Diese Schritte zeigen dir, wie du die Festplatte deines Power Mac G5 ersetzt.
Was du brauchst
-
-
-
Entferne das Luftleitelement (die durchsichtige Plastikabdeckung) durch Ziehen am Griff.
-
-
-
Drehe die Kunststofflasche mit der Bezeichnung „B“ auf der rechten Seite nach oben.
-
-
-
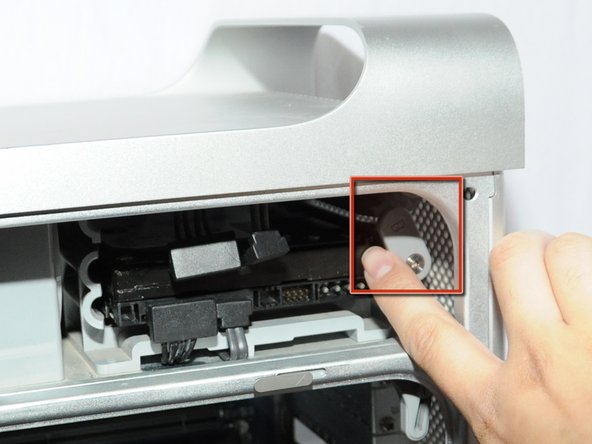
Entferne beide Kabel von der Festplatte.
Notice the picture showing fingers pointing to the cables. The bay chamber wall stores four mushroom head screws for the second hard drive. If you replace an old drive out of PowerMac G5, remember to retrieve those mushroom head screws back and install them to the sides of the new drive.
This helped me, should be in the main instructions.
Petteri -
how do you take the cables out
-
-
-
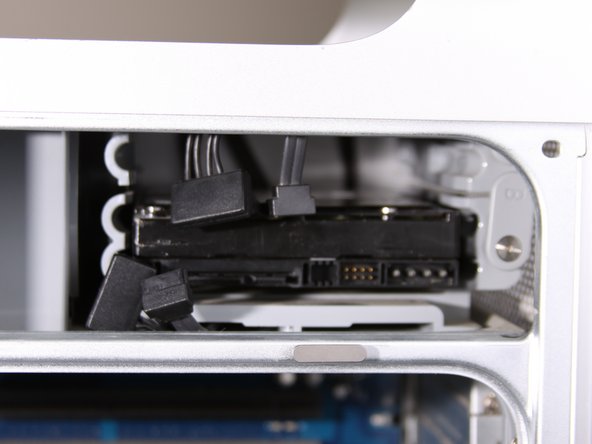
Zieh die Festplatte heraus.
If your PowerMac G5 has two hard drives installed and you would like to replace the one in the upper bay (A bay), you have to remove the drive in the lower bay (B bay) first in order to have the space to allow the upper drive to "fall into."
There are three levels of "racks". The drive in the upper bay occupies the upper two levels. You will not notice this when you pull out the drive. It is only when you are going to insert a new drive into the upper bay (A bay) that you wonder how it goes. First, you insert the drive into the middle rack and push the drive toward the back of the bay. The middle rack will guide the drive and raise the inner half of the drive to the top rack level. Then, you insert the two side feet (the mushroom head screws) of the outer half of the drive into the top rack. Once it clicks into the position, it's done.
This helped me, should be in the main instructions.
Petteri -
There is no way to grab the hard drive in my Power Mac G5 Dual. Fingers cannot grip the drive to pull it out. Is there some sort of tool that might make is possible to remove the drive?
You can “grab” the sides of the drive with the fingertips of each hand and pull it towards you until it is far enough out to use only one hand. Be aware that there is a bare circuit board on the bottom of the drive so be careful when you handle it from the top & bottom surfaces.
Once you delve into the innards of your G5 a couple of times it gets like second nature - it had been about five years since I mothballed my G5 and I needed this guide as a reminder for pulling the drives so I could wipe them before recycling it.
-
-
-
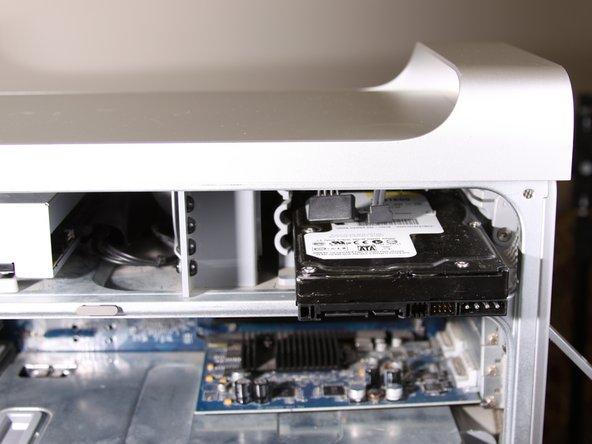
Nachdem die Festplatte draußen ist, sollte es so aussehen.
-


Um dein Gerät wieder zusammenzusetzen, folge dieser Anleitung in umgekehrter Reihenfolge.
Um dein Gerät wieder zusammenzusetzen, folge dieser Anleitung in umgekehrter Reihenfolge.
Rückgängig: Ich habe diese Anleitung nicht absolviert.
101 weitere Nutzer:innen haben diese Anleitung absolviert.
Besonderer Dank geht an diese Übersetzer:innen:
100%
Pierre Siemann hilft uns, die Welt in Ordnung zu bringen! Wie kann ich mithelfen?
Hier starten ›
Team

Cal Poly, Team 5-8, Forte Winter 2010 Mitglied von Cal Poly, Team 5-8, Forte Winter 2010
CPSU-FORTE-W10S5G8
7 Mitglieder
20 Anleitungen geschrieben
8 Kommentare
I've tried many times to remove this and my other misplaced comment duplicate, but here they'll stay apparently... you're free to delete them if you can.
Petteri -
REMOVE the plastic cover to avoid knocking it off in the process of working on the drive bays. (Just a precaution - kind of like not setting a glass of red wine on an elegant white table cloth.)
EyeSpye -
The Comments appended to these instructions are VERY helpful. If you read them you will save time, and avoid some of the mistakes I made - particularly with respect to the Drive mounting screws located to the left side of the drive installation bays, and the need to remove the bottom drive FIRST if you wish to access the top drive. THANKS for a great set of instructions.
This was helpful! Excellent photographs and clear, simple instructions. Thanks, Jessica and iFixit!
I used these instructions to remove an additional hard drive while leaving the original hard drive in place. I did not know which one to remove, as the hard drives do not have side labels, so I guessed: the original drive was on top, the additional drive on the bottom. It might be helpful for other viewers to know what to do in a similar situation.
Cheers.
Can I put my hard drive from my old black MacBook into one of these? Without anything messing up ?
Hello! Excellent guide! I do have a question, however.
Due to an upcoming move I am thinning out my possessions. I am stripping down many of my old Macs to sell them as "shells" (as in, I'm keeping the RAM and hard drives for myself to keep any sensitive information that might still be on them, and then selling the shells "as is", because it's this or the curb. I know a guy that can sell anything, why not make a few bucks?).
Bear in mind I am a production artist, not a computer tech, so my working knowledge of the guts in these things is kind of limited and learned-as-I-go.
In any case, I have removed all 8 of the RAM cards in my Power Mac G5, and the HD found in slot "B".
However, there is a drive in slot "A", although it's been too long and I can't remember what this drive is for!! And it seems impossible to take out, so...
My questions to anyone are: What is this drive for, does it pose an information risk if I leave it there, and if so, is there a way to remove it? Thank you in advance!
~Mary
Problem I have is the top Slot is almost impossible to remove the drive.