Zum Hauptinhalt wechseln

Protocol Dronium III AP Trim Rocker Switch Replacement

Was du brauchst

  1. Protocol Dronium III AP Trim Rocker Switch Replacement, Trim Rocker Switch: Schritt 1, Bild 1 von 3 Protocol Dronium III AP Trim Rocker Switch Replacement, Trim Rocker Switch: Schritt 1, Bild 2 von 3 Protocol Dronium III AP Trim Rocker Switch Replacement, Trim Rocker Switch: Schritt 1, Bild 3 von 3
    • Remove the four (4) 8.5mm screws from the body of the remote using a JIS #1 screwdriver.

    • Remove the two (2) 4mm screws from the handle using a JIS #1 screwdriver.

    • Open remote body lifting back a full 180 degrees from face.

  2. Protocol Dronium III AP Trim Rocker Switch Replacement: Schritt 2, Bild 1 von 3 Protocol Dronium III AP Trim Rocker Switch Replacement: Schritt 2, Bild 2 von 3 Protocol Dronium III AP Trim Rocker Switch Replacement: Schritt 2, Bild 3 von 3
    • Remove the four (4) 6mm screws attaching the motherboard to body of the controller using a JIS #1 screwdriver

    • Gently lift the motherboard backwards.

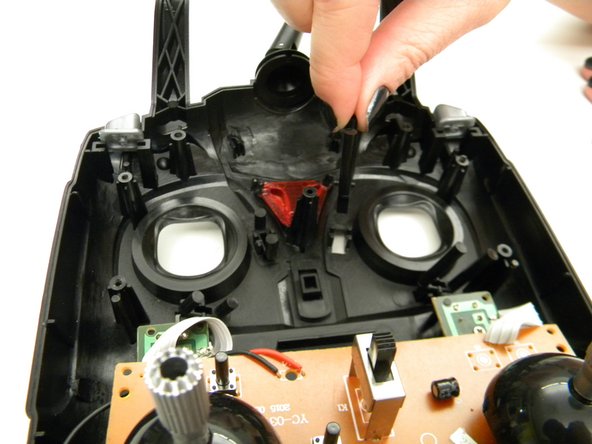
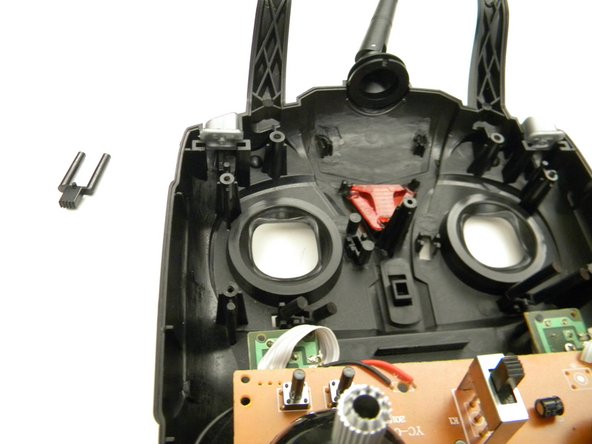
  3. Protocol Dronium III AP Trim Rocker Switch Replacement: Schritt 3, Bild 1 von 3 Protocol Dronium III AP Trim Rocker Switch Replacement: Schritt 3, Bild 2 von 3 Protocol Dronium III AP Trim Rocker Switch Replacement: Schritt 3, Bild 3 von 3
    • Remove the trim rocker switch from the controller.

Abschluss

To reassemble your device, follow these instructions in reverse order.

Steven Mooers

Mitglied seit: 10/18/17

401 Reputation

4 Anleitungen geschrieben

Team

UW Tacoma, Team S1-G1, Rose Fall 2017 Mitglied von UW Tacoma, Team S1-G1, Rose Fall 2017

UWT-ROSE-F17S1G1

4 Mitglieder

4 Anleitungen geschrieben

0 Kommentare

Kommentar hinzufügen

Seitenaufrufe:

Letzte 24 Stunden: 1

Letzte 7 Tage: 2

Letzte 30 Tage: 4

Insgesamt: 264