Einleitung
This guide will walk you through how remove the drone motors from the lower housing. Minimal tooling is required; however, prerequisite steps are required. This guide is useful for replacing a motor that may be defective or damaged.
Was du brauchst
-
-
Remove the chrome shaft cover by lightly pulling it away from the drone.
-
-
-
Using a Phillips #000 screwdriver, remove the 7mm screw from the propeller stop.
-
-
-
Remove the propeller stop from shaft by lightly pulling it away from the drone.
-
-
-
-
Remove the 8mm long Phillips #0 screws (24 total) from the lower housing unit.
-
-
-
Separate the upper and lower housing units by lightly pulling the two housing units apart.
-
-
-
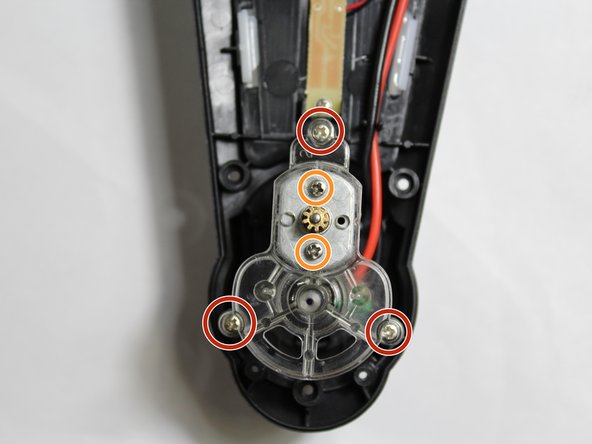
Remove the 3 outer 8mm long Phillips #0 screws from the lower drone housing.
-
Remove the 2 inner 3 mm long Phillips #0 screws from the drone motor.
-
-
-
Remove the two 6mm long Phillips #0 screws from the lower motor cover located on the underside of the drone.
-
-
-
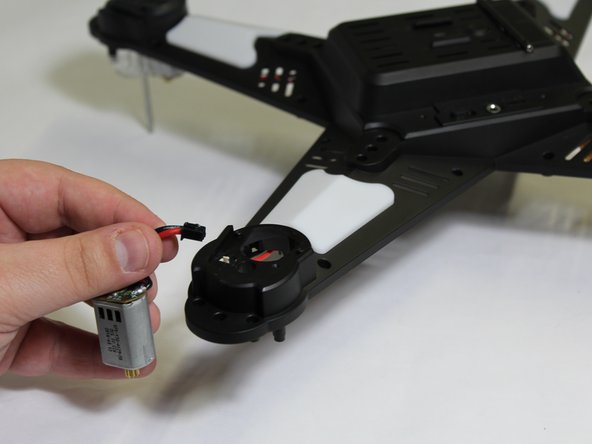
Unclip the wire plug by applying light pressure to the wire plug with the plastic opening tool, and remove the motor.
-


To reassemble your device, follow these instructions in reverse order.
To reassemble your device, follow these instructions in reverse order.
Rückgängig: Ich habe diese Anleitung nicht absolviert.
Eine weitere Person hat diese Anleitung absolviert.

Team

UW Stout, Team S8-G4, Ogden Spring 2018 Mitglied von UW Stout, Team S8-G4, Ogden Spring 2018
UWSTOUT-OGDEN-S18S8G4
4 Mitglieder
6 Anleitungen geschrieben