Diese Version enthält möglicherweise inkorrekte Änderungen. Wechsle zur letzten geprüften Version.
Was du brauchst
-
Dieser Schritt ist noch nicht übersetzt. Hilf mit, ihn zu übersetzen!
-
Grasp the tail end of the drone where the lip of the battery protrudes.
-
-
Dieser Schritt ist noch nicht übersetzt. Hilf mit, ihn zu übersetzen!
-
Pull away from the drone to remove the battery.
-
-
Dieser Schritt ist noch nicht übersetzt. Hilf mit, ihn zu übersetzen!
-
Place a prying tool under the base of the propeller.
-
-
-
Dieser Schritt ist noch nicht übersetzt. Hilf mit, ihn zu übersetzen!
-
Use a moderate amount of force to pry the propeller out of its base. The propeller should pop off.
-
-
Dieser Schritt ist noch nicht übersetzt. Hilf mit, ihn zu übersetzen!
-
Unscrew the 4.9mm Phillips #000 screw that is located at the end of the drone's arm.
-
-
Dieser Schritt ist noch nicht übersetzt. Hilf mit, ihn zu übersetzen!
-
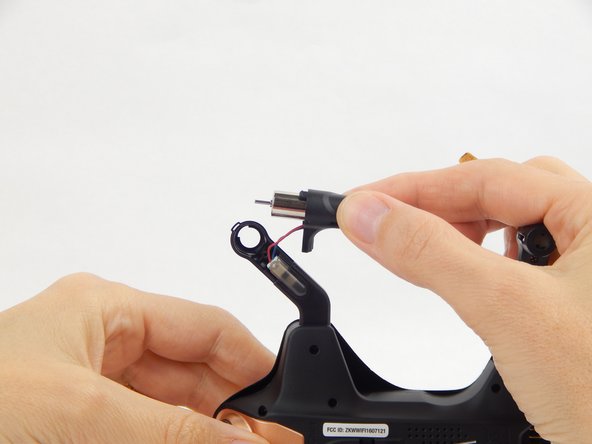
Hold the base of the arm while gently pulling the motor cover away from the arm.
-
-
Dieser Schritt ist noch nicht übersetzt. Hilf mit, ihn zu übersetzen!
-
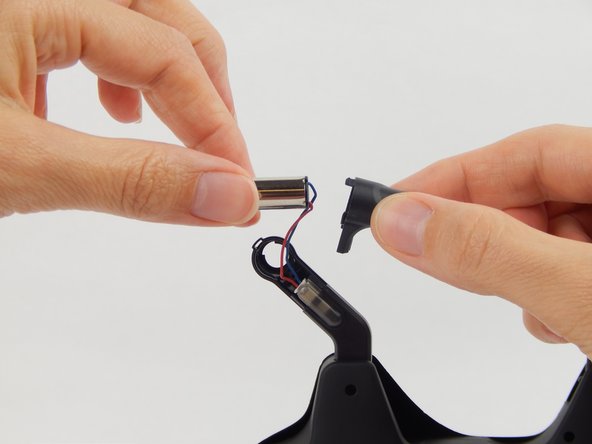
Gently pull the motor out from the plastic cover.
-
-
Dieser Schritt ist noch nicht übersetzt. Hilf mit, ihn zu übersetzen!
-
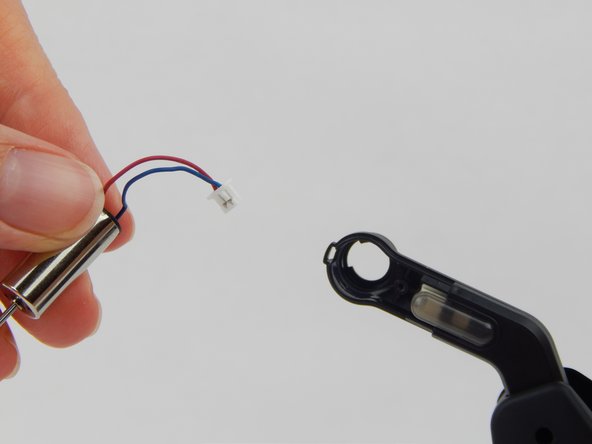
Grasp the clip’s edges with a pair of tweezers and pull outward.
-


Rückgängig: Ich habe diese Anleitung nicht absolviert.
4 weitere Nutzer:innen haben diese Anleitung absolviert.
Team

USF Tampa, Team S1-G2, Leahy Spring 2018 Mitglied von USF Tampa, Team S1-G2, Leahy Spring 2018
USFT-LEAHY-S18S1G2
4 Mitglieder
6 Anleitungen geschrieben