Zum Hauptinhalt wechseln

Quantum View 10.1 camera Replacement

Was du brauchst

  1. Quantum View 10.1 camera Replacement, Open Quantum View case: Schritt 1, Bild 1 von 1
    • Start by turning the tablet over with the screen down. Carefully use a plastic opening tool to pry the cover off. Start from the corner opposite the hibernate button.

  2. Quantum View 10.1 camera Replacement, Removing the electrical tape and magnets.: Schritt 2, Bild 1 von 2 Quantum View 10.1 camera Replacement, Removing the electrical tape and magnets.: Schritt 2, Bild 2 von 2
    • Pick up the magnets from the bottom edge of the tablet next to the keyboard connection and put them in a place that they will not get lost. Then carefully remove all 4 strips of electrical tape.

  3. Quantum View 10.1 camera Replacement, Unhooking the battery: Schritt 3, Bild 1 von 2 Quantum View 10.1 camera Replacement, Unhooking the battery: Schritt 3, Bild 2 von 2
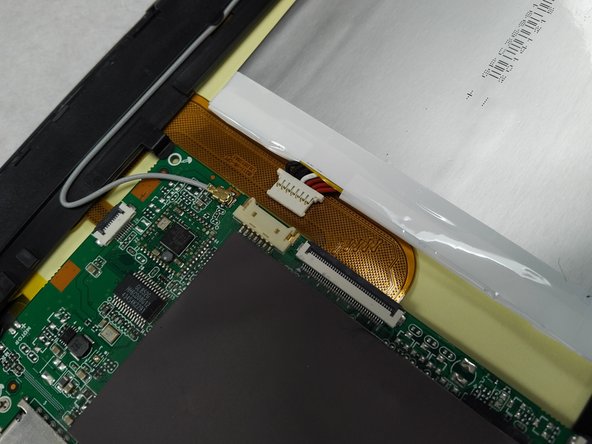
    • Using a small plastic opening tool; genteelly pull the connection off of the motherboard.

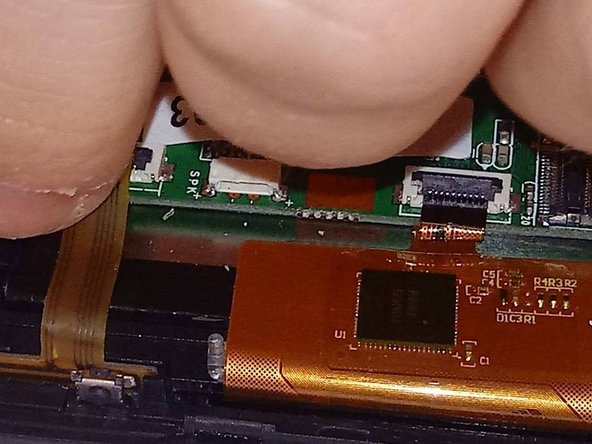
    • Remove yellow plastic and carefully pull clip away from connection.

  4. Quantum View 10.1 camera Replacement, Remove camera clip: Schritt 5, Bild 1 von 2 Quantum View 10.1 camera Replacement, Remove camera clip: Schritt 5, Bild 2 von 2
    • Remove yellow tape.

    • Unclip ribbon connector.

  5. Quantum View 10.1 camera Replacement, Remove camera: Schritt 6, Bild 1 von 2 Quantum View 10.1 camera Replacement, Remove camera: Schritt 6, Bild 2 von 2
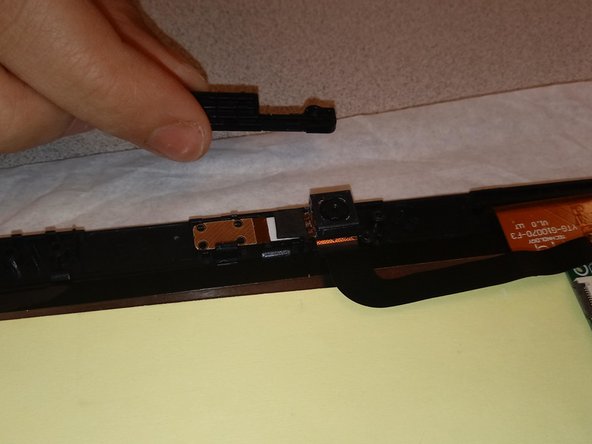
    • Unscrew plastic camera holder using a PH00 screwdriver bit.

    • Release the plastic holder tab and remove camera.

Abschluss

To reassemble your device, follow these instructions in reverse order.

Team

Gateway Community College Team 1 BPC270 36301 Mitglied von Gateway Community College Team 1 BPC270 36301

Community

4 Mitglieder

7 Anleitungen geschrieben

0 Kommentare

Kommentar hinzufügen

Seitenaufrufe:

Letzte 24 Stunden: 0

Letzte 7 Tage: 2

Letzte 30 Tage: 4

Insgesamt: 149